Cruising Active Transport
We circumnavigated between 2008 and 2014. After sailing to Alaska we ended up in Seattle for four years.
19 September 2018
08 August 2018 | Marina del Rey
23 July 2018 | Marina del Rey
22 July 2018 | 25 miles west of Cambria
21 July 2018 | Crossing Monterey Bay
21 July 2018 | South of the Golden Gate
16 July 2018
14 July 2018 | Grand Marina
14 July 2018 | San Francisco Bay
13 July 2018 | Point Arena
12 July 2018 | Thirty Miles NW of Humbolt Bay, CA
11 July 2018 | Crescent City
10 July 2018 | Neah Bay
09 July 2018 | Thirty five miles WNW of Reedsport, Oregon
08 July 2018 | Forty Miles West of Columbia River Entrance
07 July 2018 | Neah Bay
06 July 2018 | Neah Bay Marina
05 July 2018 | Neah Bay Marina
04 July 2018
03 July 2018 | Port Angeles City Floats
Youtube Video of our Voyage
19 September 2018
John
I just added a link to a youtube video of a google earth animation that shows the route we took around the world. The route for our circumnavigation is in red. Our subsequent voyage to Alaska and then Seattle is in Yellow.
Settling in at Marina del Rey
08 August 2018 | Marina del Rey
John
We have been here in Los Angeles for two weeks, at this point, and life has settled into familiar routines.
We bought a car. We got a 2012 Honda Civic that runs on compressed natural gas. Almost all the airport shuttles use CNG for fuel so there are quite a few fueling stations nearby.
CNG and Electric vehicles are the only ones that are allowed to use the car pool lanes with only 1 person in the car. They used to allow hybrid vehicles to use those lanes but ended that program when Toyota sold thousands of Prius cars just so their owners could get the magic sticker that entitled them to use the carpool lanes. The carpool lanes became so crowded that their original purpose, of encouraging car pooling, was negated.
We have both ordered bicycles. Neither has shown up yet but we expect them to be very useful here in Marina del Rey because parking can be a real problem in the shopping plazas like the one where we have to go to pick up our mail.
The bicycle trails are well developed in this part of Los Angeles. It is possible to ride all the way to Malibu on bike trails and there are a lot of cultural activities that we will be able to bike to. We are going to see Shakespeare by the Sea this Saturday evening at Pollywog park in Manhattan Beach. We are seeing "The Merry Wives of Winsor" which is Shakespeare's take on "Housewives of Beverly Hills."
We have also bought tickets to a couple of events at the Hollywood Bowl this month. The first is a performance by the LA Symphony. dorected by Dutamel and with Itzhak Perlman on the violin. The, later in the month we are going to a performance of Carmina Burana.
The Hollywood bowl is a wonderful venue for big performances. It's way too big for a lot of things but it is very nice to have your picnic dinner and wine before the performance starts.
LA has so much going on that we could spend a fortune on everything that is worth seeing.
We have been having a heat wave but here on the edge of the ocean we have cooling breezes most of the day.
Shawn has actively started looking for a job and has a lot of leads on really interesting opportunities. A couple of the jobs he has looked at are in Santa Monica which is so close that his commute would consist of a 25 minute bike ride along the beach.
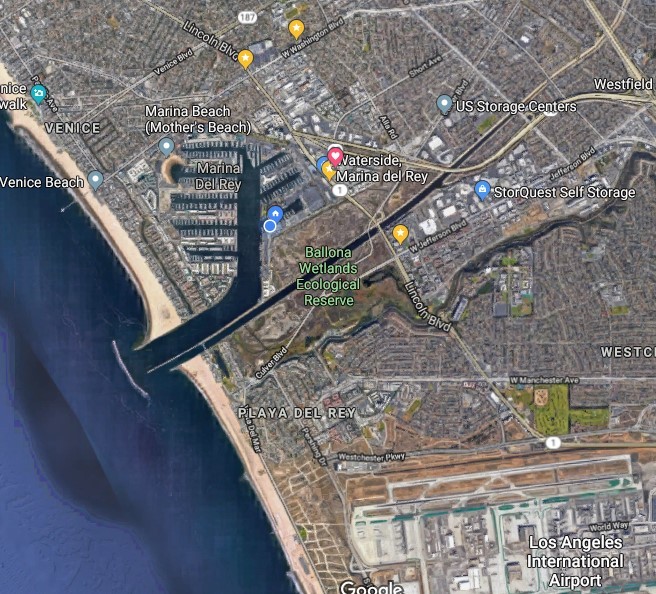
Im adding a satellite view of Marina del Rey that I snagged from google earth. At the bottom are some of the runways at LAX. Any of our international friends with layovers at LAX can easily come visit us. Give us enough warning and we will pick you up. Visiting some place like Venice Beach would be a lot more fun that sitting in the airport.
The blue dot in the marina is our slip.
We bought a car. We got a 2012 Honda Civic that runs on compressed natural gas. Almost all the airport shuttles use CNG for fuel so there are quite a few fueling stations nearby.
CNG and Electric vehicles are the only ones that are allowed to use the car pool lanes with only 1 person in the car. They used to allow hybrid vehicles to use those lanes but ended that program when Toyota sold thousands of Prius cars just so their owners could get the magic sticker that entitled them to use the carpool lanes. The carpool lanes became so crowded that their original purpose, of encouraging car pooling, was negated.
We have both ordered bicycles. Neither has shown up yet but we expect them to be very useful here in Marina del Rey because parking can be a real problem in the shopping plazas like the one where we have to go to pick up our mail.
The bicycle trails are well developed in this part of Los Angeles. It is possible to ride all the way to Malibu on bike trails and there are a lot of cultural activities that we will be able to bike to. We are going to see Shakespeare by the Sea this Saturday evening at Pollywog park in Manhattan Beach. We are seeing "The Merry Wives of Winsor" which is Shakespeare's take on "Housewives of Beverly Hills."
We have also bought tickets to a couple of events at the Hollywood Bowl this month. The first is a performance by the LA Symphony. dorected by Dutamel and with Itzhak Perlman on the violin. The, later in the month we are going to a performance of Carmina Burana.
The Hollywood bowl is a wonderful venue for big performances. It's way too big for a lot of things but it is very nice to have your picnic dinner and wine before the performance starts.
LA has so much going on that we could spend a fortune on everything that is worth seeing.
We have been having a heat wave but here on the edge of the ocean we have cooling breezes most of the day.
Shawn has actively started looking for a job and has a lot of leads on really interesting opportunities. A couple of the jobs he has looked at are in Santa Monica which is so close that his commute would consist of a 25 minute bike ride along the beach.
Im adding a satellite view of Marina del Rey that I snagged from google earth. At the bottom are some of the runways at LAX. Any of our international friends with layovers at LAX can easily come visit us. Give us enough warning and we will pick you up. Visiting some place like Venice Beach would be a lot more fun that sitting in the airport.
The blue dot in the marina is our slip.
We are tied up in MDR
23 July 2018 | Marina del Rey
John
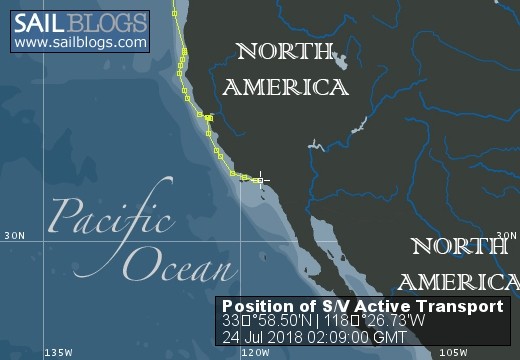
After a bumpy ride around Point Conception last night we made it to marina del Rey around 5 PM this afternoon.
It was a motor boat trip the whole way.
After a couple of tries we got docked with the help of our friend Cecile who was sitting on her boat waiting for us and then did her Vanna White imitation to show us to our slip.
Tomorrow we will be occupied with errands like getting a mailbox, getting driver's licenses, picking up a rental car, etc.
At the fuel dock in Oakland Shawn's shorts got caught on the lifeline and it ripped the pocket off. His cell phone was in the pocket and it had a pocket on the back that contained his driver's license and credit cards. So replacing all that stuff will be among the errands we have to deal with.
Our friend Cecile, who has her sailboat next to our old slip in Seattle, is coming by in a few minutes so we can go get some supper. I ate the last of our KFC this morning (aka the Breakfast of Champions)
| Vessel Name: | Active Transport |
| Vessel Make/Model: | Tayana 37 PH |
| Hailing Port: | Seattle, Washington |
| Crew: | John and Shawn |
| About: | |
| Extra: |
Active Transport's Photos - Engine Work in Mazatlan


 This was the result of the broken hose clamp that let a hose leak salt water all over the back of the engine.")


. The only hose clamps we could find at the time were a it too long for the job but they worked just fine. Yanmar used automotive type hose clamps for many of the hose clamps on the engine. Automotive hose clamps have stainless bands but the screw that tightens the bands are common steel and rust. Marine quality hose clamps are all stainless. They still rust but not nearly as bad.")


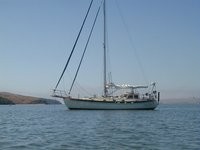
On the hook in Tomales Bay
Who: John and Shawn
Port: Seattle, Washington
Gallery