Alchemy II
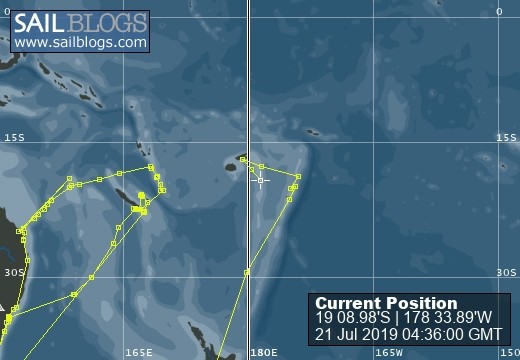
30 July 2019 | Falaga, Lau Group (SE Fiji)
09 July 2019
07 July 2019
07 July 2019
07 July 2019
04 July 2019
03 July 2019
02 July 2019
01 July 2019
28 June 2019
25 June 2019
22 June 2019
21 June 2019
18 June 2019
18 June 2019
17 June 2019
11 June 2019
10 June 2019
10 June 2019
Jervis Bay
29 November 2015 | Long Beach/Hole in the Wall, Jervis Bay (NSW)
We set off from Broken Bay on Saturday morning, with NE winds forecast. It was looking like being a pretty good day sail to Jervis Bay - or if things well, an overnighter to Eden. Somehow the north easterlies never materialised, and we were instead met with 15 knots from the south. For much of the day, we weren't even able to lay our course into Jervis Bay. A tad frustrating. Never mind - we resorted to sheer will power to mentally force those numbers on the wind instrument down so they were closer to an N - or even an E - than an S. It was a tough battle, but we eventually won. Then the wind dropped out completely, leaving us to motor for the last two or three hours. Not the most splendid day's sail ever.
On a positive note, we spotted plenty of marine life on the last part of the trip, including what we think were dolphins known as "false killer whales" - dark coloured, dome headed, and about 3m long. Unfortunately no decent photos to show.
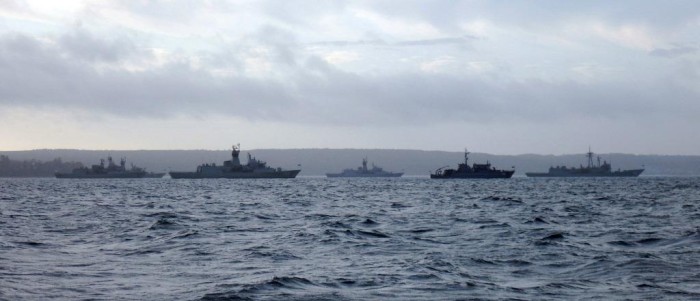
From some distance away, we noticed a large plume of smoke coming from Beecroft Peninsula on the eastern side of Jervis Bay. It seemed like quite a sizeable fire, with a couple of choppers working flat out to drop water onto the blaze. We joked that the Navy had accidentally set fire to the bushland during their target practice (there's a big naval base at Jervis Bay) - according to the radio report we heard a little later, this was actually the case!
When we did reach Jervis Bay, there were at least half a dozen navy boats there, plus a couple of subs. Luckily we didn't run into any trouble as we headed for the eastern anchorage of Long Beach. A couple of people we subsequently met in Eden told us when they'd been there a day or so before, naval forces had commanded them to leave the area, as live firing was about to take place. The down side of all the naval goings on was that we weren't allowed to go ashore - and Jervis Bay has really beautiful beaches.
We spent the next day "taking it easy" (another break from the extremely tough life we lead at the moment), waiting for a southerly front to pass.
On a positive note, we spotted plenty of marine life on the last part of the trip, including what we think were dolphins known as "false killer whales" - dark coloured, dome headed, and about 3m long. Unfortunately no decent photos to show.
From some distance away, we noticed a large plume of smoke coming from Beecroft Peninsula on the eastern side of Jervis Bay. It seemed like quite a sizeable fire, with a couple of choppers working flat out to drop water onto the blaze. We joked that the Navy had accidentally set fire to the bushland during their target practice (there's a big naval base at Jervis Bay) - according to the radio report we heard a little later, this was actually the case!
When we did reach Jervis Bay, there were at least half a dozen navy boats there, plus a couple of subs. Luckily we didn't run into any trouble as we headed for the eastern anchorage of Long Beach. A couple of people we subsequently met in Eden told us when they'd been there a day or so before, naval forces had commanded them to leave the area, as live firing was about to take place. The down side of all the naval goings on was that we weren't allowed to go ashore - and Jervis Bay has really beautiful beaches.
We spent the next day "taking it easy" (another break from the extremely tough life we lead at the moment), waiting for a southerly front to pass.
Comments
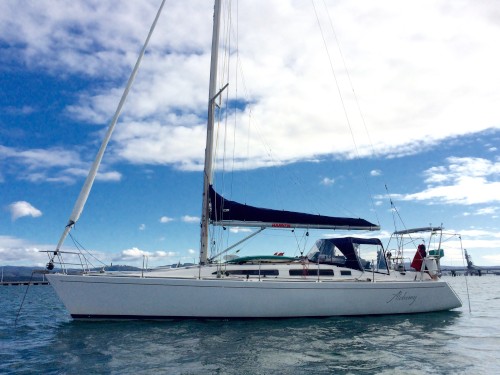
| Vessel Name: | Alchemy II |
| Vessel Make/Model: | Duncanson IMS Offshore 40 (with a bit tacked on the back) |
| Hailing Port: | Hobart, Australia |
| Crew: | Matt & Sally Westland |
Alchemy II's Photos - Main
No items in this gallery.
Who: Matt & Sally Westland
Port: Hobart, Australia