

stern gland seals & more
Caution: This article has a yawn rating of 5 - you have been warned :-)
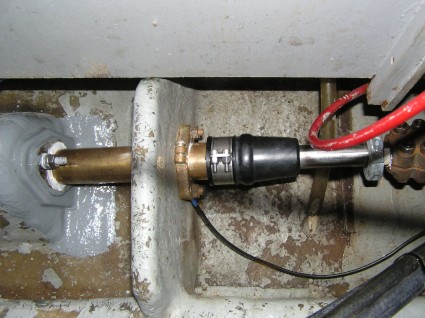
Flirtie is fitted with Volvo Penta stern gland seals...principally a rubber seal which keeps the water out where the propeller shaft enters the boat. These seals require little maintenance (just squeezing when the boat is launched to expel any trapped air and greasing every 100hrs or so)....but they do require changing every 5 years according to the manufacturer. A trawl of the internet suggests that many owners don't change theirs for 10 years or so and have had little problem. Ours are certainly of that age so no surprise they are on our winter jobs list.
Whilst the job isn't difficult, it does entail disconnecting the propeller shaft from the gearbox and sliding it back so that the old seal can be removed and the new one installed.
Some owners have done this afloat but we certainly wouldn't recommend it except in an absolute emergency....take a look at this video clip.
Also a word of warning given to us by the previous owners that should be heeded...make sure that:
a) the propeller shaft is properly fitted into the coupling
b) the bolts that connect the coupling to the shaft are done up tightly.
If either of these are not done correctly there is a good chance that at some inopportune moment the propeller shaft will part with the coupling. As a minimum this is likely to be embarrassing or worse which happened to the previous owner, the shaft disappeared completely leaving a gaping hole. I'm quite sure that once they plugged the hole and made it back to port they would have been seeking compensation from the engineer who did the work in the first place!
So a relatively simple task you would think...well that's what we thought before we were lifted out back in December.
We commissioned the local yard to power jet the hull in preparation for fresh antifouling which revealed that both cutlass bearing housings (the casting that the propeller shaft runs through) were not particularly well bonded to the hull and on closer inspection were weeping slightly inside which we hadn't noticed. So now the job isn't just replacing the seals but rebedding the cutlass bearing housings as well :-(

Voids beneath housing

Salt crystals around stern tube
Not surprisingly it didn't take long to remove the propeller shaft and cutlass bearing housing, the housing being held on with just a couple of bolts and mastic that was failing.
With everything removed and cleaned up it was nice to see that everything was in good order including the actual bearings so in theory it was just a matter of rebedding the housings.

Cutlass bearing housing, Stern tube & new backing pads
Unfortunately a dry run with all the components on the starboard side suggested otherwise. Typically the back of the housing should be parallel with the hull where it is mates but this wasn't the case with us with differences between 0mm and 7mm depending on where you looked - a challenge for any mastic!
A dry run on the port side revealed a similar problem but the differences not so dramatic.
There are various ways to correct the problem but we chose to use thickened epoxy to create our own casting to make up the difference. We keyed the hull thoroughly and carefully applied parcel tape to the housing and PTFE tape to the bolts to prevent the epoxy sticking to these items and then gently bolted the housing to the hull.

Plenty of parcel tape
Using the propeller shaft, P bracket and gearbox flange we were able to ensure everything stayed in alignment whilst the epoxy set. We did this for both housings.

All set, awaiting finishing
The original installation had the housings through bolted with small washers and nuts inside the hull which were difficult to access and do up. We decided to improve on the installation by adding a backing plate of stainless steel and welded captive nuts to make installation easier and increase the surface area.
With the epoxy set and some minor finishing to the casting it was time to put it all back together. Thankfully this went smoothly with both housings and then we added new seals before finally torquing down the bolts on the couplings.

Bonded & bolted together
Unfortunately now we have to be patient and wait for the launch to confirm if we've done everything correctly. Watch this space.......
Flirtie is fitted with Volvo Penta stern gland seals...principally a rubber seal which keeps the water out where the propeller shaft enters the boat. These seals require little maintenance (just squeezing when the boat is launched to expel any trapped air and greasing every 100hrs or so)....but they do require changing every 5 years according to the manufacturer. A trawl of the internet suggests that many owners don't change theirs for 10 years or so and have had little problem. Ours are certainly of that age so no surprise they are on our winter jobs list.
Whilst the job isn't difficult, it does entail disconnecting the propeller shaft from the gearbox and sliding it back so that the old seal can be removed and the new one installed.
Some owners have done this afloat but we certainly wouldn't recommend it except in an absolute emergency....take a look at this video clip.
Also a word of warning given to us by the previous owners that should be heeded...make sure that:
a) the propeller shaft is properly fitted into the coupling
b) the bolts that connect the coupling to the shaft are done up tightly.
If either of these are not done correctly there is a good chance that at some inopportune moment the propeller shaft will part with the coupling. As a minimum this is likely to be embarrassing or worse which happened to the previous owner, the shaft disappeared completely leaving a gaping hole. I'm quite sure that once they plugged the hole and made it back to port they would have been seeking compensation from the engineer who did the work in the first place!
So a relatively simple task you would think...well that's what we thought before we were lifted out back in December.
We commissioned the local yard to power jet the hull in preparation for fresh antifouling which revealed that both cutlass bearing housings (the casting that the propeller shaft runs through) were not particularly well bonded to the hull and on closer inspection were weeping slightly inside which we hadn't noticed. So now the job isn't just replacing the seals but rebedding the cutlass bearing housings as well :-(
Voids beneath housing
Salt crystals around stern tube
Not surprisingly it didn't take long to remove the propeller shaft and cutlass bearing housing, the housing being held on with just a couple of bolts and mastic that was failing.
With everything removed and cleaned up it was nice to see that everything was in good order including the actual bearings so in theory it was just a matter of rebedding the housings.
Cutlass bearing housing, Stern tube & new backing pads
Unfortunately a dry run with all the components on the starboard side suggested otherwise. Typically the back of the housing should be parallel with the hull where it is mates but this wasn't the case with us with differences between 0mm and 7mm depending on where you looked - a challenge for any mastic!
A dry run on the port side revealed a similar problem but the differences not so dramatic.
There are various ways to correct the problem but we chose to use thickened epoxy to create our own casting to make up the difference. We keyed the hull thoroughly and carefully applied parcel tape to the housing and PTFE tape to the bolts to prevent the epoxy sticking to these items and then gently bolted the housing to the hull.
Plenty of parcel tape
Using the propeller shaft, P bracket and gearbox flange we were able to ensure everything stayed in alignment whilst the epoxy set. We did this for both housings.
All set, awaiting finishing
The original installation had the housings through bolted with small washers and nuts inside the hull which were difficult to access and do up. We decided to improve on the installation by adding a backing plate of stainless steel and welded captive nuts to make installation easier and increase the surface area.
With the epoxy set and some minor finishing to the casting it was time to put it all back together. Thankfully this went smoothly with both housings and then we added new seals before finally torquing down the bolts on the couplings.
Bonded & bolted together
Unfortunately now we have to be patient and wait for the launch to confirm if we've done everything correctly. Watch this space.......
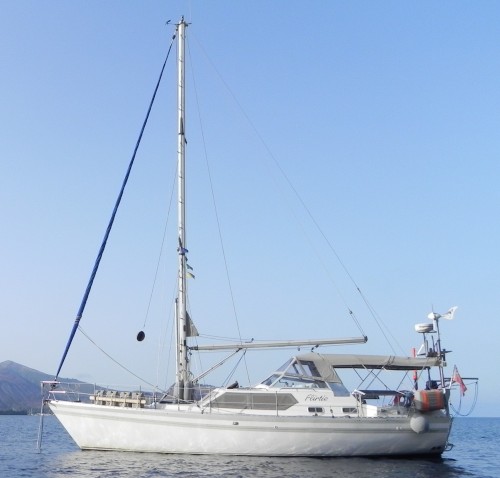
Yacht Flirtie
Who: Bruce and Caroline Trott
Port: Dartmouth, UK
Previous tracks and our latest location

Latest Blog posts
- Why do we want feathering propellers?
- Sicily, Marina di Ragusa to Malta, Manoe...
- Merry Christmas
- Flirtie has shiny new standing rigging!
- our brief 2023 sailing season in summary
- Meet the newest family member
- We've escaped and we're out sa...
- We've returned... back aboard Flirtie
- Merry Christmas
- Plans change!
- Italy, Rocella Ionica to (almost) Crotone
- Sicily, Siracusa to mainland Italy, Roce...
- Sicily, Portopalo to Siracusa
- Sicily, Marina di Ragusa to Portopalo
- An unexpected delay and start to our sea...
Comments