18 April 2011 | Alexandria, VA
11 May 2010
26 September 2009
31 July 2009
26 April 2009
24 January 2009 | Cadle Creek
27 December 2008 | Chesapeake Bay
09 November 2008
13 October 2008
30 September 2008
13 July 2008 | Warehouse Creek
08 June 2008
30 May 2008 | St. Mary's River
26 May 2008 | Rhode River & Chesapeake Bay
24 May 2008 | Chesapeake Bay
04 May 2008 | Chesapeake Bay
03 May 2008
29 April 2008
29 April 2008
16 April 2008
Back in Commission!
07 August 2006 | Cadle Creek, MD
I repaired my outboard! A week ago I was afraid of some major damage and thought I was going to have to take it into a Honda dealer. Well, I figured out the problem and fixed it.
Using this Tech Tip from Douglas Young on the Catalina 25 National Association, I created a flush kit for my Honda BF15A outboard. The engine is different from the one he has in his article, so I had to figuring some things out on my own. I shopped around for all the same parts that he described to be bought, but had a hard time finding the same ones.
I bought a �" hose end cap, 3/8" x 3/8" x 3/8" T-fitting, 2' of 3/8" tubing, a 1" long �" piece of threaded PVC, and the most difficult parts for me to find were the parts to convert the �" garden hose to 3/8". I could not find the Rainbird sprinkler system swivel fitting that steps down the size that Douglas used. I ended up finding two pieces at a Tractor Supply store that put together will do the same thing. It just needed a rubber seal which I had a spare from the two pack of hose end caps I bought. I also could not find the black tubing that he used which appears to be the same used on the engine. After having this clear PVC tubing installed and using the engine several times this weekend, it didn't appear affected by anything yet.
Here are the parts laid out and how to simply put it together:


Once I got to my outboard I had to figure out which hoses were which. I traced the cooling exit hose to where what I later found to be the thermostat. I then saw a larger hose just above it that leads around the back and down into the lower section of the outboard. I removed the hose and found it must be the water cooling hose since there was a little residue and salt:

I then cut the cooling hose and inserted the T-fitting:

I used a little dish soap on the fitting to slide the hoses on easily. One thing I learned after I finished is that the T-fitting was slightly interfering with the latch when the cover is put back on. Luckily I was able to move it out of the way, but if you tap into this line, you may want to move it slightly. I also cut the hose shorter so it fits better under the cover and doesn't interfere with anything.
I then removed the threaded plug from my home made kit, connected up the garden hose, and let it flush the engine. It works great!

This image doesn't show the water flowing out of the upper coolant exit, but I fixed that separate problem minutes later.
This kit cost me less than $5 in parts and is much more convenient than using the hose adapter that Honda sells. Honda's connects to the lower portion of the outboard on a small threaded inlet. It would be very difficult, if even possible to reach from the boat cockpit to connect their flush kit. Having this adapter in the top of the engine makes flushing a breeze. Now, when ever I get back from sailing, I simply remove the cover, connect up the hose and flush the engine while I finish putting everything away on the boat.
As I mentioned above, when I connected up the hose and flushed the engine, water was only coming out of the lower unit. This must mean that the cooling passageway in the engine block must be obstructed somewhere. So, I removed the housing that the two cooling hoses were attached to. I found that to be the thermostat and behind it were many small chunks of rubber clogging the system.

I used some needle nose pliers to remove as much as I could see.

It appears to possibly be parts of the impeller. I then remounted the thermostat and turned on the hose. Water still was not flushing through the engine block. I then removed the thermostat again and disconnected the engine block coolant exit hose. The small tip of the �" water hose to 3/8" hose converter from my kit has a �" opening which fit right over the coolant outlet nipple. I wrapped a little electrical tape around the nipple to give it a better water seal, then pressed the hose against it, turned the water on and flushed water through the system in the reverse flowing direction. I let it flow for a few minutes and let everything flush out. Whatever was in there got dislodged and the block was free flowing. I then reconnected the thermostat and connected my flush kit normally, turned on the water and I had water flowing through the entire system!

I then let it flush through for about ten minutes to make sure nothing else would get lodged in there and to help clean it out since I had never flushed it this year since I bought the boat. I then plugged my flush kit, put the engine in the water and started it up. It cranked right up and ran smoothly with water flowing freely and strongly through the coolant exit, shooting into the water.

I let it run for several minutes and it was running great! I cranked up the throttle and observed the exhaust. One concern Dave had is that he did not notice the exhaust coming out of the prop. I read online last week during my research that during low RPMs, such as idle, the exhaust actually comes out of a small vent under the top section of the engine. When I turned up the RPMs, sure enough, I saw the exhaust come out of the prop and at idle I did not see it. So, there are no problems with the exhaust. When I take the boat out at the end of the season for quite a few projects, I plan to install a new impeller. I'm assuming that's what those rubber pieces were, but it is still pumping strong, so I think it will be fine for now.
I worked on the engine Saturday and that really made my day. I really like the gratification of figuring something out and fixing it myself.
After repairing my outboard on Saturday I went for a nice sail by myself. Originally I didn't intend on sailing since I thought I'd be making repairs all day, so I had no crew lined up. I couldn't pass up on some excellent weather to try single handling for the first time, so I got everything ready to go. Since I just installed my Davis Tiller Stay and cam cleats the previous weekend, single handling is now possible and much easier. Before I leave my slip, I always try to make sure everything is ready to go, main halyard connected and free, cushions out, and everything accessible. I left my slip which went well. I have a bulkhead slip, pretty much like parallel parking since I have a boat in front and back of mine. Luckily my marina is very well protected and I removed all the lines and pushed the stern out. Then I just reverse out into the channel and head on out. I then motored out to the West River, pointed into the wind and set my new tiller stay. I went to raise the main, but the wire was caught on a screw that is sticking out my mast where a steaming light was once mounted. Just my luck, it rarely happens. I went below and got my boat hook, couldn't quite get the hook around the wire and the wind was turning me towards shallow waters. I get back to the helm and redirect myself and try again. It took several tries to free it, but I finally did. I then attempted to raise the main again, this time it got caught on one of the bolts extending from the spreader sockets! HAHA Just my luck again. I was able to shake it free after a few times and then quickly raise the main, cleat it and get back in the cockpit. I shut off the outboard and opened up the genoa. Then I just sat back and relaxed. Winds were supposed to be 5-10 knots, so it was pretty calm. I was cruising 2-3 knots just tacking back and forth close hauled up the channel. Tacking single handling wasn't difficult at all. The main tacks by itself and I just had to take care of the jib sheets. The bimini provided plenty of shade making the 90F+ day comfortable. I was out for about an hour and a half when the wind pretty much died. I then fired up the outboard and motored the rest of the way back to port. Here I am and no one is at the helm!

I was sailing directly downwind with my main lowered and genoa pulling me back to port, that's why the main sheet is tight. I really like the tiller stay. It doesn't hold a course like the electronic AutoTillers, but for short times and $25, it works well enough. It's so convenient to be able to let go of the tiller go grab something in the cabin, lower the keel, or do what ever and still mostly stay on course.
Coming back to my marina I docked just right. I have a bow line knot tied into my stern line that I can drop over a winch to stop me from hitting the boat in front of mine. I had no problems and just completed my first time single handling successfully! Saturday was a great day for me since I accomplished this along with repairing my engine. I then finally applied a coat of Wood Pro to my cockpit trim. I've been meaning to do this for months, especially since I originally refinished the other teak in January and February when I first bought my boat. I'll put a total of 4 coats on, hopefully finish this coming weekend.
On Sunday Chris joined me for some sailing. I got my battery that is mounted under my dinette seat mounted down. A couple months ago the original glue join broke free during some strong heeling over. The battery toppled over, but now it's strapped down. We then set sail. It was another calm day, winds forecasted to be 5-10 knots and clear and sunny skies. I tested out the bimini more on Sunday. I moved it forward another notch or two to prevent the back edge from rubbing the main sheet. The front straps still worked fine being clipped to the stanchions directly below. I used my winch handles for the genoa and the frame does interfere. This is no big deal since I have two speed winches, so I can crank both directions. Here is a photo:

We had a relaxing sail and we sailed out the main channel, past the green marker and then headed home. Chris got some more time in taking the helm. With the calmer winds we rarely hit 4 knots, but it was a nice day just being on the water. We got back to the marina and I put on a second coat of Wood-Pro on the cockpit trim. Two more coats next weekend and I will have finally finished all my wood work!
So this was an excellent weekend! Trouble shooting and repairing my engine by myself and then successfully completing my first single handling sail was very gratifying. Now I know I can sail by myself if I have no crew and I am become even more comfortable and confident with my abilities. I can't wait until next weekend!
Using this Tech Tip from Douglas Young on the Catalina 25 National Association, I created a flush kit for my Honda BF15A outboard. The engine is different from the one he has in his article, so I had to figuring some things out on my own. I shopped around for all the same parts that he described to be bought, but had a hard time finding the same ones.
I bought a �" hose end cap, 3/8" x 3/8" x 3/8" T-fitting, 2' of 3/8" tubing, a 1" long �" piece of threaded PVC, and the most difficult parts for me to find were the parts to convert the �" garden hose to 3/8". I could not find the Rainbird sprinkler system swivel fitting that steps down the size that Douglas used. I ended up finding two pieces at a Tractor Supply store that put together will do the same thing. It just needed a rubber seal which I had a spare from the two pack of hose end caps I bought. I also could not find the black tubing that he used which appears to be the same used on the engine. After having this clear PVC tubing installed and using the engine several times this weekend, it didn't appear affected by anything yet.
Here are the parts laid out and how to simply put it together:
Once I got to my outboard I had to figure out which hoses were which. I traced the cooling exit hose to where what I later found to be the thermostat. I then saw a larger hose just above it that leads around the back and down into the lower section of the outboard. I removed the hose and found it must be the water cooling hose since there was a little residue and salt:
I then cut the cooling hose and inserted the T-fitting:
I used a little dish soap on the fitting to slide the hoses on easily. One thing I learned after I finished is that the T-fitting was slightly interfering with the latch when the cover is put back on. Luckily I was able to move it out of the way, but if you tap into this line, you may want to move it slightly. I also cut the hose shorter so it fits better under the cover and doesn't interfere with anything.
I then removed the threaded plug from my home made kit, connected up the garden hose, and let it flush the engine. It works great!
This image doesn't show the water flowing out of the upper coolant exit, but I fixed that separate problem minutes later.
This kit cost me less than $5 in parts and is much more convenient than using the hose adapter that Honda sells. Honda's connects to the lower portion of the outboard on a small threaded inlet. It would be very difficult, if even possible to reach from the boat cockpit to connect their flush kit. Having this adapter in the top of the engine makes flushing a breeze. Now, when ever I get back from sailing, I simply remove the cover, connect up the hose and flush the engine while I finish putting everything away on the boat.
As I mentioned above, when I connected up the hose and flushed the engine, water was only coming out of the lower unit. This must mean that the cooling passageway in the engine block must be obstructed somewhere. So, I removed the housing that the two cooling hoses were attached to. I found that to be the thermostat and behind it were many small chunks of rubber clogging the system.
I used some needle nose pliers to remove as much as I could see.
It appears to possibly be parts of the impeller. I then remounted the thermostat and turned on the hose. Water still was not flushing through the engine block. I then removed the thermostat again and disconnected the engine block coolant exit hose. The small tip of the �" water hose to 3/8" hose converter from my kit has a �" opening which fit right over the coolant outlet nipple. I wrapped a little electrical tape around the nipple to give it a better water seal, then pressed the hose against it, turned the water on and flushed water through the system in the reverse flowing direction. I let it flow for a few minutes and let everything flush out. Whatever was in there got dislodged and the block was free flowing. I then reconnected the thermostat and connected my flush kit normally, turned on the water and I had water flowing through the entire system!
I then let it flush through for about ten minutes to make sure nothing else would get lodged in there and to help clean it out since I had never flushed it this year since I bought the boat. I then plugged my flush kit, put the engine in the water and started it up. It cranked right up and ran smoothly with water flowing freely and strongly through the coolant exit, shooting into the water.
I let it run for several minutes and it was running great! I cranked up the throttle and observed the exhaust. One concern Dave had is that he did not notice the exhaust coming out of the prop. I read online last week during my research that during low RPMs, such as idle, the exhaust actually comes out of a small vent under the top section of the engine. When I turned up the RPMs, sure enough, I saw the exhaust come out of the prop and at idle I did not see it. So, there are no problems with the exhaust. When I take the boat out at the end of the season for quite a few projects, I plan to install a new impeller. I'm assuming that's what those rubber pieces were, but it is still pumping strong, so I think it will be fine for now.
I worked on the engine Saturday and that really made my day. I really like the gratification of figuring something out and fixing it myself.
After repairing my outboard on Saturday I went for a nice sail by myself. Originally I didn't intend on sailing since I thought I'd be making repairs all day, so I had no crew lined up. I couldn't pass up on some excellent weather to try single handling for the first time, so I got everything ready to go. Since I just installed my Davis Tiller Stay and cam cleats the previous weekend, single handling is now possible and much easier. Before I leave my slip, I always try to make sure everything is ready to go, main halyard connected and free, cushions out, and everything accessible. I left my slip which went well. I have a bulkhead slip, pretty much like parallel parking since I have a boat in front and back of mine. Luckily my marina is very well protected and I removed all the lines and pushed the stern out. Then I just reverse out into the channel and head on out. I then motored out to the West River, pointed into the wind and set my new tiller stay. I went to raise the main, but the wire was caught on a screw that is sticking out my mast where a steaming light was once mounted. Just my luck, it rarely happens. I went below and got my boat hook, couldn't quite get the hook around the wire and the wind was turning me towards shallow waters. I get back to the helm and redirect myself and try again. It took several tries to free it, but I finally did. I then attempted to raise the main again, this time it got caught on one of the bolts extending from the spreader sockets! HAHA Just my luck again. I was able to shake it free after a few times and then quickly raise the main, cleat it and get back in the cockpit. I shut off the outboard and opened up the genoa. Then I just sat back and relaxed. Winds were supposed to be 5-10 knots, so it was pretty calm. I was cruising 2-3 knots just tacking back and forth close hauled up the channel. Tacking single handling wasn't difficult at all. The main tacks by itself and I just had to take care of the jib sheets. The bimini provided plenty of shade making the 90F+ day comfortable. I was out for about an hour and a half when the wind pretty much died. I then fired up the outboard and motored the rest of the way back to port. Here I am and no one is at the helm!
I was sailing directly downwind with my main lowered and genoa pulling me back to port, that's why the main sheet is tight. I really like the tiller stay. It doesn't hold a course like the electronic AutoTillers, but for short times and $25, it works well enough. It's so convenient to be able to let go of the tiller go grab something in the cabin, lower the keel, or do what ever and still mostly stay on course.
Coming back to my marina I docked just right. I have a bow line knot tied into my stern line that I can drop over a winch to stop me from hitting the boat in front of mine. I had no problems and just completed my first time single handling successfully! Saturday was a great day for me since I accomplished this along with repairing my engine. I then finally applied a coat of Wood Pro to my cockpit trim. I've been meaning to do this for months, especially since I originally refinished the other teak in January and February when I first bought my boat. I'll put a total of 4 coats on, hopefully finish this coming weekend.
On Sunday Chris joined me for some sailing. I got my battery that is mounted under my dinette seat mounted down. A couple months ago the original glue join broke free during some strong heeling over. The battery toppled over, but now it's strapped down. We then set sail. It was another calm day, winds forecasted to be 5-10 knots and clear and sunny skies. I tested out the bimini more on Sunday. I moved it forward another notch or two to prevent the back edge from rubbing the main sheet. The front straps still worked fine being clipped to the stanchions directly below. I used my winch handles for the genoa and the frame does interfere. This is no big deal since I have two speed winches, so I can crank both directions. Here is a photo:
We had a relaxing sail and we sailed out the main channel, past the green marker and then headed home. Chris got some more time in taking the helm. With the calmer winds we rarely hit 4 knots, but it was a nice day just being on the water. We got back to the marina and I put on a second coat of Wood-Pro on the cockpit trim. Two more coats next weekend and I will have finally finished all my wood work!
So this was an excellent weekend! Trouble shooting and repairing my engine by myself and then successfully completing my first single handling sail was very gratifying. Now I know I can sail by myself if I have no crew and I am become even more comfortable and confident with my abilities. I can't wait until next weekend!
Comments
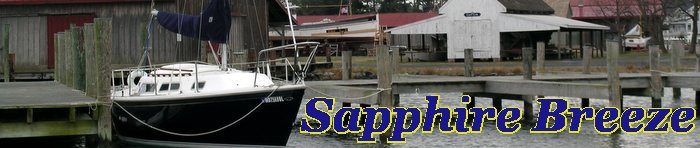
| Vessel Name: | Sapphire Breeze |
| Vessel Make/Model: | 1982 Catalina 25 SK/SR |
| Hailing Port: | Mayo, MD |
| Crew: | Justin |
| Extra: | This site is all about my experiences with my first boat; from restoring it, to my sailing adventures. I enjoy hearing from my readers, so feel free to send me an email. I'm also interested in meeting new people in the area, especially people in my age range since I hardly know any that sail. |
Gallery not available

Who: Justin
Port: Mayo, MD
SailBlogs Friends
