Kaimusailing
s/v Kaimu Wharram Catamaran
| Vessel Name: | Kaimu |
| Vessel Make/Model: | Wharram Custom |
| Hailing Port: | Norwalk, CT |
| Crew: | Andy and the Kaimu Crew |
| About: | Sailors in the Baltimore, Annapolis, DC area. |
17 April 2024 | St Marys, GA
Dinghy Skeg
I was suffering with what seemed like a cold and also had allergy symptoms. I awoke and felt fine. The green pollen that was coating everything was gone. Maybe it will return.
07 April 2024 | St. Marys, GA
Clammy Hands
Items came in from TEMU, the Chinese cut rate retailer. One was a nice little drone that cost about twelve and a half dollars. It looked like an easy thing to play with while I coughed and sneezed. I was fighting a summer cold, even though it is not summer elsewhere, it seems like it here. A nice [...]
02 April 2024 | St. Marys, GA
Sun Doggie
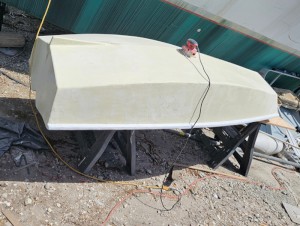
After laminating the cedar strips onto the gunwales of the dinghy I found the screws I used wouldn’t come out. The epoxy had seized them. The screw heads were stripped so I cut a straight slot in the heads with the cut off wheel. The cedar smoked when the screw heads got red hot. I could remove [...]
21 March 2024 | St. Marys, GA
Just Add Water
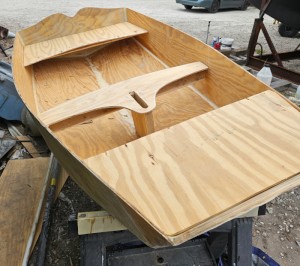
The rainy weekend started off with overcast and fog but no rain. It looked like I might be able to get something done on the D4 dinghy. I wanted to change the bow seat which is really the bow deck. The sailing option uses the deck to hold the freestanding mast. I didn’t like how the deck looked, [...]
01 March 2024 | St. Marys, GA
D4 Dinghy Alternative Seats
The rain event was more wind than rain, strong winds with gusts up to 44 mph. We drove into town to see what the harbor was like. There was a small sailboat that had dragged anchor and was sitting close to shore. The tide was out. We left and played with Bleu at Notter’s Pond.
23 February 2024 | St. Marys, GA
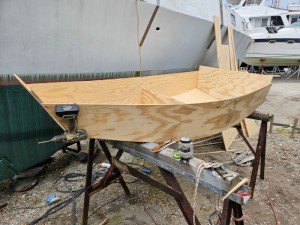
D4 Inside Seams
Day two of the dinghy build started out with me finishing wiring the hull bottoms together on the centerline of the bottom panels. This was much easier than the wiring of the chine edges of the bottom panels and the side panels.
Beware the Ides of March
The old navigation software doesn't have any provision for AIS. This is automatic identification, which runs at VHF frequencies. A small receiver picks up the AIS reports from any ships in the area, converts it to serial data, and nav software displays the information overlaid on electronic chart. There are also applications that compute the AIS data and calculate any potential collisions. Some nav software will also do the calculations and display ships as part of the electronic chart. Seaclear and Nobeltec do this. My Fugawi software is too old and doesn't have AIS capability. Seafarer which runs on linux also has AIS capability. I was able to confirm the AIS receiver was talking to the laptop, but there was no data about ships. This could be because of no shipping or no signal due to VHF being line of sight and the hills around the inlet blocking the signal.
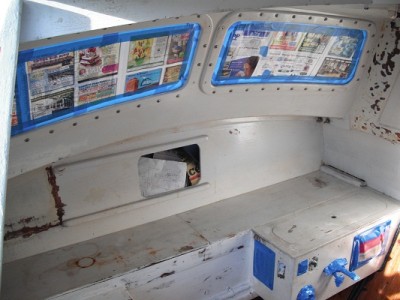
All this testing was part of the planning of how the pilothouse would be used in the future. One of the previous builders had started to build a sort of cabinet in the corner of the pilothouse. Perhaps it was for the radios, or radar display, or maybe a chartplotter. I decided I didn't like it and attacked it with the portable circular saw, then beat on it with a heavy hammer, finally used the angle grinder to smooth off the last evidence that it had ever been there. I liked the idea of having more counter space. One problem in any pilothouse is keeping electrical wiring away from magnetic compass and autopilot. Opening up counter space increased the chances of finding a compass location free of interference. Already it looked like the autopilot could be mounted on the outboard cabin side of the pilothouse and be away from any wiring.
Now a change has been made in the electrical plan. Originally I was planning to put the shore power connector at the pilothouse and split it to both hulls and have inverter/shore power selected by plugging that hulls AC feed into a duplex outlet that has shore power on one spigot and inverter on the other spigot. The port hull has a 1500 watt UPS and the starboard hull has a 3000 watt "modified sine wave" inverter. The UPS has a cleaner AC output than the inverter. It also is designed to take shore power or battery power automatically. I needed to add a second AC power panel to the port hull. I found an excellent panel at auction for only $95, less than the retail for the AC panel existing in the pilothouse. One idea was to replace the pilothouse panel with the new larger panel and put the original smaller panel in the port hull (chartroom). Then it occurred to me that the larger panel could be in the chartroom and carry UPS power only. If shore power is connected, it will automatically feed the whole boat. The inverter can still exist in the starboard hull and have its own output in the galley/dinette and draw its power from the starboard battery bank. This change in plan meant that there was no more wiring to do in the pilothouse. I could continue rehabbing it, so I sanded some more, and masked off for painting.
The painting took 2 days and because of the cold weather, the finish had a lot of blobs. The surface was warm due to the radiant space heat in the pilothouse, but the paint itself was cold and it made a big difference in the viscosity. I thought it was because of old paint, but after waiting a few days for new paint, it came out much the same. The end result was not bad, though. It had a certain character, maybe a workboat.
Now there is a new idea about project priorities. Details take the most time, but some details have to be done before moving on to another space. It's very satisfying to complete an area of a project and move on, and leave some details for later work. In the pilothouse I concluded that there was about 3 weeks work left before I could move into the port hull. One big item that involves all the spaces is lighting. These days LED lights are the first choice for interior lights. The reduction in wattage, while still maintaining acceptable light intensity, enables other devices to be added to the system, while still using the same battery capacity. LED bulbs that can fit into traditional incandescent or halogen fixtures dramatically reduce the amperage. I had installed halogen aircraft "eyeball" fixtures in my old sloop and I like them, so I began looking for similar fixtures on ebay. To make a long story short, I ended up with 18 track lighting fixtures that had the same ability to be aimed anywhere, and the same halogen bulbs, MR16. MR16's are readily available as LED bulbs. These fixtures came without bulbs, so I was only paying about $2 apiece. I envisioned using surface mount track to mount lights throughout the boat. At some point I realized that track is usually designed so that the entire track is controlled, not the individual lamps. Plus, I did not have the track, plus, I did not have the 120VAC/12VDC converters required for these lamps. No problem, I would just create a mounting system so that I could surface mount the lamps and wire them individually. The result was removal of the track lighting interface hardware, and substituting a Lexan block. The block mounts to the surface, the lamp mounts to the block. The wiring can feed through the surface, such as into a cabinet, if the lamp is mounted on the side of a cabinet, or the block and lamp can have a groove that allows the wiring to continue onto the surface. This would be useful for mounting on the overhead or on exterior bulkheads. It took a couple of days to make the Lexan blocks and modify the fixtures. I found out the hard way that the metal bodies of the fixtures were very fragile and cutting and drilling would destroy the body of the fixture. The repair of the fixtures that broke is a detail to be left for later. We have to move on.
There were several low voltage flourescent fixtures that came with the boat way back in 2001. There was evidence of corrosion on most of them, plus the fixtures themselves were faded yellow. A new fixture was about $11 from a Canadian R/V supplier. After spending a couple of days trying to restore the old fixtures, they went into a box for recycling. I ordered a few new flourescents.
I found 3 incandescent dome lamps, very salty design. They use festoon bulbs, which are available as LED's. I needn't get ahead of myself, we were still only working on the pilothouse. I had the pair of track lighting fixtures for the space, but no bulbs. I ordered four different LED MR16 bulbs from what I thought were 4 different companies. They all were coming from China, and all from the same company. After they arrive I can decide which I want to order in bulk for the rest of the spaces.
There is plenty of work to do, and in this circumstance, there is little need for a rigid organization of jobs. Just work on anything that hits your fancy. A box arrived with a bunch of electrical parts. 25 toggle switches, some waterproof momentary switches, and terminal blocks. Earlier a bunch of GFI outlets arrived. They came with compact and full sized outlet plates. The extra plates might be good for mounting the toggle switches. I tried one and it fit. It looked like there might be room for 3 or 4 switches on each outlet plate. It turned out that four would quite not fit, and 3 would leave a space.
Enter the multifunction tool from Harbor Freight. It comes with a little blade that looks like a narrow scraper with little teeth on it. It vibrates from side to side like a little saw. It is so effective, I was able to modify a wall plate in less than 5 minutes and mount 4 toggle switches on it. Later I did the other 4 plates. In the pilothouse I would put the two track light lamps, permanent GPS, and AIS receiver on the 4 toggle switches. How neat. Any device that had its own ON/OFF switch would be wired directly to the circuits terminal block, but if it didn't have a switch, it would be wired to the toggle switches.
Another device that needed organization was the old Autohelm 3000 autopilot. The physical installation of the drive motor and belt to the pilothouse helm wheel was OK, but the mount of the control head had to be moved away from the magnetic compass. Otherwise, the compass would stay on the same heading no matter which way the boat pointed. I moved it to the outboard side of the pilothouse. It was wired to its own breaker on the DC panel. After it was wired up, a test produced a chirp and lit the LED indicator on the control head.
The SSB had never been installed, and it would probably be necessary to haul the boat to create a proper ground plane for the SSB radio. No need worry about that now, just install the control head, radio, and antenna tuner. Lots of details there to be left for later. The VHF radio ended up in the forward port corner of the pilothouse with an under the counter mount. It was wired into the terminal block and tested OK.
The magnetic compass had never been properly installed. It ended up being difficult, because the mounting holes were internal to the compass and the only access to them would require making a 3" hole below the compass. The multitool came in handy, carving a nice octogonal hole, and the compass was finally installed. It also came in handy to chop out outlet holes. Very Useful.
It looks like work will move onto deck, installing windlass foot switches and navigation light runs. Also the head and chartroom in the port hull are targets.
The windlass had no controls installed, as yet. The idea was to have foot switches on deck near the windlass and an up/down switch in the pilothouse. Then it dawned on me that the motor controls are at the ondeck helm station and we needed windlass controls there.
Also, the navigation lights were replaced with LED units, but not wired.
Well, more wiring, but we are closer to having a fully functioning boat for another shakedown.
