Kaimusailing
s/v Kaimu Wharram Catamaran
| Vessel Name: | Kaimu |
| Vessel Make/Model: | Wharram Custom |
| Hailing Port: | Norwalk, CT |
| Crew: | Andy and the Kaimu Crew |
| About: | Sailors in the Baltimore, Annapolis, DC area. |
17 April 2024 | St Marys, GA
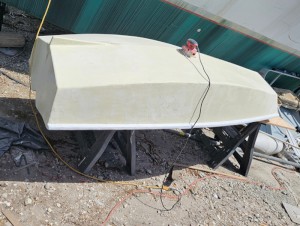
Dinghy Skeg
I was suffering with what seemed like a cold and also had allergy symptoms. I awoke and felt fine. The green pollen that was coating everything was gone. Maybe it will return.
07 April 2024 | St. Marys, GA
Clammy Hands
Items came in from TEMU, the Chinese cut rate retailer. One was a nice little drone that cost about twelve and a half dollars. It looked like an easy thing to play with while I coughed and sneezed. I was fighting a summer cold, even though it is not summer elsewhere, it seems like it here. A nice [...]
02 April 2024 | St. Marys, GA
Sun Doggie
After laminating the cedar strips onto the gunwales of the dinghy I found the screws I used wouldn’t come out. The epoxy had seized them. The screw heads were stripped so I cut a straight slot in the heads with the cut off wheel. The cedar smoked when the screw heads got red hot. I could remove [...]
21 March 2024 | St. Marys, GA
Just Add Water
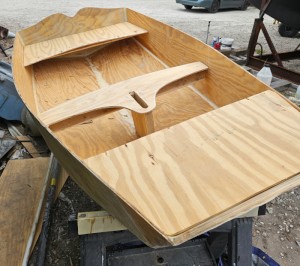
The rainy weekend started off with overcast and fog but no rain. It looked like I might be able to get something done on the D4 dinghy. I wanted to change the bow seat which is really the bow deck. The sailing option uses the deck to hold the freestanding mast. I didn’t like how the deck looked, [...]
01 March 2024 | St. Marys, GA
D4 Dinghy Alternative Seats
The rain event was more wind than rain, strong winds with gusts up to 44 mph. We drove into town to see what the harbor was like. There was a small sailboat that had dragged anchor and was sitting close to shore. The tide was out. We left and played with Bleu at Notter’s Pond.
23 February 2024 | St. Marys, GA
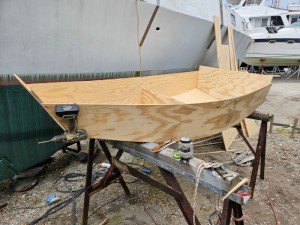
D4 Inside Seams
Day two of the dinghy build started out with me finishing wiring the hull bottoms together on the centerline of the bottom panels. This was much easier than the wiring of the chine edges of the bottom panels and the side panels.
A New Hatch

I had a couple of Lewmar Concept hatches that came with the boat. They were new at that time, but were now obsolete. No repair parts or accessories are available. Kieth Lamb, the previous builder, had said "They can sleep under the stars". That's the only clue I had about where these hatches should be installed. I noticed I was running a 500 watt lamp in the main bunk in order to see what I was doing. Yes, this could be where those hatches should go. First I thought it would be nice to install both of them above the main bunk so that the forward hatch opened forward and the after hatch opened aft. A breeze would be drawn down by th eforward hatch and evacuated by the aft hatch. The cabin top however was a composite structure of 3/8"ply over 1" divynicell and a 1/4" ply inner layer. This is very strong, but if too many cutouts are made in the deck or the cabin top, it gets flimsy. It would have to be just one hatch.
This little job of painting the main bunk was turning into a major project. First the replacement of the rotted overhead, then the additional work of inserting a hatch. It was a complex job cutting the hole for the hatch. A simple cutout would expose the sandwich of ply and divynicell foam and would have to be sealed up to prevent moisture getting into the sandwich. A fellow captain had approached me about a problem with her main hatch. She had a balsa core cabin top, and the periphery of the main hatch was soft and needed to be opened up to remove the soft balsa. The next step would be to insert new core material and then glass the opening back up. In our case the core was an inert foam, but the opening presents a weakness point in the cabin top. If there is much crew stomping around the hatch area, stress cracks could develop and then moisture could get in and attack the ply above and below the foam. The normal treatment is to gouge out the foam and put in some harder material and laminate the two ply surfaces together. I decided to use fiberglass mill ends in epoxy resin to form the hatch opening and reinforce the area. Also microballons were incorporated into the mixture to make it smoother. The opening for the hatch was cut in staggered layers. The first layer on the cabin top is a little bit larger than the overall hatch. Then the foam layer and the inner ply layer were cut out to match the hatch flange. We left most of the foam so that a minimum of glass/epoxy mixture would be needed to fill the gap.
In order to keep the epoxy/glass from falling down into the main bunk dams of plastic were taped and air nailed around the opening. This plastic came from kitty litter pails and the radius for the cornes came from Bryers ice cream buckets. I was sure that epoxy/glass was the right stuff to use, since it would be impervious to moisture and provide a solid surface to screw the hatch flange into. All the microballons and most of the glass millends went into this concoction. It looked like chocolate cole slaw.
Unfortunately the end result needed to be reshaped to clean up rough edges with an angle grinder with a flap disk. Also hot melt glue stick used to hold the plastic dams had to be carved away with a knife. There were snow drifts of fiberglass on deck and it got into my skin as I sweated around grinding the glass.
The next step was a trip to West Marine for epoxy hardener, microfiber powder, and syringes to apply it. I normally use Raka Systems epoxy, but I was running low and decided to use up the rest of my WEST epoxy. There might be a can of hardener for the WEST epoxy somewhere on the boat, but I needed it now and got it at West Marine. Incidently, WEST epoxy and West Marine are not affiliated.
After I spent all morning putting in a nice fillet around the hatch and some additional material to even out the top of the opening, I found it wasn't hardening. My calibration of the mixture was wrong, so it all had to be scraped off and redone. After it was reapplied, I put plastic drop cloth across the hatch opening and placed the hatch into position. Now the opening would have the exact shape of the hatch frame. The next step would be to finish any areas that needed more epoxy fiberglass paste.
Next it was down into the main bunk. Although I tried to keep any epoxy mixture from falling down there, there was a lot of it, plus all the sanding and scraping residue. I ran the vacuum to pick up the small stuff and ran the multitool with the scraper attachment to clean up epoxy residue. It worked very well. Next I worked on the overhead and pried off the plastic strips kept the microballoon putty in place on the overhead seams. Then the pad sander with 120 grit paper quickly sanded the overhead down to a perfectly smooth surface. I wiped away the dusty sanding residue and applied a coat of epoxy to the bare wood on the overhead.
When the hatch opening was finished, the portlights, stainless fittings, and some exposed wiring were masked off. A coat of clear urethane was sprayed to seal any bare wood and block any stains. Then two coats of arctic white were sprayed. After the paint dried, the hatch was mounted with bronze screws and silicone sealant. The bolt holes for the genoa track and a nearby cleat had to be redrilled through the new overhead panels. I planned to rebed the bolts with UV6800, but the tube was old and the stuff was like thick tar, it had hardened in the tube. I used more silicone to do the bolts.
Just like the paint job in the chartroom, the white paint made imperfections stand out. There was checking of the wood and some cracks and nail holes needed to be filled and repainted. That would wait for another time. The hatch opening also had imperfections. I was planning to use the interior hatch trim on the hatch that would be installed above the dinette in the starboard hull. I only had one interior trim. It would have made the hatch opening look a lot better. I put it up to the opening and saw it was just a bit too large to fit. It is designed larger than the hatch so that the hatch can fit inside the interior trim. It's nice to have it because it has a bug screen that snaps onto the trim.
Later I began cleaning out the vanity area that is the space between the main bunk and the forward bunk. The vanity area is the forward section of the port hull cabin from the forward hatch forward to the end of the cabin. It is about 10 feet long and has a counter with a vanity sink and small cabinet above. Below the counter is storage with sliding doors. The counter is against the outboard side of the hull. The inboard side has a hanging locker and some other storage spaces. While cleaning them out, I found the other hatch interior trim piece. We will redo the main bunk hatch opening in the future and install the trim there.
The next project, the vanity area, involves cleaning and painting the area, dressing the forward solar panel wiring and the port navigation light wiring, installing the water system pump, vanity faucet fixture, and hooking up the plumbing back to the lines that feed the head. We have left the lighting fixtures for the main bunk, forward bunk, and vanity area to be done all at once. This area includes the forward ladder that needs its steps redone, similar to the ladder (stairs) that were redone in the chartroom.
The weather has not cooperated, it has hit 98 and 99 degrees the last couple of days. This will definitely slow things down as we head into June.
