Kaimusailing
s/v Kaimu Wharram Catamaran
| Vessel Name: | Kaimu |
| Vessel Make/Model: | Wharram Custom |
| Hailing Port: | Norwalk, CT |
| Crew: | Andy and the Kaimu Crew |
| About: | Sailors in the Baltimore, Annapolis, DC area. |

17 April 2024 | St Marys, GA
Dinghy Skeg
I was suffering with what seemed like a cold and also had allergy symptoms. I awoke and felt fine. The green pollen that was coating everything was gone. Maybe it will return.

07 April 2024 | St. Marys, GA
Clammy Hands
Items came in from TEMU, the Chinese cut rate retailer. One was a nice little drone that cost about twelve and a half dollars. It looked like an easy thing to play with while I coughed and sneezed. I was fighting a summer cold, even though it is not summer elsewhere, it seems like it here. A nice [...]

02 April 2024 | St. Marys, GA
Sun Doggie
After laminating the cedar strips onto the gunwales of the dinghy I found the screws I used wouldn’t come out. The epoxy had seized them. The screw heads were stripped so I cut a straight slot in the heads with the cut off wheel. The cedar smoked when the screw heads got red hot. I could remove [...]

21 March 2024 | St. Marys, GA
Just Add Water
The rainy weekend started off with overcast and fog but no rain. It looked like I might be able to get something done on the D4 dinghy. I wanted to change the bow seat which is really the bow deck. The sailing option uses the deck to hold the freestanding mast. I didn’t like how the deck looked, [...]

01 March 2024 | St. Marys, GA
D4 Dinghy Alternative Seats
The rain event was more wind than rain, strong winds with gusts up to 44 mph. We drove into town to see what the harbor was like. There was a small sailboat that had dragged anchor and was sitting close to shore. The tide was out. We left and played with Bleu at Notter’s Pond.

23 February 2024 | St. Marys, GA
D4 Inside Seams
Day two of the dinghy build started out with me finishing wiring the hull bottoms together on the centerline of the bottom panels. This was much easier than the wiring of the chine edges of the bottom panels and the side panels.
The Vanity
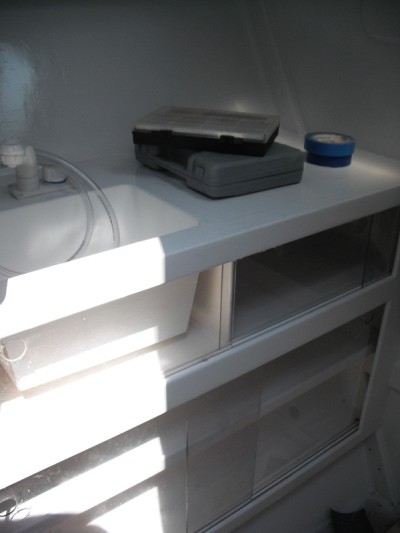
The new faucet was measured to make a cutout template and then the holes were cut in the counter for the faucet. There were two existing holes, not where I wanted, so they would be plugged later before painting. The counter top could be arctic white or it could be covered in wood laminate. The faucet is electric with a switch that will be wired into the water pump circuit, joining the faucets in the head. If any faucet is opened, it turns on the pump.
There were several impeller pumps from Harbor Freight on hand. Their weak spot is the pair of brush springs in the motor. The springs corrode and then the pump fails. The springs are not available as a repair part, but the assembly that includes the brush holder and springs is available. I bought 4 of these assemblies after one of the pumps failed so that I would have spares for the other pumps. The pump I grabbed for this installation was another with a spring problem. It ran intermittently. One spring was partially corroded away. I replaced the assembly, cleaned the commutator, and tested the pump. It would be mounted under the sole close to the forward bunk where the water tank was installed.
The ladder (stairs) in the hatchway to the vanity area would be modified so that the steps would be mounted further away from the hull side, maybe 1 1/2 inches further. Also the top step was missing and the temporary pine step (ugly) would be replaced with a new one made of oak. The oak was tongue and groove leftover from the deck table. It was 48" long and the step is 24" wide. The oak was 4" wide and the new step, including the extra 1 1/2 inches, was 8" wide. Just cut the plank in half and glue it together. The other existing steps were either light teak or maybe oak, making an easy match. They would have to be sanded and resurfaced with two part clear urethane. Across from the hatchway ladder was another few steps going up the opposite side of the hull between the vanity counter and the main bunk. These steps were for access to the bunk. They would also be finished clear urethane, while the rest of the vanity space would be arctic white.
To extend the hatchway steps away from the hull side, the wooden blocks on either side of each step needed to be extended. These were quickly made of 1" square stock and about 4" long. 12 of these were made and glued in place. The bottom step needed a vertical support at the center of the step. One of the middle steps happened to be alongside a drawer opening and had nothing to fasten the wooden block, so a metal angle will be installed as a support.
After resurfacing the steps the area was prepared for painting. Sanding residue was vacuumed up and portlights and adjacent areas were masked off. Every stainless fitting such as bolt heads and screws had to be masked. The two faucet holes in the vanity sink counter had to be filled and faired. The surfaces were scrubbed with detergent and water to remove any other dust or stain.
Clear two part urethane was sprayed over all the bare wood surfaces, all the blemishes, and all over anything else until the paint was gone. Then arctic white was sprayed. A second mix of arctic white depleted that paint color and we ran out of paint before the first coat was done. It was a blessing in disguise, as I was having a lot of trouble in the heat and the air circulation was giving me excessive paint fumes. Another batch of paint was ordered and when it arrives in a couple of days we can complete the job.
While I was waiting for the paint the local weather went ballistic with very high temperatures. I found it was nice to work from the dinghy under the bridgedeck with a breeze blowing through. I was setting up a linkage between the rudder crossarm and the engine so that the engine would turn and help the rudders at slow speeds. I couldn't complete the job as the heat became oppressive.
The paint arrived and the painting had to be completed before the afternoon heat wave. Once again the masking tape gave up during the paint job and a quick retaping was necessary. I mixed up a double batch of paint and sprayed it on. If the wind wasn't blowing toward shore, it would blow onto an adjacent boat or over our deck, so it was good to get the job done now. There was no problem of paint fumes or heat. The paint ran out, but we painted the most important areas first and the last areas were inside some cabinets, which could be painted with a brush later.
The next day the masking tape and plastic were removed. There were some spots that needed repainting. My temporary coveralls left lint in some places. The masking peeled some paint off in a few places. Once again we were working against a rising ambient heat. I knocked off at noontime.
It was quick work to mix up a small epoxy mix and glue the stair steps in place with the air nailer and stainless nails. The vanity area had double grooves for sliding doors for the cabinets. Three sets of sliding doors were cut from 1/8" lexan and 1" finger holes were drilled in the corners. A dremel tool with a tiny drum sanding bit cleaned up the holes and rounded the edges. Ordinary alcohol from Home Depot brushed onto the door panels helped remove the plastic overlay.
Once again, the layer of arctic white showed areas of plywood checking and some flaws in the surface. Along with the lint from the coveralls, there was enough to justify a touch up paint later.
The completion of this job leaves a bunch of work to hook up and install lights, pumps, tubing, wires, and eventually, the wet cells for the port hull battery bank. It also is showing me that a general clearing out of excess junk is necessary. There is stuff in the way of plumbing and electrical work. Also the boat has to be moved to pump out the holding tank and to go sailing. The new priority is to get it ready for some sailing.
