Kaimusailing
s/v Kaimu Wharram Catamaran
| Vessel Name: | Kaimu |
| Vessel Make/Model: | Wharram Custom |
| Hailing Port: | Norwalk, CT |
| Crew: | Andy and the Kaimu Crew |
| About: | Sailors in the Baltimore, Annapolis, DC area. |
17 April 2024 | St Marys, GA
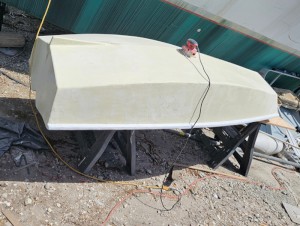
Dinghy Skeg
I was suffering with what seemed like a cold and also had allergy symptoms. I awoke and felt fine. The green pollen that was coating everything was gone. Maybe it will return.
07 April 2024 | St. Marys, GA
Clammy Hands
Items came in from TEMU, the Chinese cut rate retailer. One was a nice little drone that cost about twelve and a half dollars. It looked like an easy thing to play with while I coughed and sneezed. I was fighting a summer cold, even though it is not summer elsewhere, it seems like it here. A nice [...]
02 April 2024 | St. Marys, GA
Sun Doggie
After laminating the cedar strips onto the gunwales of the dinghy I found the screws I used wouldn’t come out. The epoxy had seized them. The screw heads were stripped so I cut a straight slot in the heads with the cut off wheel. The cedar smoked when the screw heads got red hot. I could remove [...]
21 March 2024 | St. Marys, GA
Just Add Water
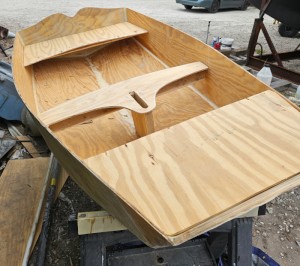
The rainy weekend started off with overcast and fog but no rain. It looked like I might be able to get something done on the D4 dinghy. I wanted to change the bow seat which is really the bow deck. The sailing option uses the deck to hold the freestanding mast. I didn’t like how the deck looked, [...]
01 March 2024 | St. Marys, GA
D4 Dinghy Alternative Seats
The rain event was more wind than rain, strong winds with gusts up to 44 mph. We drove into town to see what the harbor was like. There was a small sailboat that had dragged anchor and was sitting close to shore. The tide was out. We left and played with Bleu at Notter’s Pond.
23 February 2024 | St. Marys, GA
D4 Inside Seams
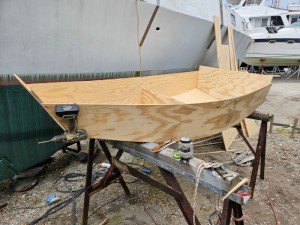
Day two of the dinghy build started out with me finishing wiring the hull bottoms together on the centerline of the bottom panels. This was much easier than the wiring of the chine edges of the bottom panels and the side panels.
#4 Beam Pt. V

.
The next day I decided to use the chainsaw to make rough angled cuts for the scarf joints. I set one plank up, the one that had been partially cut and abandoned when I cut my thumb and began to bleed all over it. Now I could attack it with a real saw, one that could cut down a whole tree. The real saw wasn't very precise in its attack and jumped around. Sure, it cut through the whole plank, but it was a real butcher job. Maybe the next one would turn out better. I brought out the next plank. It too had been partially cut, but there was no blood on it.
.
A car pulled up and Capn Neal jumped out. His friend had brought him from another marina where he had hauled out his boat. Neal wanted to pick up his car. Yes, yes, Neal, take your car away and don't come over here and see my crappy scarf joints. Neal came over.
.
He had plenty of advice about my choice of wood, crappy carpentry, and offered sympathy. He had his own problems. His beautiful Sparkman and Stevens sloop was hauled out for rudder repair. He had to remove, dissect, rebuild, and reassemble his rudder. I offered my condolences. It seemed like forever before he finally left. Cornelia Marie came up from Captain Kris' full keeled ketch with the puppy, an unusually active dog. She too had advice before she disappeared into the woods with the frisky dog. There was a trail there and plenty of room for doggy business.
.
My next cut with the chain saw was a little better, but I couldn't prevent an awful result. It was angled, yes, but very rough. I worried about how much wood would be lost with such crude cuts, for I had calculated using both ends of the plank. I now had 4 ends of planks, 4 rough bevels that needed to be smoothed out to form perfect scarf joints. I remeasured and remarked the bevels and stacked them so they formed one big very rough bevel, 40 inches long.
.
The first thing I did was attack it with the angle grinder with its rough flap disk and take off the obvious high spots. Then I continued, carefully avoiding taking off more wood than necessary, but getting the whole big rough bevel to approximate the correct angle, and mostly flat. Then I ran the power planer down the rough bevel and made it smooth. Then I separated the plank ends and selected the one that should fit the next spot on the new beam. The bevel was checked with a straight edge and touched up a bit with the grinder and the belt sander.
.
Both sides of the plank were marked down its centerline to show where the center “I” part of the beam would attach to it. The side that actually bonded to the I part was marked to show where epoxy glue needed to be applied. The other side was marked to show where the air nailer could be used to nail the plank to the “I” part.
.
The epoxy procedure outlined in the Gougeon's book has a two part process, first paint the glue joint with epoxy, then go back and coat it with thickened epoxy, then put it all together. Clamping pressure should be just enough to bring the surfaces together, but not so much that epoxy gets totally squeezed out of the glue joint.
.
It takes a day for the glue to properly harden and only one plank can be attached at a time. This prevents disturbing a wet glue joint. Two planks can be attached by doing one early in the day and then another after 2-3 hours to allow the epoxy to set up.
.
When I was getting some lumber from the stack on the foredeck, I grabbed the inner forestay to steady myself. It was loose, not tensioned like it had been. After some thought I realized the rigging was loose because the beam I had removed was helping to keep the hulls level. The mast is in the middle of the boat, sitting on beams #2 and #3, and also on a short crossbeam right under the mast. The short crossbeam is not the full width of the boat, it only runs between the hulls and rests on brackets mounted on the inboard surfaces of the hulls. Thus, this beam which bears most of the weight of the rig is pushing downward and that downward force is brought to the inboard gunwales of the hulls. The hulls try to “heel over” toward the mast, but the longer crossbeams, #1,2, 3, and 4 keep the hulls level and resist the downward force. It looked like beams 1, 2, and 3 were not keeping the hulls level after I removed beam #4. When I put the new beam #4 in place, bolting it to its mounts, it will have to fight against the rig tension. It would be prudent to slack the rig before tightening up those bolts. Also it is becoming apparent that beams 1,2, and 3 probably should be replaced ASAP.
.
A knowledgeable boat carpenter looked at the beam I removed and said it must be spruce. I looked up spruce on the internet and found out it is very susceptible to rot, untreated it will only last about 18 months if fresh water can soak it. That explains why my beams had failed so quickly. All it takes is one spot where moisture gets into the wood, it swells and cracks the fiberglass sheathing. This allows more moisture to get in, then the wood quickly rots and it only becomes apparent when it has progressed quite a bit, underneath the fiberglass sheathing. For this reason I will not sheath the new beams. If they begin to deteriorate, I will be able to see it right away.
.
I used the power plane to make scarf joints on four 12 foot planks, at the ends. It worked very well and didn't take too long. These represented the last of the scarf joints. Now the job remained of adding them to the beam, gluing them on one at a time. It only takes about an hour to mix the epoxy, paint the beam with a first coat, mix colloidal silica into epoxy for a vaseline like consistency and slather that onto one side of the joint, then lightly clamp the plank into position, air nail it so it doesn't shift, and finally add more clamps to eliminate any voids.
.
The picture is of the beam under construction. It is no longer resting on the old beam. Now it needs fillets, spacers, and shaping before it can be painted and mounted.
