Kaimusailing
s/v Kaimu Wharram Catamaran
| Vessel Name: | Kaimu |
| Vessel Make/Model: | Wharram Custom |
| Hailing Port: | Norwalk, CT |
| Crew: | Andy and the Kaimu Crew |
| About: | Sailors in the Baltimore, Annapolis, DC area. |

07 April 2024 | St. Marys, GA
Clammy Hands
Items came in from TEMU, the Chinese cut rate retailer. One was a nice little drone that cost about twelve and a half dollars. It looked like an easy thing to play with while I coughed and sneezed. I was fighting a summer cold, even though it is not summer elsewhere, it seems like it here. A nice [...]

02 April 2024 | St. Marys, GA
Sun Doggie
After laminating the cedar strips onto the gunwales of the dinghy I found the screws I used wouldn’t come out. The epoxy had seized them. The screw heads were stripped so I cut a straight slot in the heads with the cut off wheel. The cedar smoked when the screw heads got red hot. I could remove [...]

21 March 2024 | St. Marys, GA
Just Add Water
The rainy weekend started off with overcast and fog but no rain. It looked like I might be able to get something done on the D4 dinghy. I wanted to change the bow seat which is really the bow deck. The sailing option uses the deck to hold the freestanding mast. I didn’t like how the deck looked, [...]

01 March 2024 | St. Marys, GA
D4 Dinghy Alternative Seats
The rain event was more wind than rain, strong winds with gusts up to 44 mph. We drove into town to see what the harbor was like. There was a small sailboat that had dragged anchor and was sitting close to shore. The tide was out. We left and played with Bleu at Notter’s Pond.

23 February 2024 | St. Marys, GA
D4 Inside Seams
Day two of the dinghy build started out with me finishing wiring the hull bottoms together on the centerline of the bottom panels. This was much easier than the wiring of the chine edges of the bottom panels and the side panels.
15 February 2024 | St. Marys, GA
D4 Dinghy Day One
A Wharram Pahi 26 had been anchored in the river nearby the boatyard and was hauled out with the travel lift. I went around to look at it and talked to the owner couple. I was surprised that it had been built in Martinique in 1988. The boat is more than 30 years old.
Utter Rudder
.
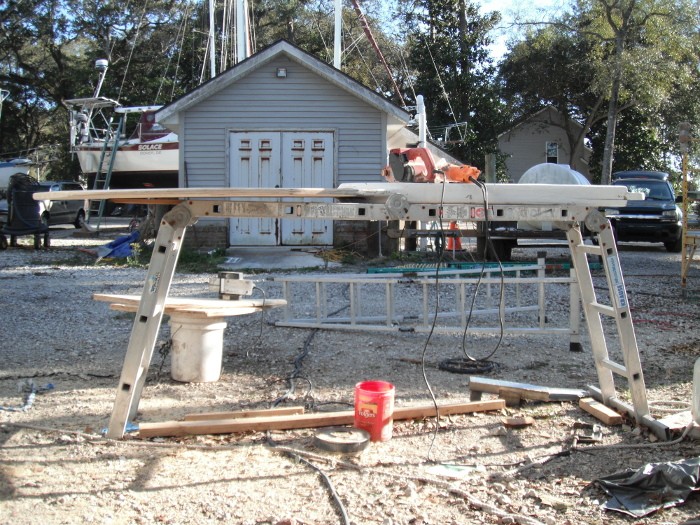
We had huge winds hitting the boatyard and blew over ladders and sent loose things flying. It also somehow inhibits work. It was like it was the weekend or a holiday.
.
I did a side job of cutting the new steps for the swimming ladder. I set up the table saw in the woodshop with the fence 23 inches from the blade, blade at just enough height to cut the 5/8 inch cedar for the steps. Apparently someone had been cutting earlier and had jammed the wood against the fence causing it to be flung backward, toward the operator and everyone else in the shop, and the piece of wood struck the back wall of the shop. When I set the saw up with the fence, Ron the carpenter said “don’t cut it like that, it will come right back in your face”, and Christian, a professional French carpenter said, “It will, for sure”. I went ahead and cut the 8 steps without any disasters. It is important to set the fence slightly wider at the exit of the blade compared to the entry. This way, the wood has no pressure to jam it against the fence, squeezing the wood around the blade which has a powerful motor to launch the little piece of wood. Also the wood I was using was thin cedar that is used for picket fences. It does not have enough strength to jam the blade.
.
When I tested the trim router on a scrap of this cedar, the wood didn’t cut cleanly, it has no strength, like marshmallow, and there were many divots where the wood came apart. This can also be caused by a dull router bit, so I sharpened the bit using the dremel tool and an 80 grit flap wheel. The flap wheel is pretty well shot, but I have a whole package of them coming from China, someday.
.
The steps were stacked and then the round off bit was run across the stacked up corners. Then the individual steps were routed all the way around with the same bit and then cleaned up with the angle grinder and flap disk. Quick workboat quality finish.
.
Now I had to go back to the starboard skeg slot and adjust it to allow the correct angle of the skeg, also not as tight. It didn’t take too long, but it is unenjoyable work with debris raining down into your face as the bottom of the keel gets routed, sanded, or ground with the flap disk. The skeg finally fit and both were removed, marked so we wouldn’t forget which was which, and brought forward to a temporary work table to do some shaping.
.
The part of the skeg that is buried in the slot in the keel is left as is with no shaping. The blade of the skeg is trimmed and rounded off so that when it is fiberglassed, the cloth and resin have a rounded edge to bend around. There is a minimum radius depending on the weight of the cloth. Also the leading edge is supposed to be finer than just a blunt round edge, so it was planed a little before rounding off the remainder and cleaning up with the flap disk and belt sander.
.
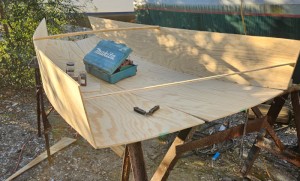
After both skegs were done, the rudder with the new blade (starboard) needed some shaping. I had made a template of the curve of the existing rudder, from the leading edge to the thinnest portion of the trailing edge, and used it to plane off the rudder until it matched the template. It was then sanded and flap disked. The round off bit was used to route the edges.
.
The picture is of the shaped objects. I felt pooped and ready to call it quits, but it was still not close to quitting time. I found another job to do.
.
The existing rudder (port) had a couple of dings, but it also had had a repair at the top of the rudder stock where the tiller arm attaches. That was gone now. Half of the repair was in the tiller bar, and half was still in the rudder stock, but there were some missing pieces. The epoxy used in the repair, plain epoxy with colloidal silica mixed in, was still there and brittle, as carpenter Ron said it would be. The failure happened after the boat had hit the jetty. The rudders were damaged but still attached at that point. Neither rudder was still attached to the boat when it got to Fort Clinch State Park. They washed up on the beach along with the tiller bar.
.
I could see that the top of the rudder cheeks had fractured and the inner plywood, which had a repair that made a discontinuity, failed on the part that hadn’t been repaired, and left a mess of wood splinters and epoxy filler. I used the speedbore tool that had done so well on the skeg slots and began removing wood and stainless screws with a vengeance. The bit was soon dull and damaged, but the dremel tool cleaned it up. I was at the end of my day and giving my last to grind out that rudder head. Finally I said, “That’s it”, and sat down and ate a cookie.
