Kaimusailing
s/v Kaimu Wharram Catamaran
| Vessel Name: | Kaimu |
| Vessel Make/Model: | Wharram Custom |
| Hailing Port: | Norwalk, CT |
| Crew: | Andy and the Kaimu Crew |
| About: | Sailors in the Baltimore, Annapolis, DC area. |
17 April 2024 | St Marys, GA
Dinghy Skeg
I was suffering with what seemed like a cold and also had allergy symptoms. I awoke and felt fine. The green pollen that was coating everything was gone. Maybe it will return.
07 April 2024 | St. Marys, GA
Clammy Hands
Items came in from TEMU, the Chinese cut rate retailer. One was a nice little drone that cost about twelve and a half dollars. It looked like an easy thing to play with while I coughed and sneezed. I was fighting a summer cold, even though it is not summer elsewhere, it seems like it here. A nice [...]
02 April 2024 | St. Marys, GA
Sun Doggie
After laminating the cedar strips onto the gunwales of the dinghy I found the screws I used wouldn’t come out. The epoxy had seized them. The screw heads were stripped so I cut a straight slot in the heads with the cut off wheel. The cedar smoked when the screw heads got red hot. I could remove [...]
21 March 2024 | St. Marys, GA
Just Add Water
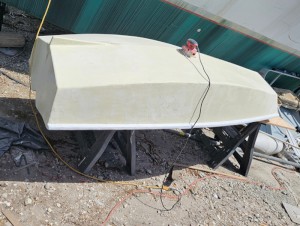
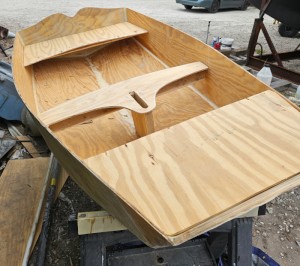
The rainy weekend started off with overcast and fog but no rain. It looked like I might be able to get something done on the D4 dinghy. I wanted to change the bow seat which is really the bow deck. The sailing option uses the deck to hold the freestanding mast. I didn’t like how the deck looked, [...]
01 March 2024 | St. Marys, GA
D4 Dinghy Alternative Seats
The rain event was more wind than rain, strong winds with gusts up to 44 mph. We drove into town to see what the harbor was like. There was a small sailboat that had dragged anchor and was sitting close to shore. The tide was out. We left and played with Bleu at Notter’s Pond.
23 February 2024 | St. Marys, GA
D4 Inside Seams
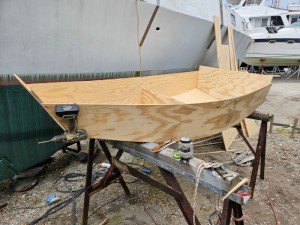
Day two of the dinghy build started out with me finishing wiring the hull bottoms together on the centerline of the bottom panels. This was much easier than the wiring of the chine edges of the bottom panels and the side panels.
Fair Thee Well

.
It was impossible to drill the holes for the U-bolt from above, the bow crosstube and stanchion were in the way and it was too big of a job to disassemble it all, so I looked at drilling from below. It was not precise, I had to guesstimate the drill holes and the angle, but it came out very close, just some attention with the round rasp file and redrill with a spade bit to bring the holes out to 5/8“ for a 1/2“ bolt, and it was done. The extra large holes were allowance for epoxy to keep water from seeping into the wood from the bolt holes.
.
The dutchman, or plug, was jammed back into the slot which had been primed with raw epoxy, then slathered with the colloidal silica mixture, and the excess was troweled back into any voids. The next morning the bolt holes were found to have been filled partly with epoxy. Some careful redrilling opened them up, and the U-bolt was test fit.
.
The phenolic microspere order came in two days earlier than I predicted. It was ordered on Sunday, when Raka was closed, and arrived on Wednesday afternoon.
.
The stem post was ground, sanded, and shaped, then primed with epoxy, and then the vertical part was coved with a layer of 10 oz. glass cloth.
.
The next day the job list included large batches of microsphere mix. I sanded the surfaces of the rudders that had already been coated with the 2nd layer of fairing mix, then flipped them to apply the microsphere mix to the other side. The starboard skeg was sanded fair. I borrowed a long, about 2 ‘, sanding board, but used a belt sander for most of the flat work.
.
The mixing directions I had seen on the internet for the microspheres said, “add a little colloidal silica (cabosil)”. How much? I couldn’t find any recipes for the mix. At the Glurit site there was a reference about microsphere/silica mixes, and they were comparing their glass microsperes with their phenolic microspheres. My problem was that I mix by volume, but these references were in grams, by weight. I had to dig up the densities of the microsperes and silica, and calculate the mix ratios in volume. It turned out the mix ratio was 17.6/1, in other words, 17.6 parts of microsperes to 1 part of silica. So the directions to add a little silica were correct. I normally use about 14 fl. oz. of spheres to 3 oz. of mixed resin, more or less. The amount of silica at 17.6 to 1 would be less than an ounce, so, just add a little.
.
I had already been using a 4:1 mix and it was satisfactory because I was mostly using power tools to do the sanding. The larger proportion of silica would normally make the fairing mix more difficult to sand. It’s beneficial characteristic is that the mix spreads more smoothly and doesn’t sag with the added silica.
.
It is also probably better to add the microspheres to the mixed epoxy, then add the silica last. Russ Brown premixes his fillers, adds metal objects to the container so that he can mix them up prior to measuring them out for his fairing mix. I think it is better to add them separately and make sure the fairing mix is the same every time you make it. I do not make large batches and try to get the work done before they start to set up, so it is important to have the batches match each other in density and sanding characteristics.
.
The stem post got a layer of glass on top, after the vertical layers were trimmed with the flap disk. I had to wait till the next day to put a layer of glass on top. There was a forecast of not only rain, but big thunderboomers, so I tried to get something done before that happened.
.
The work included sanding the last surfaces of the rudders that hadn’t had their 2nd coat of fairing compound sanded, and the port skeg. The port bow repair got a primer coat of epoxy and the newly sanded surfaces of the rudders started to get their finish coat of epoxy, all from the same mix, but then the thunderboomers came in. I could see that the work was resulting in a nice finish on the rudders, but it was cut short, plus, there was rain coming down. Who knows what the epoxy would look like after that.
.
I covered everything up and retreated to the galley stool which now had a furry comfortable toilet seat cushion on top of it. No one would ever guess.
.
I had a shopping list, so went out to get the main thing, water, and ended up getting some kielbasa as well.
.
When I got back to the boat it had stopped raining. I had to hook up the garden hose to the boatyard’s sulfur water to do some necessary dishwashing. I, wanted to get a picture outside, but had to wait for the rain to subside again. It was coming in waves along with notices on the cell phone of “wind anomalies”.
.
I had things battened down, then took the ten dollar camera and the bicycle down to the docks at the boatyard and got a picture of the fronts that were coming through. I got some other shots, cycled back through the sluggish wet gravel pavement and put the camera disk in the computer to see what I had. The weather then unloaded a downpour, but no wind anomalies. The picture is a panorama from the ten dollar camera.
