Kaimusailing
s/v Kaimu Wharram Catamaran
| Vessel Name: | Kaimu |
| Vessel Make/Model: | Wharram Custom |
| Hailing Port: | Norwalk, CT |
| Crew: | Andy and the Kaimu Crew |
| About: | Sailors in the Baltimore, Annapolis, DC area. |
17 April 2024 | St Marys, GA
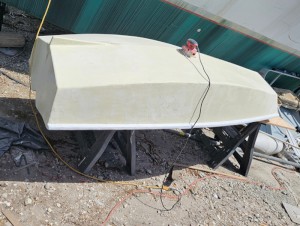
Dinghy Skeg
I was suffering with what seemed like a cold and also had allergy symptoms. I awoke and felt fine. The green pollen that was coating everything was gone. Maybe it will return.
07 April 2024 | St. Marys, GA
Clammy Hands
Items came in from TEMU, the Chinese cut rate retailer. One was a nice little drone that cost about twelve and a half dollars. It looked like an easy thing to play with while I coughed and sneezed. I was fighting a summer cold, even though it is not summer elsewhere, it seems like it here. A nice [...]
02 April 2024 | St. Marys, GA
Sun Doggie
After laminating the cedar strips onto the gunwales of the dinghy I found the screws I used wouldn’t come out. The epoxy had seized them. The screw heads were stripped so I cut a straight slot in the heads with the cut off wheel. The cedar smoked when the screw heads got red hot. I could remove [...]
21 March 2024 | St. Marys, GA
Just Add Water
The rainy weekend started off with overcast and fog but no rain. It looked like I might be able to get something done on the D4 dinghy. I wanted to change the bow seat which is really the bow deck. The sailing option uses the deck to hold the freestanding mast. I didn’t like how the deck looked, [...]
01 March 2024 | St. Marys, GA
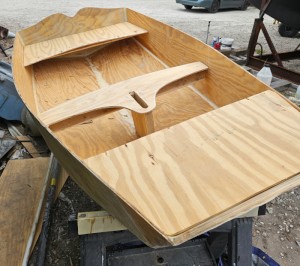
D4 Dinghy Alternative Seats
The rain event was more wind than rain, strong winds with gusts up to 44 mph. We drove into town to see what the harbor was like. There was a small sailboat that had dragged anchor and was sitting close to shore. The tide was out. We left and played with Bleu at Notter’s Pond.
23 February 2024 | St. Marys, GA
D4 Inside Seams
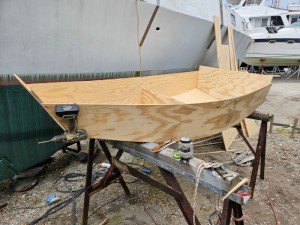
Day two of the dinghy build started out with me finishing wiring the hull bottoms together on the centerline of the bottom panels. This was much easier than the wiring of the chine edges of the bottom panels and the side panels.
Solar Panelology

.
Next the new solar panels with brackets were placed in their approximate positions above the 4 hatches. Then the position of the hole in the cabin top for the wire chase was marked. Consideration had to be made for routing the solar wiring inside the cabins. I had purchased 4 plumbing fittings from Lowe's that consisted of about 4 inches of straight pipe and then the rest was like bellows. You could bend the bellowed section almost 180 degrees. I glued these into the cabin tops into the 4 wire chase holes with the bellows section above the cabin top. The wiring would follow this "gooseneck" into the cabins. Later the goosenecks would be filled with expanding foam to keep insects from turning the cabins into beehives.
.
I began to plan the battery part of the installation, where to mount the solar charge controllers, which were the original Sunsei 25 amp PWM controllers, and the monitor panels that read out battery voltage and charge current. My plan to add additional batteries might have to wait so that installation could begin right away.
.
In the starboard hull the batteries are under the outboard dinette bench seat, which had its internal shelf lowered to allow the batteries headroom. To add more batteries, which would go under the inboard dinette bench seat, that shelf would also have to be lowered and I didn't want to start that job yet.
.
In the port hull the batteries are under the full sized bunk in the middle of the hull. They are mounted in a shelf on the outboard side and there is room in the shelf for two more batteries. The problem with this installation is that it is difficult to access the tops of the batteries to service them when they need water. I had to use a mirror. Now we were going to chop apart the full sized bunk which runs athwartship leaving just the head and foot of the bunk remaining as counters. My plan is to cut out a hatch in the counter over the batteries, allowing access to them for service. The center section of the bunk that was removed will be retained so that the bunk can be put back together when needed to sleep visitors.
.
The cabin tops were covered with a plastic drop cloth to prevent the heavy dew that had made the cabins very wet every morning. The job now was to refinish them using the belt sander, then apply epoxy fairing compound, then paint, then bolt on the solar panels, and run the solar wiring down into the cabins.
.
For some reason I wanted to try out the crimping tool on the solar connectors. These were MP3 connectors that I had researched to mate with the existing connectors on the solar panels. It didn't look like they would fit, so I had been using the one solar panel as a test with clip leads and Walmart cheap electric cords to the charge controller. Now I tried crimping a connector. I call this kink of crimper a "butterfly" crimper. It was nearly impossible to get the shell of the connector on the cable or get the cable and pin into the connector body. The trick was to use a shot of WD-40 to lubricate things. It went together easily then. The first crimp I tried was very difficult, I was using the 4mm setting, which was what these PV cables were supposed to be. Next I found 6mm setting to work much more easily and still produced an acceptable crimp.
.
The cables and connectors were tested and it turned out they were compatible with the existing connectors on the solar panels, so I didn't need as many connectors as I had ordered. The panels were sitting on top of the cabin and cables were made up to run to the charge controller, only they weren't cinched down permanently. The monitor said we were making 7.6 amps and the sun was nearly setting. This was looking good.
.
The next morning the monitor was saying .7 amps and the sun wasn't even up yet. Then when it rose we had the batteries running up to 14.4 volts as the controller ran them through the equalization phase, they were fully charged. It was not yet noon. Later the charge would be about 2 amps, a trickle charge, with the batteries at 13.5 volts. Not too bad.
.
In the port hull the full size athwartship bunk was chopped out to make a 5 foot counter on each side of the hull with a 2 foot wide aisle between them. The chopped out piece was sized to fit on top of one of the counters. Ultimately it will be possible to drop it back into position, making a full size berth again when needed.
.
The starboard cabin top was belt sanded, then loose sheathing was ground away with a 36 grit flap wheel on the angle grinder. The technique is to sand toward the sheathing edge, which will peel away if it isn't adhering, until it doesn't peel away. Then the bare wood substrate is primed with epoxy and then can be glassed with new glass or coated with thickened epoxy.
.
One spot was soft and the soft wood was ground out with the angle grinder with a chainsaw blade, then ply was cut to a nominal 1' square and placed over the bad area. The perimeter of the ply was cut using the multitool with halfmoon blade and straight blade for the corners. The bad area was then removed from the foam core of the cabin top. This is one of the advantages of foam core ply construction. If either side of the composite structure deteriorates, it can be removed and replaced in an individual patch.
.
The photo is of the plywood patch glued in place with epoxy and weighted down with a type 24 deep cycle battery to clamp it together.
