Kaimusailing
s/v Kaimu Wharram Catamaran
| Vessel Name: | Kaimu |
| Vessel Make/Model: | Wharram Custom |
| Hailing Port: | Norwalk, CT |
| Crew: | Andy and the Kaimu Crew |
| About: | Sailors in the Baltimore, Annapolis, DC area. |

17 April 2024 | St Marys, GA
Dinghy Skeg
I was suffering with what seemed like a cold and also had allergy symptoms. I awoke and felt fine. The green pollen that was coating everything was gone. Maybe it will return.

07 April 2024 | St. Marys, GA
Clammy Hands
Items came in from TEMU, the Chinese cut rate retailer. One was a nice little drone that cost about twelve and a half dollars. It looked like an easy thing to play with while I coughed and sneezed. I was fighting a summer cold, even though it is not summer elsewhere, it seems like it here. A nice [...]

02 April 2024 | St. Marys, GA
Sun Doggie
After laminating the cedar strips onto the gunwales of the dinghy I found the screws I used wouldn’t come out. The epoxy had seized them. The screw heads were stripped so I cut a straight slot in the heads with the cut off wheel. The cedar smoked when the screw heads got red hot. I could remove [...]

21 March 2024 | St. Marys, GA
Just Add Water
The rainy weekend started off with overcast and fog but no rain. It looked like I might be able to get something done on the D4 dinghy. I wanted to change the bow seat which is really the bow deck. The sailing option uses the deck to hold the freestanding mast. I didn’t like how the deck looked, [...]

01 March 2024 | St. Marys, GA
D4 Dinghy Alternative Seats
The rain event was more wind than rain, strong winds with gusts up to 44 mph. We drove into town to see what the harbor was like. There was a small sailboat that had dragged anchor and was sitting close to shore. The tide was out. We left and played with Bleu at Notter’s Pond.

23 February 2024 | St. Marys, GA
D4 Inside Seams
Day two of the dinghy build started out with me finishing wiring the hull bottoms together on the centerline of the bottom panels. This was much easier than the wiring of the chine edges of the bottom panels and the side panels.
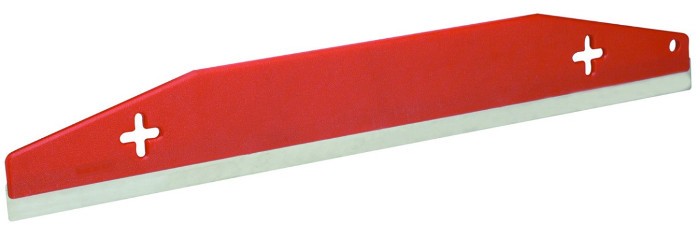
24 In. Multipurpose Trim Guard
.
I made an error in planning the work on the hatches. The individual tasks included priming with epoxy, painting with arctic white, drilling holes for machine screws and bedding them with epoxy filler, laying down bedding tape on the hatch coaming, and finally screwing down the hatches. My error was in deciding to do the whole job on both hatches in one day. In retrospect it would have been much better to do the priming and painting one day, and do the drilling, bedding, and screwing down the hatches a second day.
.
It didn't help that the ambient temperatures were up in the mid 80's. The epoxy would set up very quickly, plus the environment up on deck was like a furnace. Doing all the tasks on both hatches meant I had to get the hatches screwed down before the epoxy hardened. The bedding tape had to be applied after the screw holes were primed and filled with epoxy. The arctic white had to be painted on top of epoxy primer, and it would be best to do this after the bedding tape. I didn't know how much area would be covered in one little batch of paint. If it covered a large area, I wouldn't be able to reach the hatch to apply the tape. It was the opposite of painting oneself into a corner, I would be painting myself away from the hatches.
.
I was using stainless steel deck screws to screw down the hatches. They use torx bits to drive the screws, and I was using two different sizes of screws. The longer screws would be used on the hinge part of the hatches and the shorter screws would be used on the rest of the hatch flanges. I put the larger torx bit in the 1/2 inch drill and the smaller bit in an electric screwdriver.
.
The actual work proceeded in a logical series of steps. First the hatches were dry fitted and screw holes were drilled for the threaded portion of the screws so that the wood coaming wouldn't split. A larger bit was used to open up the top portion of the holes to allow epoxy to bed the screws and prevent moisture from getting into the wood. Next epoxy was injected into the screw holes with a plastic syringe and the remainder was brushed onto the surfaces to be painted, as a primer. Next the bedding tape was stuck down. A small batch of arctic white was mixed and painted onto any surfaces that would be inaccessible after the hatches were installed. Finally, the hatches were jammed into position and screwed down.
.
It was so hot up on deck that I drank over a gallon of water, but felt dizzy and weak anyway. I couldn't stop. The epoxy would set up and make it impossible to drive the screws in. I had to rush to get it all done in spite of feeling like I would pass out and fall down off the deck onto the ground.
.
I was glad to get the job done, all in one day. My goal is now to finish any deck work and the rest of the cabin sides by the end of the month.
.
I made an order for more epoxy and 7 oz. cloth from Raka in Ft. Pierce, and an order from Harbor Freight Tools for more chip brushes, plastic gloves, a replacement multitool, and an item called "24 In. Multipurpose Trim Guard". I had been searching for it using several appropriate names, like straightedge, painter's trowel, etc. and couldn't find it on the website. Somehow I ran across it while searching pages and pages of painting tools. This stiff but flexible tool helps painters keep paint from flinging blobs of paint onto a nearby surface of a different color, for instance, keeping trim enamel on a door frame from splashing onto the adjacent wall. In the past I have used one to fair epoxy filler over a large area. It can also be used to maintain a straight margin on spray paint. It is less than $5 from Harbor Freight. Easy to find in their stores, but well hidden on their website.
