Kaimusailing
s/v Kaimu Wharram Catamaran
| Vessel Name: | Kaimu |
| Vessel Make/Model: | Wharram Custom |
| Hailing Port: | Norwalk, CT |
| Crew: | Andy and the Kaimu Crew |
| About: | Sailors in the Baltimore, Annapolis, DC area. |

23 April 2024 | St Marys, GA
D4 Launchie
The laptop pooped the bed, so I have to scurry around with alternatives. Not as bad as typing on the phone.

17 April 2024 | St Marys, GA
Dinghy Skeg
I was suffering with what seemed like a cold and also had allergy symptoms. I awoke and felt fine. The green pollen that was coating everything was gone. Maybe it will return.

07 April 2024 | St. Marys, GA
Clammy Hands
Items came in from TEMU, the Chinese cut rate retailer. One was a nice little drone that cost about twelve and a half dollars. It looked like an easy thing to play with while I coughed and sneezed. I was fighting a summer cold, even though it is not summer elsewhere, it seems like it here. A nice [...]

02 April 2024 | St. Marys, GA
Sun Doggie
After laminating the cedar strips onto the gunwales of the dinghy I found the screws I used wouldn’t come out. The epoxy had seized them. The screw heads were stripped so I cut a straight slot in the heads with the cut off wheel. The cedar smoked when the screw heads got red hot. I could remove [...]

21 March 2024 | St. Marys, GA
Just Add Water
The rainy weekend started off with overcast and fog but no rain. It looked like I might be able to get something done on the D4 dinghy. I wanted to change the bow seat which is really the bow deck. The sailing option uses the deck to hold the freestanding mast. I didn’t like how the deck looked, [...]

01 March 2024 | St. Marys, GA
D4 Dinghy Alternative Seats
The rain event was more wind than rain, strong winds with gusts up to 44 mph. We drove into town to see what the harbor was like. There was a small sailboat that had dragged anchor and was sitting close to shore. The tide was out. We left and played with Bleu at Notter’s Pond.
Fairing and Painting Complete
.
I continued working like a dog, grinding the hulls with 40 grit belt sander until it stopped working. The trigger switch was bad. First I tested the electrical wiring with my Harbor Freight DMM, it was only about 6 months old, but it read something like 9.89 no matter what function I switched it to, or what I stuck the probes onto. Off to Walmart for a $15 DMM, about as basic as you can get. That is what I used to find out the trigger switch on the belt sander was defective.
.
Knowing what happens when you take a spring loaded switch apart I did my disassembly in a bowl. When I got it all apart I had a bowl full of little copper contacts, springs, dust, and the trigger and plastic shell. The contacts were burned, so I scraped them bright with my trusty knife. Suddenly there was a SPROING, and a hidden tiny spring with a tiny ball bearing in the end of it flew off. I did find it and was able to reassemble the switch.
.
It is possible to grind the 165 sq ft of one hull side in a day, including a lunch break and other breaks, usually when it’s time to change the sanding belt. The belts seem to last up to 50 sq ft.
.
After going over the whole hull with the 40 grit belt, the angle grinder with 36 grit flap disk is used to grind out any cracks or pits in the surface. The idea is to explore any spot that may have let moisture into the substrate. Then the pits and cracks are filled with epoxy thickened with 50/50 phenolic microsperes/colloidal silica. The thicker the mix, the lighter it will be and the more easily it will be sanded, later.
.
Next the filled spots are hit with the belt sander with 120 grit belt. Sometimes curvature in the hull surface or a slight depression in the filled epoxy surface evades the sanding belt, so the orbital sander or pad sander is used to smooth the surface. The pad sander is using 3M 150 grid “gold” self adhesive paper, while the orbital is using 120 grit ventilated velcro sanding pads made by Klingspor.
.
After the hull is sanded again with the pad or orbital sander, paying attention to any roughness felt by hand, the sanding dust is brushed off and a primer coat of unthickened epoxy is rolled on. I used 3/16“ nap rollers, but after using Whizz foam rollers for the cyanoacrylicurethane, I think they would make a better epoxy surface too. The epoxy was rolled on in 1 1/2 cup batches due to the tendency to thicken right up in the high heat before an entire batch was used up. 2 batches would do one side of one hull, about 165 sq ft.
.
The paint, arctic white acrylic urethane from Trinity1945, was mixed according to the ratio 8:2:1, that is 8 oz of paint to 2 oz of reducer to 1 oz of hardener. My procedure was to take a drinking glass that had been marked at the 8 oz level and measure out the paint, then empty it into the paint tray, scraping out any residue with a small chip brush. Then a 1 oz shot glass was used to measure out the ounce of hardener that was then poured into the paint tray. Next the shot glass got an ounce of reducer which works like a solvent or cleaner, to wash out the remnants of hardener. Before pouring the ounce of reducer into the paint tray, the paint and hardener were mixed. The ounce of reducer was poured into the paint measuring glass and then swirled around to wash out any remnants of paint. Then into the paint tray, followed by another shot the same way, further washing out the measuring shot glass and drinking glass. Then the paint in the tray was mixed to incorporate the reducer. There is an induction time supposedly, but I would then get to work painting without waiting.
.
The paint color for the topsides of the hulls was tinted with blue pigment from Raka epoxy, 1/2 teaspoon in each batch of paint. This produced a very slight blue tint. The pigment is viscous and it was necessary to clean the measuring spoon completely into the paint to make sure the same amount of pigment went into every batch. This was done during the mixing process when the first shot of reducer was in the drinking glass. Then the measuring spoon with pigment was washed off with the chip brush and the ounce of reducer in the glass. After dumping the ounce of pigmented reducer into the paint tray, the second shot of reducer came along and cleaned up any remaining pigment in the drinking glass.
.
Radio Bill had given me a cheap foam little paint roller, I think they are called Whizz, about 4 or 5 inches wide. In my experimentation using DIY paint pads and 3/16“ nap rollers, the pads didn’t apply enough paint and did it slowly, and the rollers left tiny bubbles that dried to form a zillion pimples in the paint surface. The foam Whizz roller was tried and made a nice smooth paint surface. Richard the Brit had recommended them also, as he had used them on his galley cabinet doors and they came out very nice.
.
I had bought a dozen of the Whizz rollers, after hearing that they dissolve in the solvents of the paint, but they seem to last a long time. They never came apart while I was painting. The technique for minimizing roller marks in the paint was to paint a vertical stripe about 30 inches long and then continue with another right next to it, then repaint the stripes in the opposite direction, so if you paint downward with the first stripe and upward with the second, then paint the first stripe again in the upward direction and the second in the downward direction. Then take the roller in a horizontal pattern, it is mostly dry of paint now, and very lightly roll back and forth down the two stripes. This will remove vertical roller marks and hopefully won’t leave horizontal ones. The key is to have the roller nearly dry of paint as you make the horizontal swipes.
.
The goal is to put paint on the surface but not so much as to drip or run. Going over the vertical stripes a second time redeposits the paint where it is needed and removes it from where there is too much.
.
The painted surface can only be as smooth and blemish free as the surface that it is painted on. In our case the original surface was kind of rough. After the sanding and filling, it is better than it was, but still not perfect. The boatyard owner said it looked good, how polite, I replied that it was adequate.
.
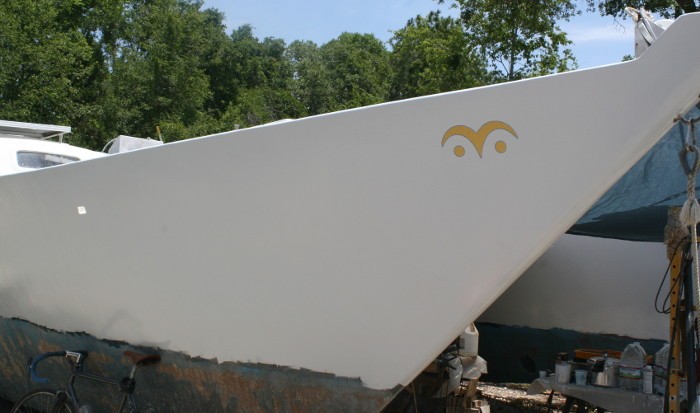
In one marathon day I sanded the filled areas, touched up the surface, rolled on a primer coat of epoxy, and finally rolled on the first coat of urethane. The next morning another coat of urethane finished the painting and after lunch the mylar decals for boat name and hailing port and the designer’s logo were stuck on.
.
After the Brits had launched their catamaran, the boatyard put a 42' Grand Banks trawler in their place. It is a magnificent boat, very well maintained. It towers over Kaimu and from the bridge deck the entire boatyard is visible, like being in an observation tower. The Brits’ boat was quite a contrast to Kaimu’s workboat finish, but the trawler was every bit as exquisite.
.
Richard came back to shore one day and came over to some items he stored on the port side of Kaimu on a worktable he had covered with a tarp. I came over to him and said “After months and months of being upstaged by your showroom quality boat, finally you launched and I had a sigh of relief, but then they park THIS next to me....” And I showed him the trawler.
