Kaimusailing
s/v Kaimu Wharram Catamaran
| Vessel Name: | Kaimu |
| Vessel Make/Model: | Wharram Custom |
| Hailing Port: | Norwalk, CT |
| Crew: | Andy and the Kaimu Crew |
| About: | Sailors in the Baltimore, Annapolis, DC area. |

17 April 2024 | St Marys, GA
Dinghy Skeg
I was suffering with what seemed like a cold and also had allergy symptoms. I awoke and felt fine. The green pollen that was coating everything was gone. Maybe it will return.

07 April 2024 | St. Marys, GA
Clammy Hands
Items came in from TEMU, the Chinese cut rate retailer. One was a nice little drone that cost about twelve and a half dollars. It looked like an easy thing to play with while I coughed and sneezed. I was fighting a summer cold, even though it is not summer elsewhere, it seems like it here. A nice [...]

02 April 2024 | St. Marys, GA
Sun Doggie
After laminating the cedar strips onto the gunwales of the dinghy I found the screws I used wouldn’t come out. The epoxy had seized them. The screw heads were stripped so I cut a straight slot in the heads with the cut off wheel. The cedar smoked when the screw heads got red hot. I could remove [...]

21 March 2024 | St. Marys, GA
Just Add Water
The rainy weekend started off with overcast and fog but no rain. It looked like I might be able to get something done on the D4 dinghy. I wanted to change the bow seat which is really the bow deck. The sailing option uses the deck to hold the freestanding mast. I didn’t like how the deck looked, [...]

01 March 2024 | St. Marys, GA
D4 Dinghy Alternative Seats
The rain event was more wind than rain, strong winds with gusts up to 44 mph. We drove into town to see what the harbor was like. There was a small sailboat that had dragged anchor and was sitting close to shore. The tide was out. We left and played with Bleu at Notter’s Pond.

23 February 2024 | St. Marys, GA
D4 Inside Seams
Day two of the dinghy build started out with me finishing wiring the hull bottoms together on the centerline of the bottom panels. This was much easier than the wiring of the chine edges of the bottom panels and the side panels.
The Return of Quackie Doodle
The beam replacement project continued. On a midweek day I found the time to try fitting the wood cap piece into the space under the mast and between the deck sections. This is the athwartships beam that is under a longitudinal I beam, forming a cross shaped structure with the mast stepped right on top the middle of the cross. This wood cap will have a new aluminum I beam beneath it. The aluminum I beam will give strength and the wood cap will duplicate the old beam's upper half and hold the deck sections. The deck sections are bolted through this wood cap with ½" bolts that are about 9 " long. There are two vertical bolts that join the longitudinal mast support to this athwartship wood cap. These are ½" threaded rod that pokes up above and down below the wood cap. Above they bolt onto the longitudinal mast I beam, below they bolt into the athwartship aluminum I beam. This lower beam sits on brackets mounted on the inboard gunwales of the hulls.
When I tried to lift the wood cap under the longitudinal I beam, the bolts didn't exactly line up with the bolt holes. The original beam had oversized holes and it looks like the bolts weren't on center, but kind of squeezed closer together than the holes in the original beam. The holes in the new beam cap needed to be adjusted to achieve the same fit. It was a discouraging discovery and the beam cap was left in place, held by webbing straps, until work could continue on the weekend.
It was a stormy day with intermittent rain, lightning, and thunder. There was enough time to get work accomplished in between the rain showers. It also didn't matter if it was raining if the work was taking place under the cross deck.
The procedure was to lower the beam cap into the water by letting out the web straps. Then it was hauled onto the dinghy, straps removed, and brought to the other end of the dock. One of the two threaded rods was then removed and the beam was brought back under the cross deck. This work required climbing up on deck to hoist the beam cap and then going back down under the deck to reposition, back and forth, until finally the one threaded rod was in its correct position. A nut could be threaded onto the rod to secure the beam cap to the bottom of the longitudinal mast beam.
The deck sections were still held in place by spectra "shoelace", a high tech rope that will hold about a ton yet is only 1/8" thick. The sections could be moved a bit while they were hanging and the bolt holes of the two sections in question were aligned by actually fitting bolts all the way through. The air space between the sections was to be occupied by the beam cap, so the bolts were removed before hoisting the beam cap into position. After adjusting the position of the beam cap yet carefully avoiding disturbing the position of the deck sections, a grease pencil was used to mark the beam cap where the bolt holes lined up.
Now the beam was dropped into the water again, ferried over to the other dock again. It looked like the vertical bolt holes were off by about ¼", so that hole was elongated. The horizontal deck section bolts were not perpendicular to the beam. A small drill hole that was perpendicular was drilled from one side of the beam and the amount of offset where it came out on the other side was used as a guide to redrill the hole at an angle so that it was on center. Then this hole was enlarged to ½" diameter.
After drilling all the holes, the beam cap was brought back under the deck and once again hoisted into position. Bolts were screwed into place. The 9 " long bolts took quite a while to ratchet into place. One bolt needed the deck section to be pried downward so that it would line up. Fortunately Captain Ed was on hand requesting me to take a picture of him and his family in front of his boat. First he had to provide leverage to the deck section while the last bolt was fitted.
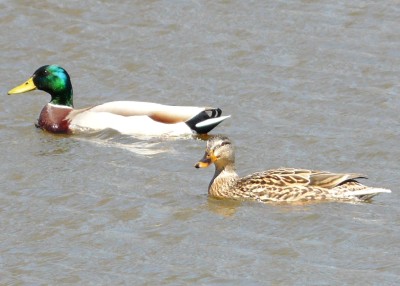
While photographic duties were underway we commented on how the weather had improved. The ducks seemed to like it. Then I noticed one of the ducks was Quackie Doodle. I looked her in the eye and became afraid she might make another nest. They scooted off, quacking.
Next it was time to check the fitting of the aluminum I beam. It had to be ferried over just like the wood cap beam, but aluminum doesn't float, so extra care had to be taken to make sure it didn't end up on the bottom of Bodkin Creek.
Extra web straps were hung below the cross deck to secure the beam. It was hoisted into position, but then it became evident that it needed to move to port about an inch for the holes to line up. I remember that the whole deck structure from day one was about an inch to port. On the port side there was no gap between the cross deck and the hull, but on the starboard side there was a good inch and a half gap. It was decided to not trim an inch off the end of the aluminum beam but to redrill the bolt holes. There would be no change in the integrity of the beam as the holes are in the unstressed portion of the beam.
The beam was removed to the dock. A pattern was made of the existing bolts and a second pattern was made of the first set of bolt holes. Then they were compared and the new hole locations were marked, drilled, and countesunk. It was now time to finish the beam with 2 part urethane paint.
First the beam was scrubbed with scotch brite pad and detergent, then rinsed and scrubbed with scotch brite and an etching solution. After rinsing and drying, it was coated with conversion coating, then the paint was mixed and applied by brush. This was my first experience with this paint and spraying paint requires adjusting the viscosity and also results in overspray. Because this beam is located where no one can see it, the quantity of coating was more important than the cosmetic quality. The paint job turned out acceptable, but with some runs and blobs. The next day I painted on a second coat.
Next we will have to mount the beam after the paint has fully cured and that will complete this project.
