Kaimusailing
s/v Kaimu Wharram Catamaran
| Vessel Name: | Kaimu |
| Vessel Make/Model: | Wharram Custom |
| Hailing Port: | Norwalk, CT |
| Crew: | Andy and the Kaimu Crew |
| About: | Sailors in the Baltimore, Annapolis, DC area. |
17 April 2024 | St Marys, GA
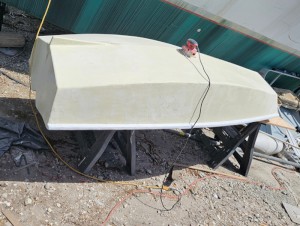
Dinghy Skeg
I was suffering with what seemed like a cold and also had allergy symptoms. I awoke and felt fine. The green pollen that was coating everything was gone. Maybe it will return.
07 April 2024 | St. Marys, GA
Clammy Hands
Items came in from TEMU, the Chinese cut rate retailer. One was a nice little drone that cost about twelve and a half dollars. It looked like an easy thing to play with while I coughed and sneezed. I was fighting a summer cold, even though it is not summer elsewhere, it seems like it here. A nice [...]
02 April 2024 | St. Marys, GA
Sun Doggie
After laminating the cedar strips onto the gunwales of the dinghy I found the screws I used wouldn’t come out. The epoxy had seized them. The screw heads were stripped so I cut a straight slot in the heads with the cut off wheel. The cedar smoked when the screw heads got red hot. I could remove [...]
21 March 2024 | St. Marys, GA
Just Add Water
The rainy weekend started off with overcast and fog but no rain. It looked like I might be able to get something done on the D4 dinghy. I wanted to change the bow seat which is really the bow deck. The sailing option uses the deck to hold the freestanding mast. I didn’t like how the deck looked, [...]
01 March 2024 | St. Marys, GA
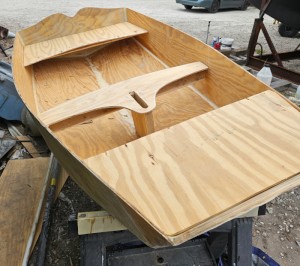
D4 Dinghy Alternative Seats
The rain event was more wind than rain, strong winds with gusts up to 44 mph. We drove into town to see what the harbor was like. There was a small sailboat that had dragged anchor and was sitting close to shore. The tide was out. We left and played with Bleu at Notter’s Pond.
23 February 2024 | St. Marys, GA
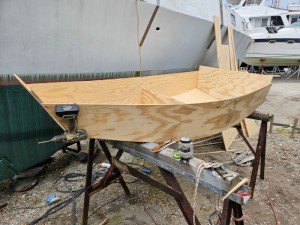
D4 Inside Seams
Day two of the dinghy build started out with me finishing wiring the hull bottoms together on the centerline of the bottom panels. This was much easier than the wiring of the chine edges of the bottom panels and the side panels.
Ten Years After

Back to the present. The pilothouse was complete for now and the work migrated to the head/chartroom area. There was an on demand water heater, portable, and it was taken out of the head/chartromm and put in the pilothouse. A couple of plastic boxes of stuff were stowed on the deck table and covered with a tarp.
The UPS was disassembled and the DC connectors were exposed to be mated to new connectors to a large pair of wet cell batteries. The new breaker panel was disassembled and reconformed to fit. Conduit needed to be installed for the port side power distribution. In the head, wires passed through for the water heater in the stern and a pump for a solar water heater. The electric head had a pushbutton switch to be wired back to the distribution panel, plus another switch which could be for a light or to override the shower sump pump.
My idea was to feed the head with water collected from the shower and washbasin. There is a drain that collects under the head sole and would normally be pumped overboard. Most boats feed the head with seawater from a through hull fitting and strainer and that goes through the head and into the holding tank. Most head problems are the result of using seawater, which crystallizes eventually, and blocks the pipes. The shower sump would need a pump anyway, most boats have a shower sump pump that drains overboard. I would take that water and send it to the head so it can flush with fresh water. In the case of needing to drain this sump when the automatic sump pump switch was defective, or something vile was in the sump and needed to be removed, or there was ample fresh rain water to use and no need to use "gray water" for the head, a switch to activate the pump and override the automatic switch would activate the pump. The switch location is directly under the FLUSH pushbutton. It would be a wierd place to put a light switch, but a logical place to put the sump pump switch.
The "vessel" or washbasin has an electric faucet that has a switch that makes contact when the tap is opened. Both hot and cold water taps have these switches. Since both hot and cold water lines come from the same pump, the switches can be wired together. Above the basin is a medecine cabinet with a mirrored door. I have these neat little "hockey puck" LED lights that take 3 AAA batteries, i.e. 4.5 volts DC. I could wire 3 of the lights together in series and feed them 12 volts, or so I thought. When I tested them, they would only come on by tapping them, which hits an internal switch. My plan was to turn them on and then control them from a toggle switch. They don't work that way, they only respond to their own internal switch. Also, with 12 volts hooked up to 3 of them, one blew a LED and stopped working. Fortunately I had plenty of the Capri lights and used a pair of them, one on either side of the medicine cabinet. Another pair were mounted in the chartroom high on the centerline of the forward bulkhead. One shines to the left onto the charttable, the other shines to the right into a hanging locker. There was an existing flourescent fixture above the chart table. It has its own rocker switch. All the Capri lights are controlled by a wall plate with 4 toggle switches mounted on the front edge of the chart table.
A lot of work is pushed forward into the crawl space that leads forward from the chartroom. It is a low area with lots of storage nooks and crannies. Above it is the queen sized birth that is located in the very middle of the hull. After the work is complete in the head/chartroom area, the next space to be overhauled is the crawl space. The DC batteries will be there along with the UPS. Also a watermaker will be installed with all its plumbing. The fresh water lines that feed the head and the water heater will pass through the crawl space, probably under the sole. Much of the work in the chartroom is half in the chartroom and half in some part of the crawl space. For instance the electrical panel won't be complete until the wiring in the crawl space is complete. The solar panels for the port hull feed the charge controller in the crawl space. One panel is above the chartroom. Its wiring passes through the chartroom on its way to the crawl space.
The previous builder had paneled the head with a flowery formica product that was easily marred. It also seemed to be deforming, reacting to humidity. It would be an awful job to pull it all out and refinish the head, so I tried to work with it. The main area of deformation was around the aft portlight. The builder didn't close up the formaica around the port, it was just cut to fit, but there was a gap that moisture could enter and get behind the formica panel. The panel warped and opened up the gap even wider. It had to be forced back into place and sealed with trim around the port.
My first idea was to mount a shelf under the port and send bolts through the bulkhead. Later I decided to put a coathook under the port. It was a logical place to hang wet foul weather gear. There was a nice piece of teak on hand, about 3 feet long, and it already had five screw holes drilled into it. I could mount five coathooks on it and bolt it through the bulkhead.
There was another piece of carpentry, a shelf in the chartroom below the chart table. It had to be big enough for a tabloid printer. My plan was to print tabloid size charts and weather maps. The printer needed about 16 inches deep and 20 inches wide. There was just enough room to squeeze it in. Of course the shelf had no right angles and the edge against the hull had a curve. It seemed like an impossible job, but the air nailer came to the rescue. It took a while, but each piece could be cut to fit and temporarily nailed together with thin brads. Then it was disassembled, brushed with epoxy, and nailed back together.
All this work was an attempt to be productive while avoiding the nasty job of fixing the head. It is an electric head and when I tested it, nothing happened. Perhaps there was dried S*** in there, perhaps it needed a motor rebuild like the windlass did. I ignored the problem and worked on anything else, but everytime I finished a job, there was the head waiting. Finally I decided to take a shot at it. If I tried to throw some water into it and see if it loosened the dried stuff in there, there would be all that liquid waiting for me if I had to disassemble it. Disassembly is a nasty job in a cramped space. The hoses have to be removed and probably the head has to be removed to get at the motor. I looked at it and threw a pail of water into it. Maybe it would loosen up overnight.
The next day it was overcast and rainy. I did any chore I could think of back at the cottage. A fellow was selling rope cheap on the internet. I had to go to the boat to measure to see if it would run through my blocks. I did not stick around, but I looked in at the head and yes, the water was still in it. Very nasty looking. All the encrusted stuff was now dissolved. Later I returned to see if the head motor would turn over. I connected the battery booster to it, but no action. I tried a small gell cell and there was a spark when I hooked it up, but no action. That left no alternative but to bail out the head and clean it up in preparation for disassembly. I put on the disposable gloves I use for painting and used a little plastic cup to scoop out the poop. There was some leakage behind the head and I used an old rag to mop that up. Every once in a while I would stop and look at it. How was I going to take it apart, what hoses had to come off. Then there would be another flood and mop up. I had spliced the motor wires and sealed the splice with waterproof cold shrink tape. There was no way to remove it, the splices had to be cut so the motor could come out. I tried testing the motor directly on its wires, no action.
The motor shaft is exposed all the way at the back and it has a key slot cut into it. I put a screwdriver in the slot and rotated the motor a bit one way and the other. When I hooked up the gel cell, there was a noise and sparking on the wires, but no action. Funny, there was no spark when I hooked up the battery booster. This should have much more juice than the little gel cell. I put a meter on it and there was no voltage. It couldn't be dead, we hadn't used it on anything. I took it over to the AC cord and plugged it in. It read full. Eventually I found the problem. The jaws of the battery booster cables have power to only one half of the jaw. There is no continuity to the other half. The jaws can't grip anything smaller than about 1/4 inch, so I had put clip leads on them. I rechecked and put them on the correct part of the jaws and measured voltage. I hooked them up to the motor and there was a whirring sound and the sound of flushing!
