Life aboard in the NE And the work continues!
Now living aboard full time while I make repairs, refits, getting her ready for the long cruise.
09 December 2013 | Piers Marina Philadelphia
09 December 2013 | Piers Marina
25 November 2013 | Piers marina
22 November 2013 | Piers Marina Philadelphia
26 August 2013 | PIERS MARINA - PHILADELPHIA
05 August 2013 | PIERS MARINA - PHILADELPHIA
19 June 2013 | always Riverside, NJ
16 June 2013 | Riverside, NJ
15 June 2013 | Still in Riverside, Nj
29 May 2013
18 May 2013 | Corsica River
22 February 2013
18 February 2013
11 February 2013 | Same!
05 February 2013 | Riverside, NJ
14 November 2012 | Still at Riverside NJ
16 October 2012 | Horta - Azores
04 October 2012 | Riverside NJ
02 October 2012 | Riverside NJ
24 September 2012 | Riverside, NJ
Shaping continues
22 February 2013
Roland
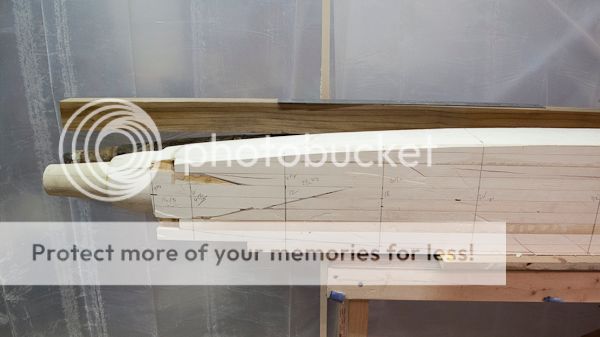
The shaping continues on the bowsprite, brought some thick plastic sheets from Ikea –actually placemats – took the profiles from the bow pulpit attachment legs and made a bunch of templates.
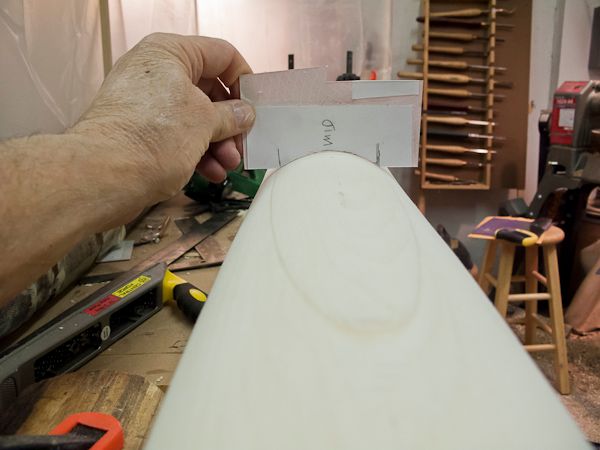
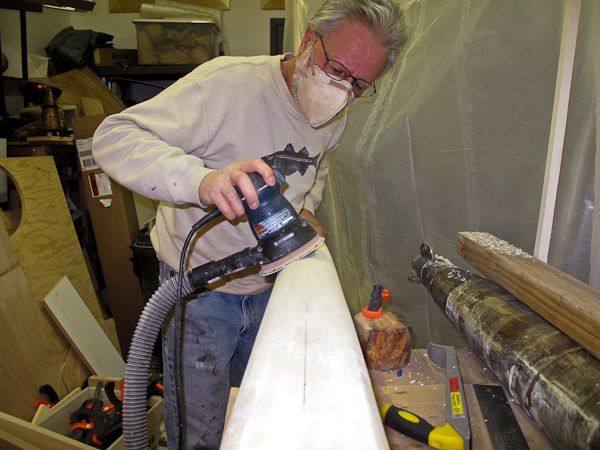
After have done most of the major shaping with the electric planer, then used a sander to get the tight final shape.
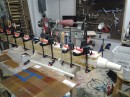
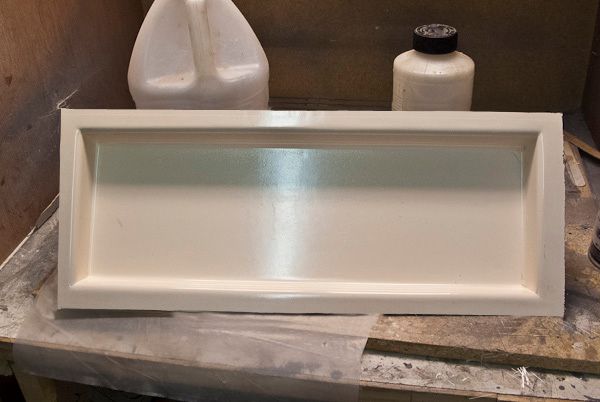
Also this week I finally finished up my molded cockpit instrument panel, It was my second attempt, as the first one never separated from mold—not enough parting wax and no PVA. From now on, when I make my next mold –before I start to lay it up- definitely going to spray the mold with PVA. I think it turned out really great! Will have to wait until spring before I can install it, am very happy with the outcome. I’m made a gallery of photos of how I made it.

After have done most of the major shaping with the electric planer, then used a sander to get the tight final shape.

Also this week I finally finished up my molded cockpit instrument panel, It was my second attempt, as the first one never separated from mold—not enough parting wax and no PVA. From now on, when I make my next mold –before I start to lay it up- definitely going to spray the mold with PVA. I think it turned out really great! Will have to wait until spring before I can install it, am very happy with the outcome. I’m made a gallery of photos of how I made it.

Big project started
11 February 2013 | Same!
Roland
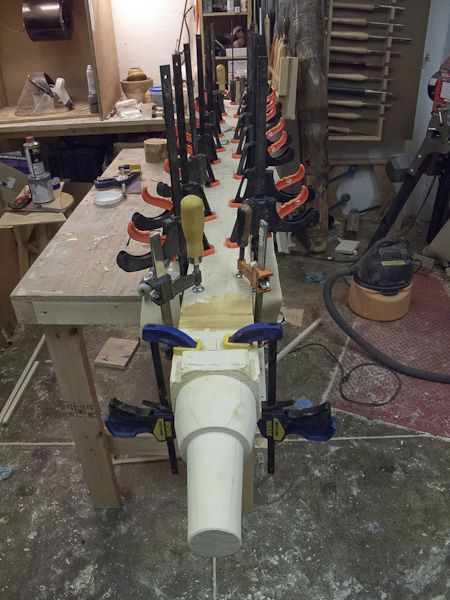
Work continues and I have now started, probably what will be my biggest and most time consuming project - the bowspite! The original was totally rotted from the inside out due to it being a box construction. Did last for almost 30 years!
I decided to go with a solid construction, mainly for ease of construction and rigidness and strength. I love using a cruising spinnaker and this boat came with a brand new- unused one!
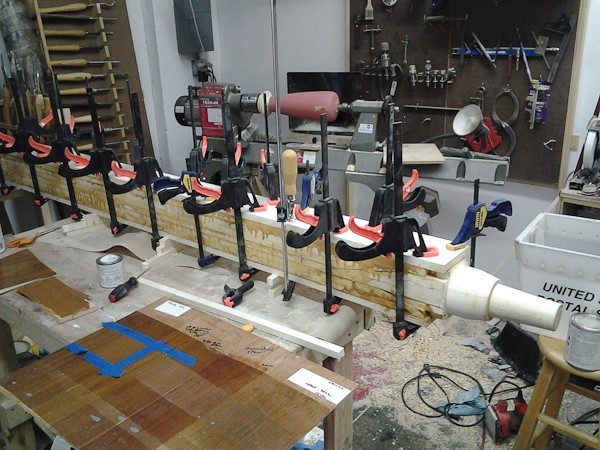
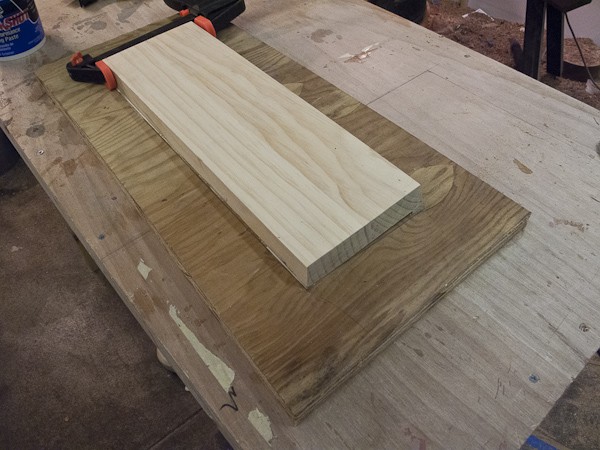
10 laminations glued together with thickened System Three epoxy!
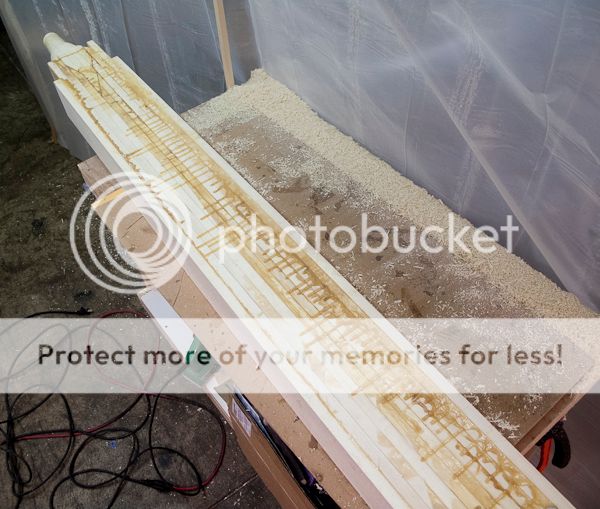
After it finally cured and harden, I planned off the top and bottom planes to remove the excess epoxy and level it out. Here's a picture of it next to the old one.
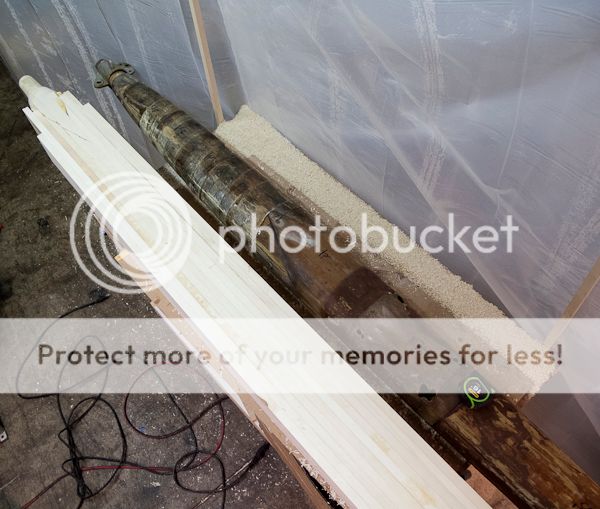
Took measurements off the old one, and have started to plane it into the shape of the original one. Has to be a very specific radius to fit through the hole in the bow of my boat and also the way my bow pulpit attaches to it the brackets have a very specific radius to them. I don't want the expense of having a new pulpit made.
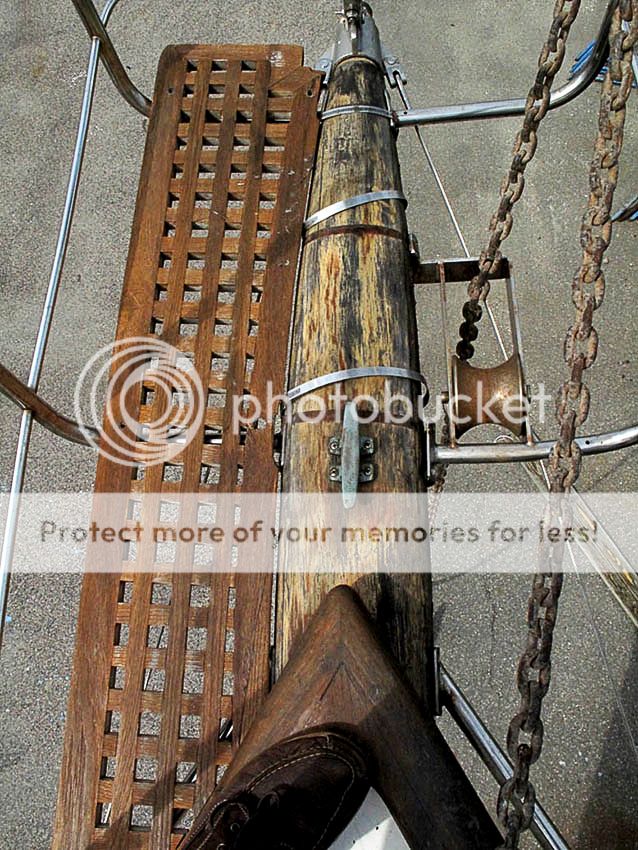
Here's the way my pulpit is attached..
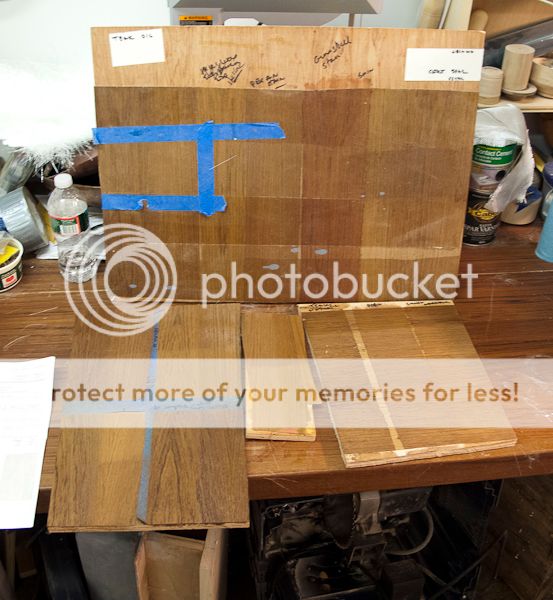
In addition, I'm trying to come up with a match of stains and varnishes to match my new teak bulkhead with the old interior. Have tried 5 different stains and 3 different varnishes still don't have a match! Time to change stores! To be continued!
I decided to go with a solid construction, mainly for ease of construction and rigidness and strength. I love using a cruising spinnaker and this boat came with a brand new- unused one!
10 laminations glued together with thickened System Three epoxy!

After it finally cured and harden, I planned off the top and bottom planes to remove the excess epoxy and level it out. Here's a picture of it next to the old one.

Took measurements off the old one, and have started to plane it into the shape of the original one. Has to be a very specific radius to fit through the hole in the bow of my boat and also the way my bow pulpit attaches to it the brackets have a very specific radius to them. I don't want the expense of having a new pulpit made.

Here's the way my pulpit is attached..

In addition, I'm trying to come up with a match of stains and varnishes to match my new teak bulkhead with the old interior. Have tried 5 different stains and 3 different varnishes still don't have a match! Time to change stores! To be continued!

Things getting done!
05 February 2013 | Riverside, NJ
Roland
Haven't posted in a while but am getting things done, mainly the bulkhead and bowspite.
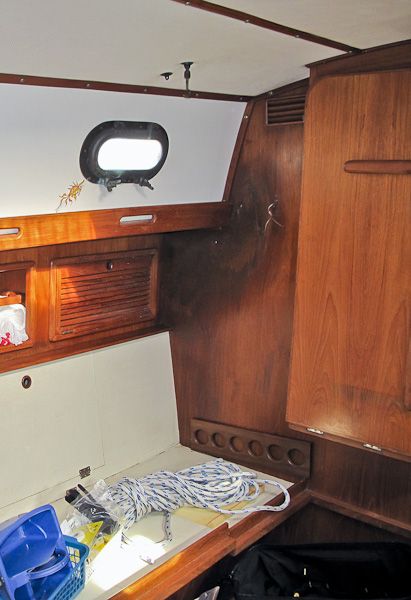
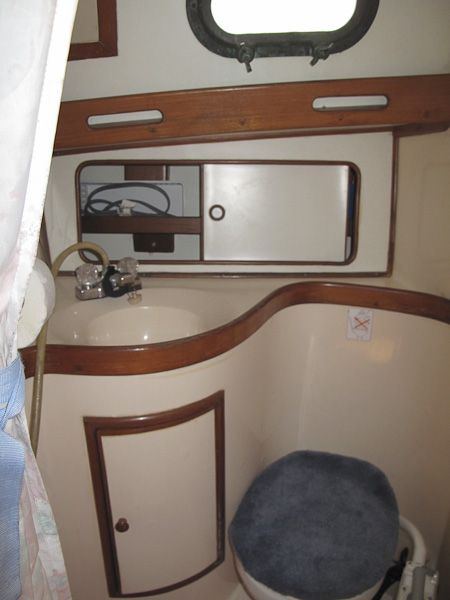
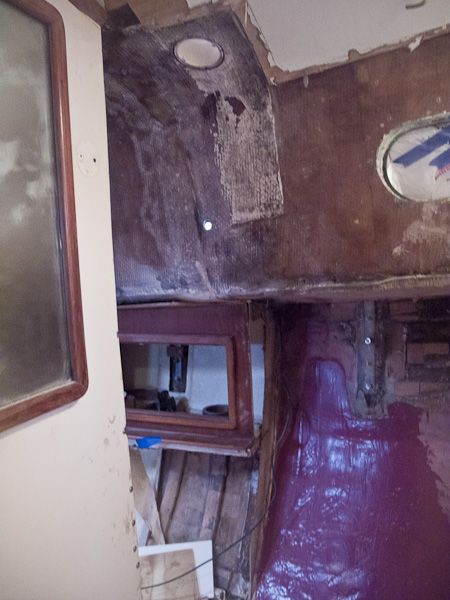
Here's what the Port side bulkhead looked like when I brought the boat. The dark area is where there is water damage, and there is pretty extensive damage.
Started to remove the outer teak veneered layer and then the 3/4 plywood- totally rotted. I think this water intrusion has been going on a long time.
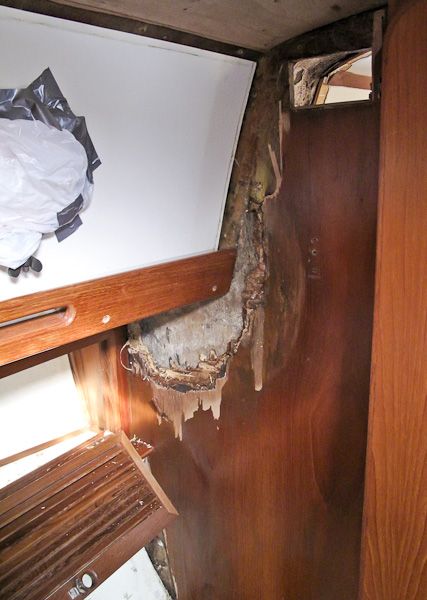
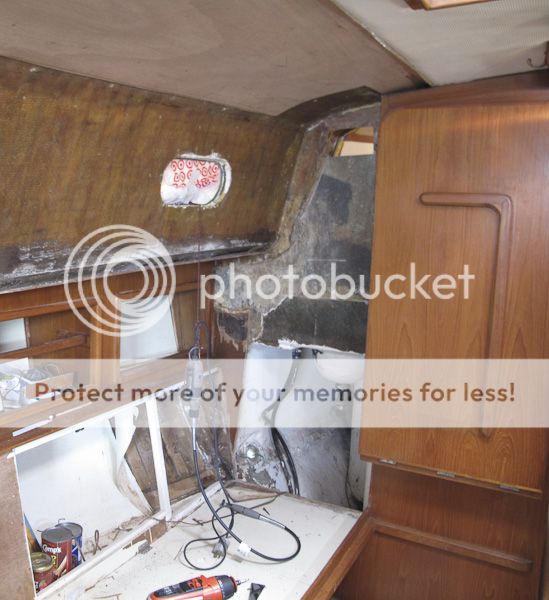
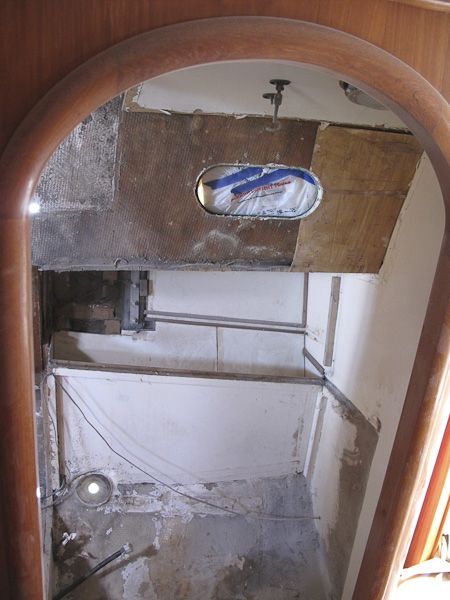
Most of the bulkhead has been removed but if I want to totally rebuild it and be able to match the original construction I will have to remove the molded in bathroom sink.
No problem since I've decided to install a composting head, I need to redo the whole bathroom anyway - so out comes everything from the head area.
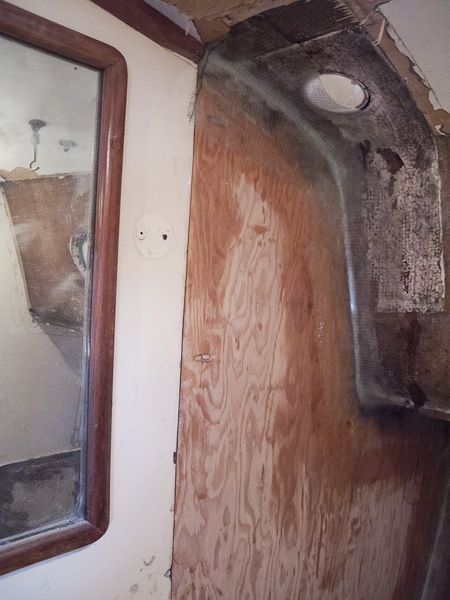
Made a pattern from 1/4 lauan
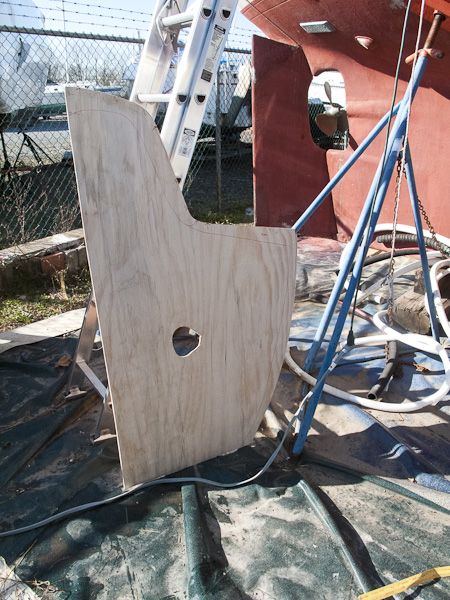
Did a dry fit and it fits perfect!
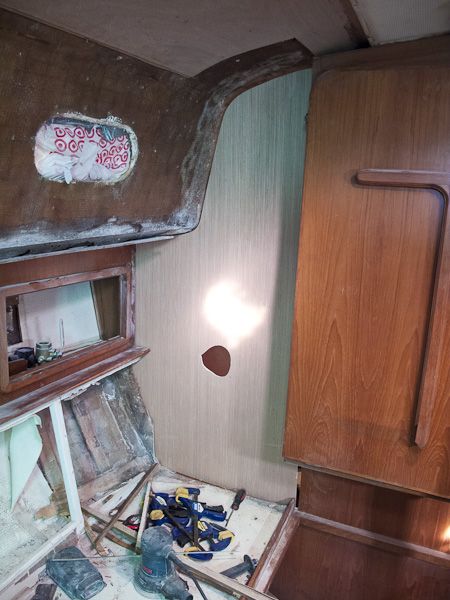
Next got some nice 3/4" marine plywood, soaked the end in epoxy. Also brought some 1/4" marine ply - covered that with a nice teak veneer- hoping it matches up. First the teak face ply went in and epoxied to the frame work and cabinet. Then the 3/4 ply was tabbed with bi-axial glass and glassed in and epoxied to the 1/4 ply and frame work.
The hole ready to receive the new bulkheads
Here's a photo of the tabbing- 2 layers of glass and epoxy!
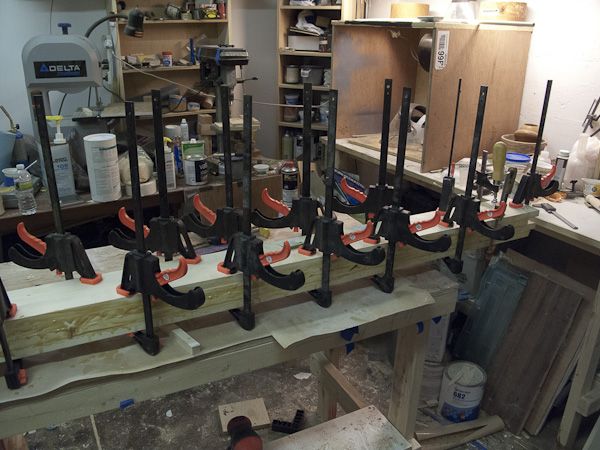
I don't have a photo of the finished bulkhead- will take one next time I'm at the boat. Due to it being very cold here, am now doing more work in my wood studio. Started working on the bowspite- Decided to make a solid one verses a box construction, simpler and stronger. Will probably be a laminate of 11 layers! Photo shows 5 layers, but tonight am glue up layer 9. Can't wait to start shaping her.
Here's what the Port side bulkhead looked like when I brought the boat. The dark area is where there is water damage, and there is pretty extensive damage.

Started to remove the outer teak veneered layer and then the 3/4 plywood- totally rotted. I think this water intrusion has been going on a long time.

Most of the bulkhead has been removed but if I want to totally rebuild it and be able to match the original construction I will have to remove the molded in bathroom sink.
No problem since I've decided to install a composting head, I need to redo the whole bathroom anyway - so out comes everything from the head area.


Made a pattern from 1/4 lauan

Did a dry fit and it fits perfect!

Next got some nice 3/4" marine plywood, soaked the end in epoxy. Also brought some 1/4" marine ply - covered that with a nice teak veneer- hoping it matches up. First the teak face ply went in and epoxied to the frame work and cabinet. Then the 3/4 ply was tabbed with bi-axial glass and glassed in and epoxied to the 1/4 ply and frame work.
The hole ready to receive the new bulkheads

Here's a photo of the tabbing- 2 layers of glass and epoxy!

I don't have a photo of the finished bulkhead- will take one next time I'm at the boat. Due to it being very cold here, am now doing more work in my wood studio. Started working on the bowspite- Decided to make a solid one verses a box construction, simpler and stronger. Will probably be a laminate of 11 layers! Photo shows 5 layers, but tonight am glue up layer 9. Can't wait to start shaping her.


New Lights
14 November 2012 | Still at Riverside NJ
One of the things I wanted to do was replace all the interior lights with LED as they will use a LOT less electricity, very important when I'm staying at anchor in some remote area- will make the batteries last a lot longer.
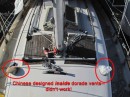
Did a lot of on-line searching, reading other sailors blogs – becoming over whelmed with all the amps/volts, imps etc! A lot of the LED replacement bulbs are very very expensive! Somewhere I read about someone using these LED lights from IKEA…
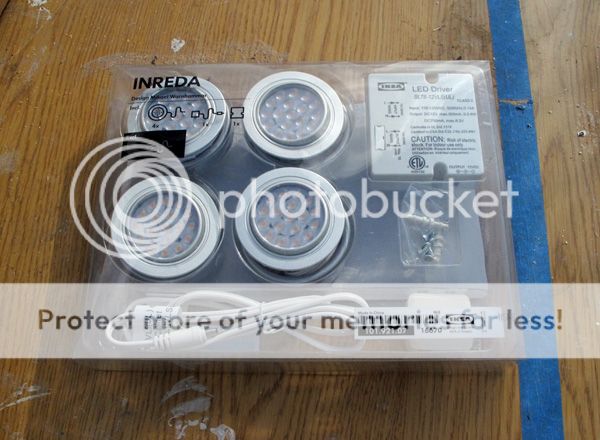
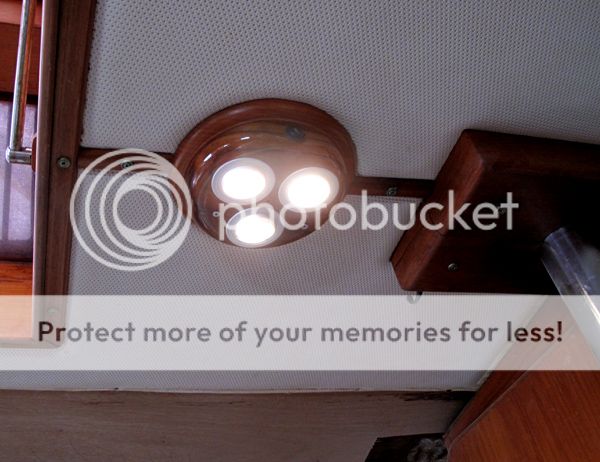
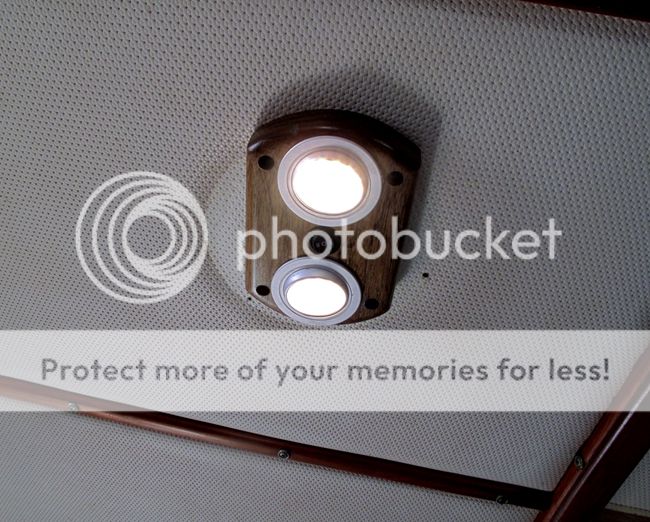
They run directly off of 12volt and come with a 110 transformer. Well since the boat is 12 volt, I didn’t need that- so I did a test wire up and they work great! Made 2 fixtures out of teak, one with 2 lights for the galley area and one with 3 for the main saloon.
So far they work great, I don’t have my hourly amp meter attached so I can’t say how much current they use, winter project. Feels good to get a little project dome.
Did a lot of on-line searching, reading other sailors blogs – becoming over whelmed with all the amps/volts, imps etc! A lot of the LED replacement bulbs are very very expensive! Somewhere I read about someone using these LED lights from IKEA…
They run directly off of 12volt and come with a 110 transformer. Well since the boat is 12 volt, I didn’t need that- so I did a test wire up and they work great! Made 2 fixtures out of teak, one with 2 lights for the galley area and one with 3 for the main saloon.
So far they work great, I don’t have my hourly amp meter attached so I can’t say how much current they use, winter project. Feels good to get a little project dome.
| Vessel Name: | Kodachrome |
| Vessel Make/Model: | Nassau 34 |
| Crew: | Roland |
Kodachrome's Photos - Main
 |
 |
 |
Photos of the process of making my molded instrument panel for the cockpit
9 Photos
Created 22 February 2013
|
 |
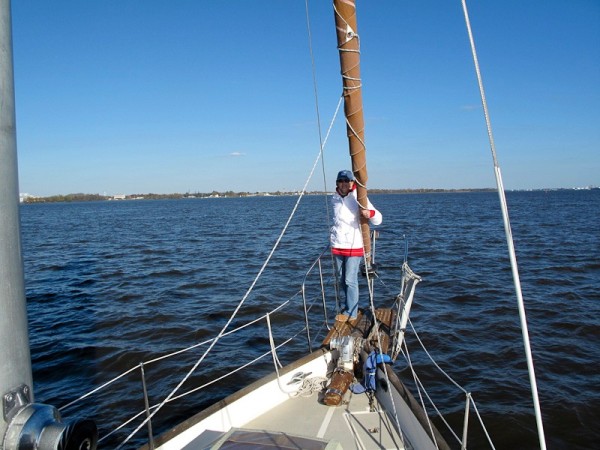 |
From Rock Hall to Riverside our late fall trip
16 Photos
Created 7 November 2011
|

Who: Roland
Gallery