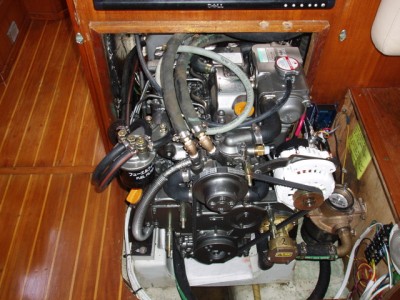
The new engine is in! I did most of the work and had the dealer inspect it to make sure the warranty would hold. The mechanical work was straightforward with the engine pretty far forward on one inch blocks, a drive saver. I did have to slide the prop shaft forward just a bit, so there's only 1/2" clearance behind the cutlass: 3/4" is really what you want, but... I kept the 3/4" water thru-hull with 1" (the Yanmar uses 1") high flow elbows and a massive strainer up by the water pump. The new JH's have the raw water pump on the front - yippee!
By swapping the waterlift around so that the inlet is aft, the exhaust worked out pretty well using a 3" to 2.25" adapter. We did measure exhaust back pressure and raw water flow and there is really no issue staying with the original 2.25" exhaust and the 3/4" thru-hull.
The new Yanmar control panel it the same width as the Volvo, but not as high, so a blanking plate was all that was required.
| Refit |
|

This picture represents a lot of work - replacing all the standing rigging. Florida Rigging did the heading and I did the install. I pulled and polished the chain plates. They look good, though I can see a tiny crack (crevice corrosion rather than stress) on the inner edge of the port chainplate. Nothing to worry about for now and we can watch it easy enough, but they will need replacing some day. I didn't want to do it now mainly because the stock plates have another issue: the holes are too big for the toggle clevis pins (see relevant commentaries by Brian Toss.) I'm undecided as to whether chainplates should be fabricated with the correct holes or to replace with a stock plate and add bushings: probably the latter. At any rate, we can safely put it off until some time later.
The original rod was actually (after 15 years in Florida) in better shape than I would have thought. The only real sign of fatigue was the heading on the lower end of the lowers. Still, 15 years is long time in the tropics...
The prebuy found some moisture in the core around the chainplates, though no delamination or to the point of being squishy. I routed out around the inside edges and filled with epoxy paste. At some point we'll replace the headliner. At that time I might drill some core samples to see how the wood looks.
I tapped holes and used screws rather than cotter pins: nothing to snag and easier to remove. Lost a tap in the process - tough stuff. The trick is to drill out a few numbered sizes larger before tapping this stuff: easy does it and lots of cutting oil.
For running rigging we've replaced most of the blocks. Neither the Harken nor Shaefer blocks, for the most part, were up for 15 years service. The Shaefer blocks had crevice crack disease. The Harken balls had UV disentigration disease. In theory, you could replace the balls, but this generation of Harken had stainless bolts in aluminum bodies: predictably frozen for life at this point. The later Harken design pay more attention to both UV resistance and corrosion issues. For sheet blocks, we used Harken roller bearing, racing stuff. For things like the checkstays and preventer tackles we used the Harken ESP series, which have very high load factors and much less expensive than the rollers.
| Refit |
|
The boat had a dutchman boom brake rigged to the vang weldment and the shroud turnbuckles. What the boom brake advocates don't tell you is how many booms have been broken. For a long (18') boom like on the J/40 it is not hard to figure out. If you use an end boom preventer, the recommended hardware should have roughly a 3000 lbs. working load. (Lesser hardware has been known to explode: http://members.dslextreme.com/users/sded/sftrip3.htm) Bring that load into the vang attachment and your talking about over 10,000 lbs. loaded sidewise on the boom AND on the gooseneck (opposing).
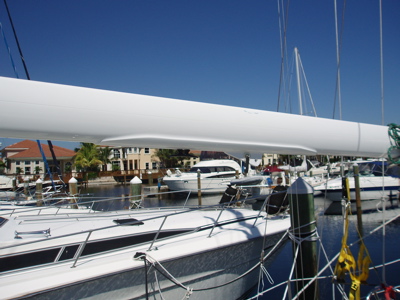
Fortunately, I noticed a small crack developing and stopped drilled it, eased the vang, and took off the boom brake to get us through the last week. Florida Rigging did the beautiful doubler work, though at great expense, as you see here.
I sold the boom brake and reverted to a more traditional preventer. A nylon pendant (for some give) lies along each side of the boom and is thru-bolt attached to the end of the boom. Each side of the boat has a 2:1 tackle from the bow that can be attached to the pendants. These tackles lead aft to stoppers next to the main sheet winches. This arrangement does require going up the shrouds to attach the tackle to the pendant, but the dual arrangement, and careful attention to where the blocks go, allows one to gybe back and forth with both sides attached and without getting the tackle hung up on the shrouds, etc. As a side benefit, you don't have to rehook around the boom brake when going forward on the jackstays. Again, a copied design, but seems a good arrangement for cruising.
| Refit |
|

The boat has a DOA 135 and a nice 155. Given that we will be in the trades for the winter/spring, the 155 is much too big. This #3 is a heavy duty, all day long in the trades sail. It has a foam luff so that we can reasonably use it down to about 85% or so. Its definitely a cruising sail, not a racing sail, but looks very well built for the purpose. We're taking the 155 w/ us, but I suspect we'll never use until perhaps we're up around the Bahamas in June.
| Refit |
|
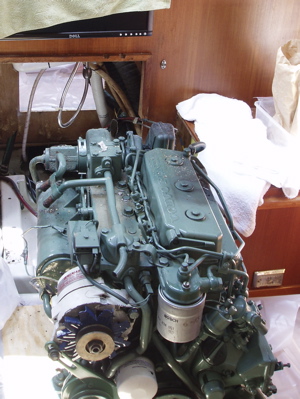
OK, this sucks. The power train on this boat has been a pain from day one. The newly rebuilt transmission was a total botch job: I actually found full sized parts floating around when I opened it for its first oil change. After much pain and anguish, I did a simple tear down and put back together with the right parts. Still, I could never fully trust it again.
The engine showed a little weird in the prebuy oil analysis, but nobody was able to figure out what was going on or seemed particularly concerned. The best advice was just to keep running it - hard when possible. Once running, it always ran well, but sometimes getting it to start was a bear and compression was starting to run low. We're still trying to figure out exactly what happened (probably a little water thrown up from a sag in the exhaust run), but she's locked solid now. Of course this is after spending Volvo bucks (its a different kind of currency I swear) replacing anything suspicous like water pumps, heat exchanger, etc. and spending a small fortune on Volvo spares to have on hand.
We did replace the stuffing box with a dripless that is truly dripless, a new cutlass bearing, and had the MaxProp overhauled. The prop was a great deal: super folks. For about $200 they remachined the prop and it has much less vibration than before. Plus it was sooo shiny :) (Not anymore:(
Well enough of Volvo. I have a new Yanmar to install, more on that later...
| Refit |
|
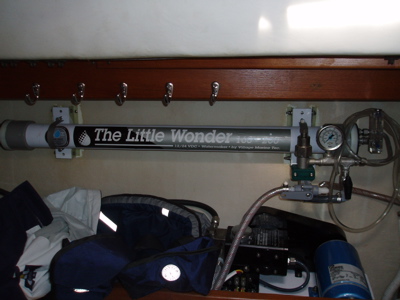
I fear watermakers, but love them too. I chose the simpliest, most rebust unit on the market, VillageMarine, at a killer price during a boat show. The installation was, shall we say, involved. It is plumbed to the port and aft tanks, but not the starboard tank. Because we can't add thru-hulls and the WM warranty requires a dedicated thru-hull, we added a valve to the aft head intake to isolate the WM during operation. Even so, we had problems underway sucking in air, which the pump really doesn't like at all. After consulting with VillageMarine, the installation became even more complicated with an additionally pump and a air/water separator. Added 1A to the operating cost. We haven't had a chance to give this new arrangement a workout, so we'll see...
Turns out dropping the water into the tanks through the vent lines isn't such a good idea. Underway, the vent line can effectively form a trap and prevent the water from draining into the tank. Had some very nice water in the bilge one day... For now, we just have to remember to crack the filler caps every hour or so while filling the tanks. Later we'll come up with a better arrangement, perhaps teeing into the filler hose.
So far its been bulletproof giving us 8GPH on about 15A: knock on wood.
| Refit |
|
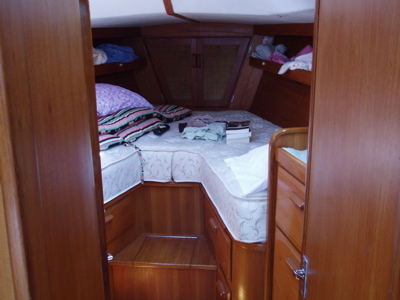
Latex and very comfy. Made a huge difference in my sleeping, though my wife might offer a differing opinion. Good thing we have a drag alarm, I just might sleep through the whole thing otherwise...
| Refit |
|
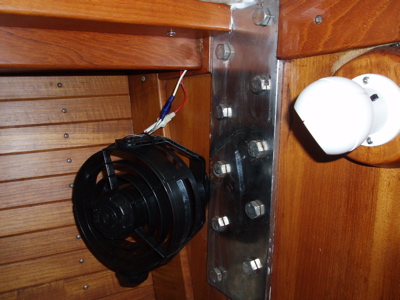
More energy savings. The original fans were worn out oscillating (well at least they oscillated at one time) Guest model. They move a lot of air but draw a lot of power (more than the fridge) and you can't tone them down to a more modest, quiet volume: on or off. Replaced with Hella fans for significant energy savings, much quieter operation, and sufficient, though somewhat less, air volume. I did keep a Guest in the Galley for increased airflow when cooking, but we leave it off otherwise.
| Refit |
|