The Adventures of Smart Move
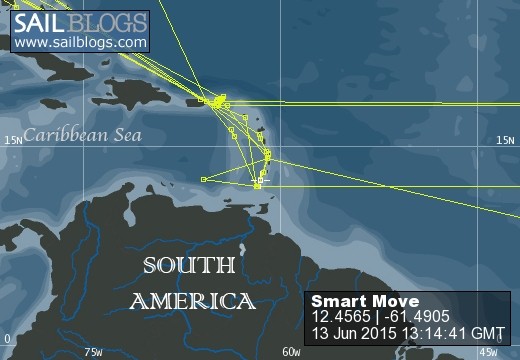
13 June 2015 | Tyrell Bay, Carriacou
24 May 2015 | Saints Anne, Martinique
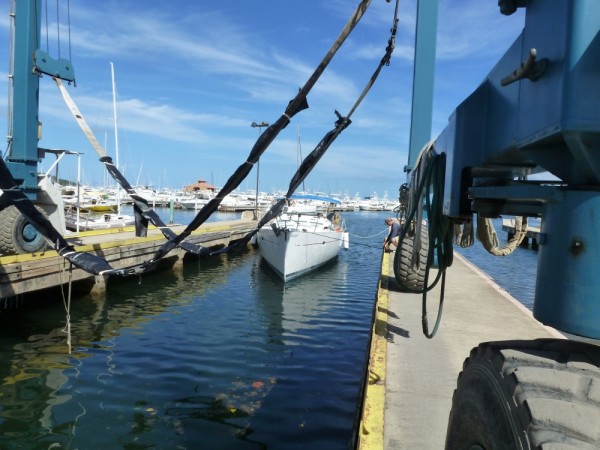
24 March 2015 | Puerto del Rey Marina, Fajardo, Puerto Rico
01 February 2015 | Charlestown, Nevis
13 January 2015 | Prickly Bay, Grenada
03 December 2014 | Prickly Bay, Grenada
01 December 2014 | Somewhere in the Caribbean Sea
01 December 2014 | Somewhere In The Caribbean Sea
30 November 2014 | Fajardo, Puerto Rico
22 November 2014 | Puerto del Rey Marina, Fajardo, Puerto Rico
29 October 2014 | San Juan, Puerto Rico
26 August 2014 | Cheyenne, Wyoming
01 August 2014 | Highlands Ranch, Colorado
29 July 2014 | Cheyenne, Wyoming
16 May 2014 | Sunbay Marina, Fajardo, Puerto Rico
15 May 2014 | Sunbay Marina, Fajardo, Puerto Rico
14 May 2014 | Sunbay Marina, Fajardo, Puerto Rico
02 April 2014 | Terre D'en Haut, Iles des Saintes
31 March 2014 | Prince Rupert Bay, Dominica
And Then There Was The Watermaker!
18 November 2012 | Fajardo, Puerto Rico
Robyn

OMG! Did you see the size of that box!?! It was 120 pounds!!! What do you think is in it??? The Spectra Rep said this is the perfect watermaker for us – do you think he was right?!? Conversations before we opened the box.
OMG, OMG! Look at all those parts!!! OMG, OMG, OMG!! Look at the size of that installation manual!!! Where are we going to put that thing??? Do you remember what we paid for this thing – maybe we can send it back!?! Conversations after we opened the box.
We were so intimidated we went sightseeing for three days!
OK, we can do this, deep breath, deep breath, another deep breath for good measure!
First, let me start with a big thanks to the folks on S/V Beyzano! If it weren’t for Rob and Rhian’s blog, we would not have started this project! For a couple whose career was structured around thinking out of the box, we certainly needed some help with this one. We were focused on locating it somewhere in the salon – the thinking was, ease of maintenance, but without a lot of modifications it was not going to fit. Rob and Rhian put their watermaker under the bed in the forward cabin – ding, the light goes on!
This was definitely a two person job. First, because some of the parts were really heavy. Second, because of the location we were installing in did not allow for us to be in close proximity to where we were mounting things. After Barry had read the installation manual two times, we felt we were ready to start.
Have I mentioned a lot of sweating and swearing were involved in this project?!? Remember the mis-labeling of the stern tank? Well ... guess what ... logic would tell you that by emptying the stern tank, would (in reality) empty the forward tank ... not happening! Again, trial and error were our best friends. Oh, and the reason we had to empty the tank ... we (or I) kept dropping things (screwdriver/drill bits and nuts) that landed and rolled to dead-center under the tank (middle of boat)!
In the end, the installation instructions were very good and we were able to get everything mounted and hooked together. Putting the watermaker in the forward cabin was really a plus as far as the electrical connections went, because there was already electrical stuff up there for the windless that we could tie into. As is shown in the pictures, that main part of the watermaker was installed under the bed on the same side of the compartment as the water tank. The two pumps were installed in the spaces on either side of the drawers. We had a bit of disagreement about the location of the gage, I wanted it on the outside, Barry wanted to mount it inside the starboard compartment with the pump. Realizing the only time I would need to see the gage was when I was doing maintenance and would have to open the compartment anyway, I gave way – a smart decision! Everything was very easy. Of course, we have not yet fired up the watermaker, so we have no idea if it is going to work as advertised. Stay tuned for further developments!
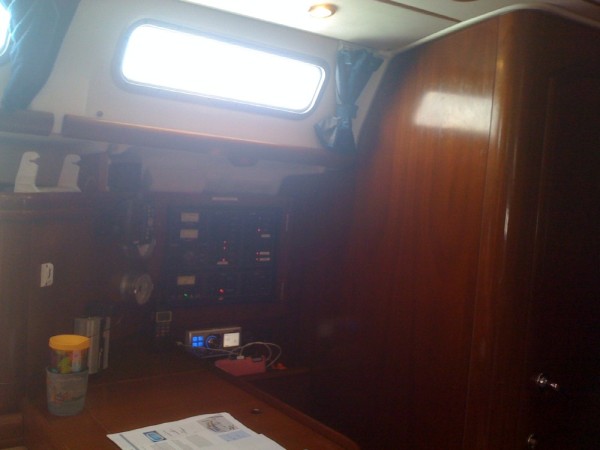
Two other projects ran parallel to the watermaker, the deck washdown pump and the new electrical panel. The electrical panel is pretty straight forward, it controls/distributes the power to the windless, watermaker and washdown pump. The wash down pump is pretty straight forward as well, pump connected to hose, connected to fresh water tank for washing down anchor and chain and top sides of Smart Move. The quick connect for the hose was located in the anchor locker.
OMG, OMG! Look at all those parts!!! OMG, OMG, OMG!! Look at the size of that installation manual!!! Where are we going to put that thing??? Do you remember what we paid for this thing – maybe we can send it back!?! Conversations after we opened the box.
We were so intimidated we went sightseeing for three days!
OK, we can do this, deep breath, deep breath, another deep breath for good measure!
First, let me start with a big thanks to the folks on S/V Beyzano! If it weren’t for Rob and Rhian’s blog, we would not have started this project! For a couple whose career was structured around thinking out of the box, we certainly needed some help with this one. We were focused on locating it somewhere in the salon – the thinking was, ease of maintenance, but without a lot of modifications it was not going to fit. Rob and Rhian put their watermaker under the bed in the forward cabin – ding, the light goes on!
This was definitely a two person job. First, because some of the parts were really heavy. Second, because of the location we were installing in did not allow for us to be in close proximity to where we were mounting things. After Barry had read the installation manual two times, we felt we were ready to start.
Have I mentioned a lot of sweating and swearing were involved in this project?!? Remember the mis-labeling of the stern tank? Well ... guess what ... logic would tell you that by emptying the stern tank, would (in reality) empty the forward tank ... not happening! Again, trial and error were our best friends. Oh, and the reason we had to empty the tank ... we (or I) kept dropping things (screwdriver/drill bits and nuts) that landed and rolled to dead-center under the tank (middle of boat)!
In the end, the installation instructions were very good and we were able to get everything mounted and hooked together. Putting the watermaker in the forward cabin was really a plus as far as the electrical connections went, because there was already electrical stuff up there for the windless that we could tie into. As is shown in the pictures, that main part of the watermaker was installed under the bed on the same side of the compartment as the water tank. The two pumps were installed in the spaces on either side of the drawers. We had a bit of disagreement about the location of the gage, I wanted it on the outside, Barry wanted to mount it inside the starboard compartment with the pump. Realizing the only time I would need to see the gage was when I was doing maintenance and would have to open the compartment anyway, I gave way – a smart decision! Everything was very easy. Of course, we have not yet fired up the watermaker, so we have no idea if it is going to work as advertised. Stay tuned for further developments!
Two other projects ran parallel to the watermaker, the deck washdown pump and the new electrical panel. The electrical panel is pretty straight forward, it controls/distributes the power to the windless, watermaker and washdown pump. The wash down pump is pretty straight forward as well, pump connected to hose, connected to fresh water tank for washing down anchor and chain and top sides of Smart Move. The quick connect for the hose was located in the anchor locker.
Comments
| Vessel Name: | Smart Move |
| Vessel Make/Model: | Beneteau 473 |
| Hailing Port: | Salt Lake City, Utah |
| Crew: | Barry, Robyn, Lilly and Chloe |
Smart Move's Photos - Main
 |
 |
 |
 |
 |
Pictures from Sherri's October 2012 visit.
9 Photos
Created 17 November 2012
|
 |
Our time in Fajardo, Puerto Rico
6 Photos
Created 17 September 2012
|
 |
 |
 |
 |
Smart Move

Who: Barry, Robyn, Lilly and Chloe
Port: Salt Lake City, Utah