
Swingin' on a Star
Ship's log for the circumnavigating Saint Francis 50 catamaran, "Swingin on a Star".
01 April 2010 | Palau
13 July 2009 | Palau
05 July 2009 | Yacht Harbor
03 July 2009 | Peleliu
02 July 2009 | Palau
01 July 2009 | Two Dog Beach
30 June 2009 | Mecharchar
29 June 2009 | Mecharchar
28 June 2009 | Ulong
27 June 2009 | Ngeruktabel
17 June 2009 | Ngeruktabel
16 June 2009 | Ngeruktabel
15 June 2009 | Ngeruktabel
14 June 2009 | Ngeruktabel
13 June 2009 | Ngerutable
25 May 2009 | Yacht Harbor
30 April 2009 | Malakal
29 April 2009 | Koror
28 April 2009 | Malakal
27 April 2009 | Malakal
Bow reinforcement
24 January 2008 | Port Louis
Randy

Bow reinforcement. This was one of those jobs you really don't want to do. We have always had gel coat cracks around the cross beam attachment points and the cracks have grown somewhat from the time that we purchased the boat from Saint Francis. Grinding off all of the gel coat inside the small bow area to check the fiberglass is no trivial task. In the end, if the glass looks fine, you may have just wasted a whole lot of time.
Yet we are headed into the South Pacific. The crossings there are much longer than those in the Caribbean and the boat services are much harder to come by. With a couple of exceptions, everyone I have talked to, including the factory, suggested I add a few layers of glass to the area to be sure there wouldn't be a problem.
Before we started we examined both bows in detail. Upon inspection it became obvious that a layer of glass had already been added to the cross beam attachment points after the boat was assembled. My suspicion is that the addition was done in Exuma not at the factory. There was fiberglass on some of the electrical conduit (which would not have been installed until all of the glass work was done at the factory) and the patch was laid on top of the interior gel coat without grinding. Glassing on top of gel coat is discouraged and greatly reduces any benefit that may be gained by adding glass. My greatest disappointment was that the factory did not inform me of the repair at the time of purchase or anytime leading up to this work.
We had to remove several bits of hardware to get the area ready for grinding. Three or four tramp track bolts had to come out, a stanchion backing plate had to be removed and the wiring conduit for the running lights had to be pined out of the way. Oh yeah, and of course the cross beam backing plates had to come off.
Catamaran rigs are pretty simple. You have your swept back shrouds and you have your forestay. You may have lowers and an intermediate fore stay as we do but the point is a huge part of your mast's stability relies on the cross beam. To unbolt this baby is a delicate thing. I prepared the boat for this by taking all three of the forward halyards down to bow cleats, two on one side and one on the other. I then sequentially winched each halyard up nice and tight but not too tight. Next I loosened the cap shrouds a bit.
Once prepared, we said a prayer and removed the backing plate on the port side. The cross beam immediately broke the residual hold of the bedding and rose up a good four inches. Everything stopped there, I began to breath again, and all was well. Ian went to work grinding off the last areas of the bow interior. The cross beam would stay disconnected for more than a day while the work was finished.
The grinding took longer than expected because we had to not only grind off the gel coat but also the fiberglass and additional gel coat layer of the after factory patch. In the end we had a clean area of factory glass cleared all around the backing plate attachment area. This gave us an area with four connected planes to reinforce: both sides of the hull, the bottom of the deck and the bulkhead.
Once we had the glass cleared I looked for cracks in the glass itself. Neither Brent, Ian nor I found anything concerning in the actual factory fiberglass. There may have been no strength issues in the first place. Then again there may have been early stage issues or small amounts of fiber cracking, hard to detect in the laminate at present. Though I was happy and reassured to see that the hull looked fine, my reinforcement plans would go forward regardless.
After considering several exotic alternatives I decided to use 1808 biaxial glass fabric for the reinforcement. Some folks have suggested Carbon Fiber or Carbon Kevlar cloth hybrids but after careful analysis I think that 1808 biaxial is the right material for the job. It is heavier than some of the exotics and in some ways not as strong pound for pound. Some of the benefits of the exotics are not relevant to this task however and the glass is far easier to work with. The area where we would be reinforcing has several 90 degree bends and there are places where the glass will need to be applied overhead. Kevlar in particular is famous for being tricky to wet out. All factors considered I was happy to be using epoxy and glass.
Brent carefully measured and pre cut the cloth into several layers. The first consisted of two large sheets that met at the top of the bow with a four inch overlap, covering the entire hull area that had been cleared. The second was a smaller pair of sheets that ended three inches or so from the edges of the first layer to ensure that no point loading would take place. The final sheet was a patch about six inches larger than the steel backing plate itself.
Brent and Ian used acetone to clean the surfaces and then pre wet the area to be covered. They then carefully applied the pieces of glass and rolled on additional epoxy carefully eliminating bubbles. Each layer was given time to setup before the next was added to ensure good adhesion, especially in the overhead spots. When they completed the hull layers they tabbed in the bow bulkhead area reinforcing the bulkhead, which had cracked at the bottom, and the entire bow laminate.
With the fiberglass work complete, the standard approach would be to gel coat the area to seal it. Instead I asked them to seal it with a layer of epoxy, just as many folks do to their bottoms before applying bottom paint. This is not as cosmetically appealing but it is extremely waterproof and also transparent. This way if I ever get paranoid I can just climb up there with a flash light and relax. No one would otherwise see this part of the boat.
The next task was to bed the backing plate with epoxy and 404. Any application of fiberglass on a curved surface is going to create a less than perfect plate bed. To avoid point loading the fiberglass with the edges of the plate you must create a perfectly flat bed for the plate to rest on that is mechanically connected to the rest of the laminate. The 404/epoxy mixture worked perfectly here. The guys placed a light layer of release wax on the plate to allow it to be removed once the epoxy had setup.
Once everything inside was set we re-drilled the crossbeam bolt holes through the new laminate and prepped the surfaces to be re-bedded. Now, how to get the cross beam back down to the level of the holes...
This was an issue I went over again and again in the day or so that the beam was floating nearly half a foot above its permanent home. Brent suggested we install the backing plate and the hull plate by removing the single bolt that attaches the beam to said plates. This was a great idea. Now we had only one bolt to slip into place once we got the beam down into position.
I had spent a bit of the day loosening the shrouds quite a bit in anticipation of this task. My next step was to scour the dock looking for people who looked like they could balance on a cross beam. In the end I turned up the crew of the Helen Mary Gee and a couple of Marina employees. I told them beer was involved and they briskly joined me at the work site.
Next Ian and Brent aligned the beam as they hung on it and I added one person at a time to the cross beam, lowering it bit by bit. When I finally had enough humans balancing on the cross beam to line it up I slid in the big bolt. It was a tricky operation due to the bushings and washers and such but we finally secured things and tightened the final bolt. The celebration began shortly thereafter.
The starboard side was trickier than the port due to the cramped quarters created by the washer/dryer but easier because we kept the cross beam in place by leaving two bolts in with washers and nuts at all times. My beer supply couldn't take another press gang and my blood pressure couldn't take another floating cross beam.
At the end of the day, the work Brent and Ian did was impeccable. The fiberglass layup in the bows of our boat are a model to strive for. They never settled either. When the bolts for the backing plates were long enough but not all the way into the nylon locking threads, they bought longer bolts instead of using the old bolts. That type of thing. If you are in Grenada and need to have some fiberglass work done I can not think of anyone I would recommend more highly than Brent and Ian. You can reach Brent at 418-6311.
Comments
| Vessel Name: | Swingin' on a Star |
| Vessel Make/Model: | Saint Francis 50 |
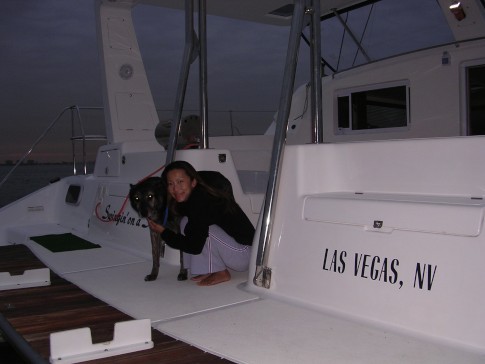
| Hailing Port: | Las Vegas, NV |
| Crew: | Randy Abernethy |
| Home Page: | http://swinginonastar.com |
Swingin' on a Star's Photos - Swingin on a Star (Main)
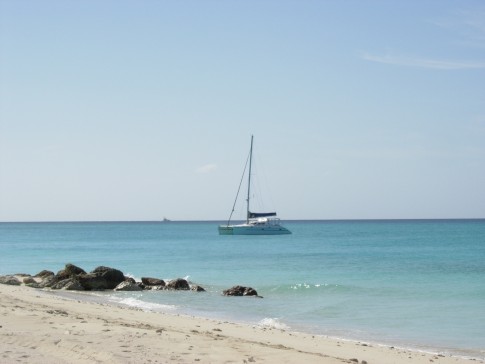 |
Selected photos of Swingin' on a Star at anchor.
7 Photos
Created 18 September 2007
|
 |
Swingin on a Star

Who: Randy Abernethy
Port: Las Vegas, NV
Gallery


History
Links
SailBlogs Friends

