Clio's Adventures

27 September 2017
21 September 2017
14 September 2017
27 August 2017
17 August 2017
16 August 2017
06 August 2017
27 July 2017
17 July 2017
09 July 2017
27 June 2017
20 June 2017
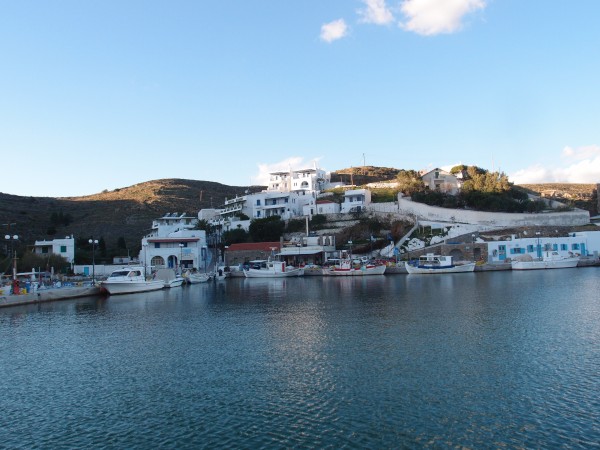
13 June 2017 | Kefallonia Island
07 June 2017
30 May 2017
21 May 2017
14 May 2017
08 May 2017
13 January 2017
10 December 2016
Secret Keel Business
21 October 2016 | Preveza, Greece
Francis and Chris
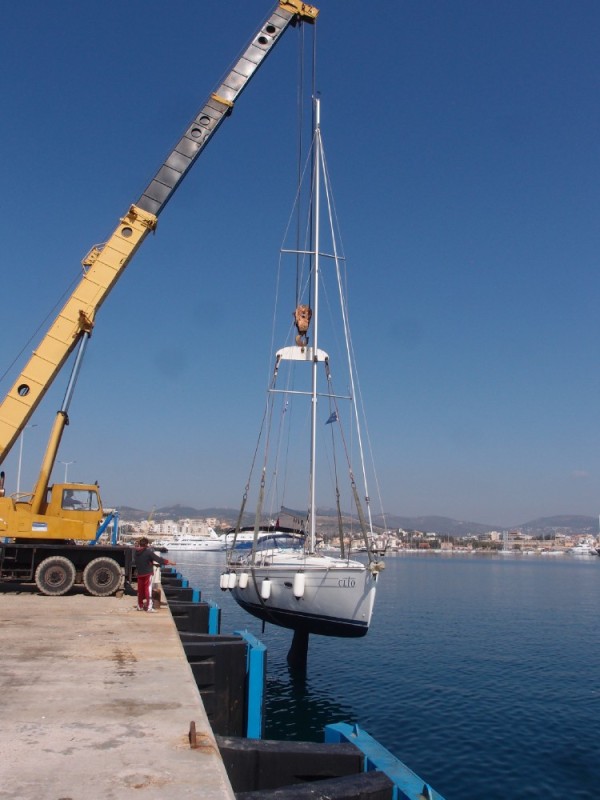
Tuesday 18 of October, and we're on the hardstand in Aktio Marina in Preveza.
This morning, after a stormy but very restful night, there was a very loud racket being produced by something a couple of boats away. It turned out to be a sand-blasting operation. Great, just what we needed. We talked with the boss-man Panos and our fears of an Australia-size hole in the budget turned out to be unfounded. About €550 to blast the keel, fill the holes with 2-pack epoxy filler and seal it with epoxy metal primer. And it can be done within a couple of days, even better as the next stage consists of putting 4 layers of 2-component epoxy primer on, each with about ½ day of curing/drying. Something we can do much cheaper ourselves.
WARNING: TECH STUFF!
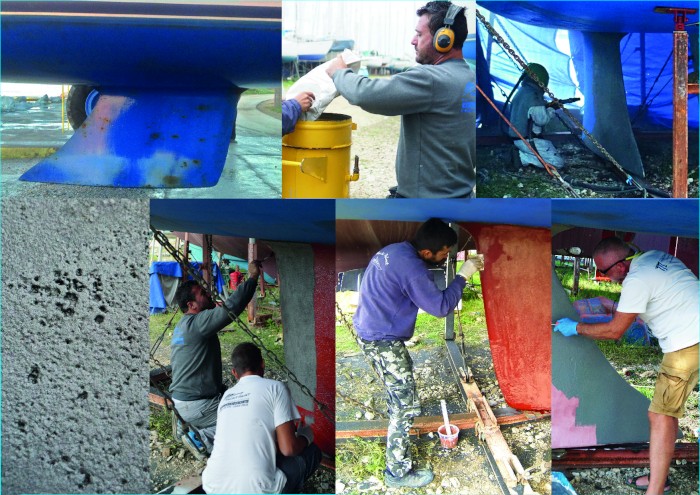
The keel and its problems. Last year we spent a fair bit of time, money and elbow grease on trying to stop the rusting of the keel. After about four weeks in the water, the keel was rusting even worse than before (top-left photo), so obviously there was something we didn't do right or we didn't properly understand.
The keel always looked a bit pitted here and there, it looked like the keel metal was electrolysing in places. Not that I could understand why, because there were no bi-metal connections exposed to seawater.
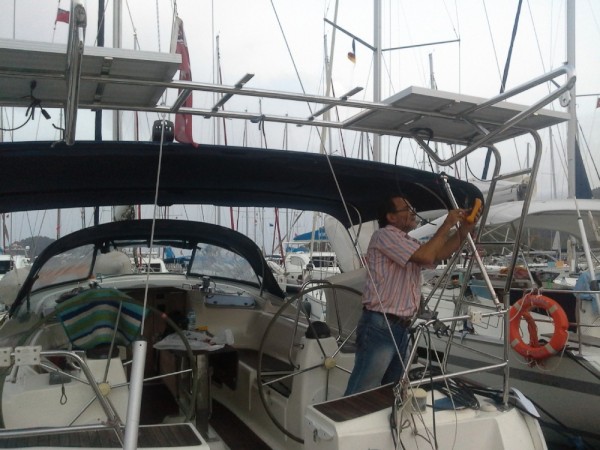
Anyway, Stephan the gifted German engineer, suggested that the rust problem was best attacked with some 'bite the bullet' sandblasting approach. I thought that was a bit over the top and a steel brush on a drill, applied at the rusty spots, should do the job. Well, we tried that last year and it failed. Maybe Stephan was right and we decided to bite that bullet as well and we hired Panos (top middle photo) to do the job. He turned out to be an excellent choice. Not only did he blast sand at keels, but he's also able to gently blast antifouling from the underwater hull without damaging the gel coat, repair structural polyester and gelcoats, and paint whatever needs painting.
So Panos and I got talking about the keel and the rusting and I ventured my opinion about the cause of the pittedness being electrolysis. He corrected that idea by explaining that the unevenness is not some erosion process, but the result of the keel being casted steel. Ahhhh, a penny dropped, now that explained everything. In the process of pouring the liquid iron into the keel mould, air bubbles get trapped along the wall of the mould, causing the pitted surface (bottom left photo). After the metal cools down, the factory fills the 'valleys' with some polyester compound and that's how they get a more or less smooth surface. But if you look a bit closer at the keel's surface after sandblasting (see details on bottom left photo), you can see that some of the 'dents' extend under the surface well beyond the opening and as such form small subsurface 'caves'. Things like steel brushes (likely to introduce more rust) or sandpaper will never reach inside those little caves. As we know, rust (iron oxide) on a steel surface (especially in the presence of sea water) will facilitate the electrochemical rusting process in a positive feedback way: rust accelerates rusting. Once rusting starts inside those little caves under the surface, there really is no other/better way to remove the rust than by sandblasting, and so resetting the rusting process. By quickly putting a metal primer on (making sure it gets into those little caves) before water and oxygen in the air can start the oxidizing (rusting) process again, we effectively set the keel back to the time it came out of the mould. Excellent, we now much better understand the process. Thanks Panos!
Now to the practice of it all. Panos and his team rock up with a fairly sizeable compressor to blast the keel with a very abrasive (glass I believe) grid. As the grid pulverizes upon impact, both the blaster and the environment need some protection. The blaster has a positive pressure helmet and a small tent is erected around the blasting area to contain the dust and stray grid (top-right photo). The whole process is done fairly quickly, it took just over an hour to blast our keel. Straight after the blasting, they applied a two-component epoxy steel primer (bottom, second from the left), making sure it covered the inside of the subsurface caves. Once the primer is on, the most time-critical work has been done as moisture and oxygen is now excluded from the metal. The primer is to cure and harden for about a day. Next day the bigger dents and caves are filled with an epoxy filler (bottom, second from the right) which needs to cure for another 24 hours and sanded down where necessary. If you sand through the original primer, you need to reapply it. In our case Panos was very prudent in just putting another coat of metal primer over the whole keel.
Well, that was their work done: very expertly, timely and with some great info on the side. Unlike many others we worked with, Panos arrives when agreed, actually responds to emails and keeps us up-to-date, something we really appreciate being so far away. We liked very much working with him, let us know if you need his details. Thanks a lot Panos and his team!
Over the next couple of days, I applied four coats of epoxy (not steel) primer, with its main objective being to protect the keel. The lady manning the Aktio chandlery suggested to use different colors between layer so you can better see what you're doing. It turned out to be an excellent suggestion. Before she (Clio, not the lady) goes into the water, we have to put on an underwater primer to allow the antifouling paint to stick better to the keel. But that is for April next year. So far, working in and with Aktio marina has been a very positive experience, even with the mozzie legions.
This morning, after a stormy but very restful night, there was a very loud racket being produced by something a couple of boats away. It turned out to be a sand-blasting operation. Great, just what we needed. We talked with the boss-man Panos and our fears of an Australia-size hole in the budget turned out to be unfounded. About €550 to blast the keel, fill the holes with 2-pack epoxy filler and seal it with epoxy metal primer. And it can be done within a couple of days, even better as the next stage consists of putting 4 layers of 2-component epoxy primer on, each with about ½ day of curing/drying. Something we can do much cheaper ourselves.
WARNING: TECH STUFF!
The keel and its problems. Last year we spent a fair bit of time, money and elbow grease on trying to stop the rusting of the keel. After about four weeks in the water, the keel was rusting even worse than before (top-left photo), so obviously there was something we didn't do right or we didn't properly understand.
The keel always looked a bit pitted here and there, it looked like the keel metal was electrolysing in places. Not that I could understand why, because there were no bi-metal connections exposed to seawater.
Anyway, Stephan the gifted German engineer, suggested that the rust problem was best attacked with some 'bite the bullet' sandblasting approach. I thought that was a bit over the top and a steel brush on a drill, applied at the rusty spots, should do the job. Well, we tried that last year and it failed. Maybe Stephan was right and we decided to bite that bullet as well and we hired Panos (top middle photo) to do the job. He turned out to be an excellent choice. Not only did he blast sand at keels, but he's also able to gently blast antifouling from the underwater hull without damaging the gel coat, repair structural polyester and gelcoats, and paint whatever needs painting.
So Panos and I got talking about the keel and the rusting and I ventured my opinion about the cause of the pittedness being electrolysis. He corrected that idea by explaining that the unevenness is not some erosion process, but the result of the keel being casted steel. Ahhhh, a penny dropped, now that explained everything. In the process of pouring the liquid iron into the keel mould, air bubbles get trapped along the wall of the mould, causing the pitted surface (bottom left photo). After the metal cools down, the factory fills the 'valleys' with some polyester compound and that's how they get a more or less smooth surface. But if you look a bit closer at the keel's surface after sandblasting (see details on bottom left photo), you can see that some of the 'dents' extend under the surface well beyond the opening and as such form small subsurface 'caves'. Things like steel brushes (likely to introduce more rust) or sandpaper will never reach inside those little caves. As we know, rust (iron oxide) on a steel surface (especially in the presence of sea water) will facilitate the electrochemical rusting process in a positive feedback way: rust accelerates rusting. Once rusting starts inside those little caves under the surface, there really is no other/better way to remove the rust than by sandblasting, and so resetting the rusting process. By quickly putting a metal primer on (making sure it gets into those little caves) before water and oxygen in the air can start the oxidizing (rusting) process again, we effectively set the keel back to the time it came out of the mould. Excellent, we now much better understand the process. Thanks Panos!
Now to the practice of it all. Panos and his team rock up with a fairly sizeable compressor to blast the keel with a very abrasive (glass I believe) grid. As the grid pulverizes upon impact, both the blaster and the environment need some protection. The blaster has a positive pressure helmet and a small tent is erected around the blasting area to contain the dust and stray grid (top-right photo). The whole process is done fairly quickly, it took just over an hour to blast our keel. Straight after the blasting, they applied a two-component epoxy steel primer (bottom, second from the left), making sure it covered the inside of the subsurface caves. Once the primer is on, the most time-critical work has been done as moisture and oxygen is now excluded from the metal. The primer is to cure and harden for about a day. Next day the bigger dents and caves are filled with an epoxy filler (bottom, second from the right) which needs to cure for another 24 hours and sanded down where necessary. If you sand through the original primer, you need to reapply it. In our case Panos was very prudent in just putting another coat of metal primer over the whole keel.
Well, that was their work done: very expertly, timely and with some great info on the side. Unlike many others we worked with, Panos arrives when agreed, actually responds to emails and keeps us up-to-date, something we really appreciate being so far away. We liked very much working with him, let us know if you need his details. Thanks a lot Panos and his team!
Over the next couple of days, I applied four coats of epoxy (not steel) primer, with its main objective being to protect the keel. The lady manning the Aktio chandlery suggested to use different colors between layer so you can better see what you're doing. It turned out to be an excellent suggestion. Before she (Clio, not the lady) goes into the water, we have to put on an underwater primer to allow the antifouling paint to stick better to the keel. But that is for April next year. So far, working in and with Aktio marina has been a very positive experience, even with the mozzie legions.
Comments
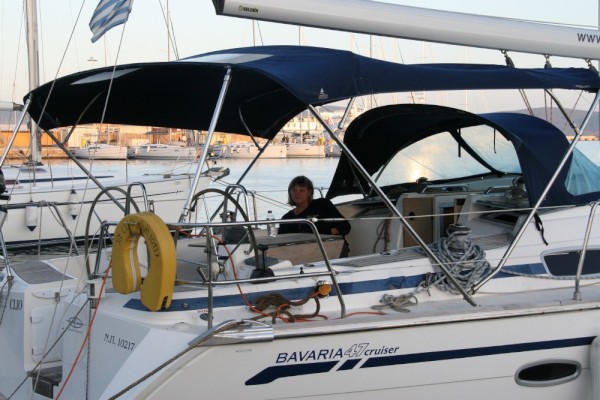
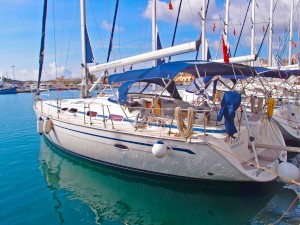
| Vessel Name: | Clio |
| Vessel Make/Model: | Bavaria 47 Cruiser |
| Hailing Port: | Brisbane, Australia |
| Crew: | Christine and Francis |
| About: | Happy laid-offs, with Greek and Turkish privileges |
| Extra: | Also have a look at http://sailingclio.org/ Map of our 2016 journey anchorages: http://sailingclio.org/Map.html |
| Home Page: | http://sailingclio.org/index.html |
| Social: |
|
Clio's Photos - Main
 |
These photos were taken on August 2016 of a cave wall on the Ionian island of Zante.
6 Photos
Created 21 August 2016
|
|
 |
Some photos from Clio's trip from Gocek to Finike and back in October 2014.
27 Photos
Created 15 December 2014
|
 |
Photos from the excellent anchorage at Gokayya, Turkey
25 Photos
Created 2 November 2014
|
 |
These photos were taken by Güçlü (Irmak yachting) to show us the progress while we are in Australia. Thanks Güçlü!
24 Photos
Created 9 July 2014
|
 |
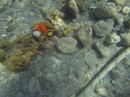
A collection of underwater photographs, mainly of marine life found during our snorkelling expeditions in Turkey.
20 Photos
Created 6 July 2014
|
 |
 |
Photos of our journey between 12 and 19 June 2014.
39 Photos
Created 29 June 2014
|
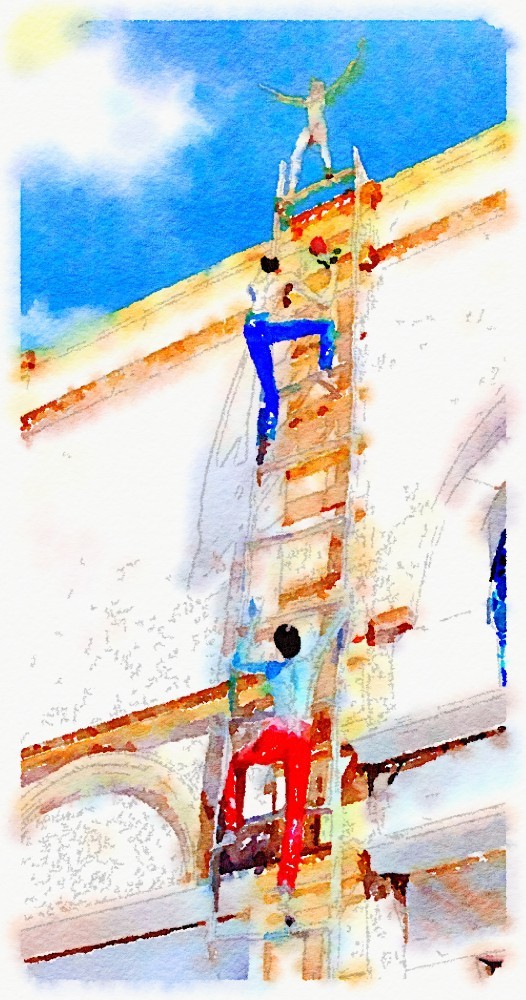 |
A selection of photos were converted in water paintings to give a cyber-artist's vision of our expedition, just for the fun of it.
32 Photos
Created 28 June 2014
|
 |
We stayed a couple of days at the Octopus hotel pontoon. Anchored in Bozuk Buku (first use of long flat-rope landline) and Ciftlik Bay, from where we took the bus to Marmaris.
41 Photos
Created 27 June 2014
|
 |
Photos were taken between28th of May and 5th of June 2014. Places: Yolluca rock, Perilli, Selimiye, Orhaniya and Marmaris
37 Photos
Created 27 June 2014
|
 |
Photos from the Yiali anchorage, Tilos, Simi in Greece and Datca in Turkey. From 21 May to 27 Mat 2014.
64 Photos
Created 17 June 2014
|
 |
Photos from Leros, Kalymnos and Kos, three islands in the Dodecanese. We visited them between 10 and 19th of May, 2014.
50 Photos
Created 30 May 2014
|
 |
Our photos of Nissos Paros, mid of April 2014
27 Photos
Created 8 May 2014
|
 |
Photos taken during our visit on Amorgos, Greece in the first week of May, 2014.
42 Photos
Created 8 May 2014
|
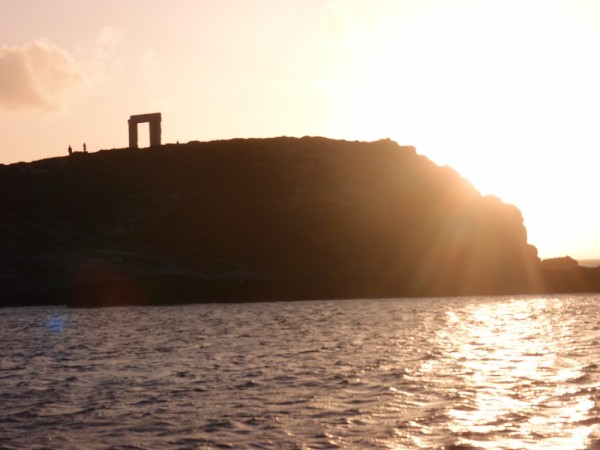 |
Some photos we took on Naxos in late April and early May 2014.
31 Photos
Created 4 May 2014
|
 |
We visited Thira by ferry on 25 and 26 of April 2014.
28 Photos
Created 28 April 2014
|
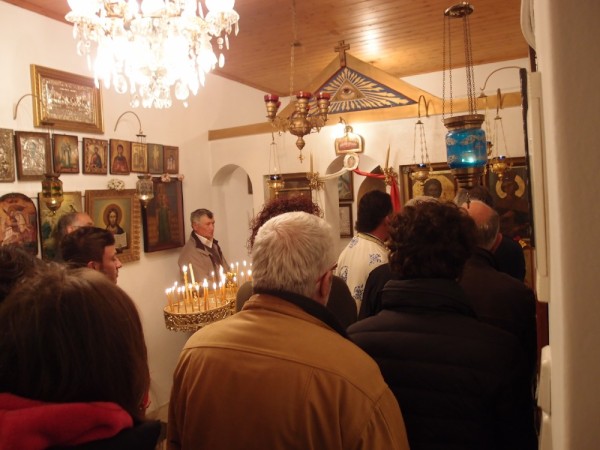 |
Some snaps from the Easter celebrations in Loutra, Kythnos
20 Photos
Created 23 April 2014
|
 |
Some photos leaving Lavrio and walking around Loutra, on Kythnos, in April 2014
25 Photos
Created 19 April 2014
|
 |
 |
We visited Loutra on the island of Kythnos from November 27 until Decmber 6, 2013 and sat out a week of gales and storms. Lovely people, port and island.
15 Photos
Created 14 December 2013
|
 |
 |
Maiden voyage of Clio, from Alimou marina in Athens to Poros island.
10 Photos
Created 24 November 2013
|
 |
Photos taken when we were looking for (and found) a boat in the Meds.
16 Photos
Created 2 September 2013
|
Clio
Who: Christine and Francis
Port: Brisbane, Australia
Gallery