Table of Contents
Links
- Skipper's Profile
- The Small Ship "Iris"
- Wauquiez Centurion 32 (new)
- Wauquiez Centurion 32 (old)
- Centurion 32 blog
- Wauquiez Shipyard
- Wauquiez Forever
- Wauquiez Amphitrites & Amphoras
- Wauquiez Boats Yahoo! Users Group
- Wauquiez Owners Yahoo! Users Group (french)
- Wauquiez Owners Group on Sailblogs
- Wauquiez forum on SailNet
- Wauquiez Info (USA)
- #015 "Baboonty"
- #022 "Taol-Heol"
- #122 "Royana"
- #190 "Viva Binga"
- #197 "Oceanos"
- #??? "Kornog"
- #20? "Spartina"
- #2?? "SY Pyxie", electric engine
- #244 "Winnibelle", crossed single-handed the Atlantic!
- #284 "Kyra"
- #2?? "Supimania"
- #297 "Tobago"
- #320 "Iris", this site
- #321 "Le Hibou"
- #336 "Helios"
- #340 "Diamba"
- #341 "La Cecilia II"
- #343 "Merkan"
- #362 "Altair"
- Wauquiez Amphitrite Trotamar III, circumnavigator neighbour at Port Ginesta
- Spyrit Boats: spare parts for Wauquiez models
- El reto de Luis Miranda: la vuelta el mundo en un Puma 26
- Sonamar
- Amici di Antiope
- Canyelles Diving, Lloret de Mar
- Port Ginesta
13 July 2005 | Barcelona, Port Olimpic
22 June 2005 | Barcelona, Port Olimpic
22 June 2005 | Barcelona, Port Olimpic
22 June 2005 | Barcelona, Port Olimpic
16 May 2005 | Barcelona, Port Olimpic
New home port and new skipper!
09 February 2019 | Garraf
Tom
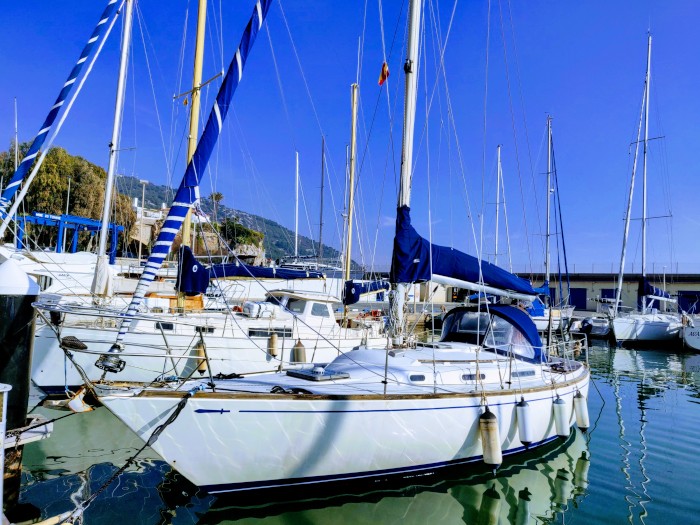
Today we sailed Iris a few miles up from Sitges to the marina of Garraf, a cozy and quiet little port that will be her new home for the coming months, awaiting the arrival of a new skipper.
Update 13/3/19: As of today Iris is in the good hands of her new skipper, Fabrice. She'll probably be baptized "Saudade" from now on, but will stay in the Garraf marina and fly the belgian flag.
I wish Fabrice fair winds and much enjoyment.
For my part, this is where this blog ends...
All the best.
Tom.
Yearly haulout
18 April 2015 | Port d'Aiguadolç, Sitges
Tom
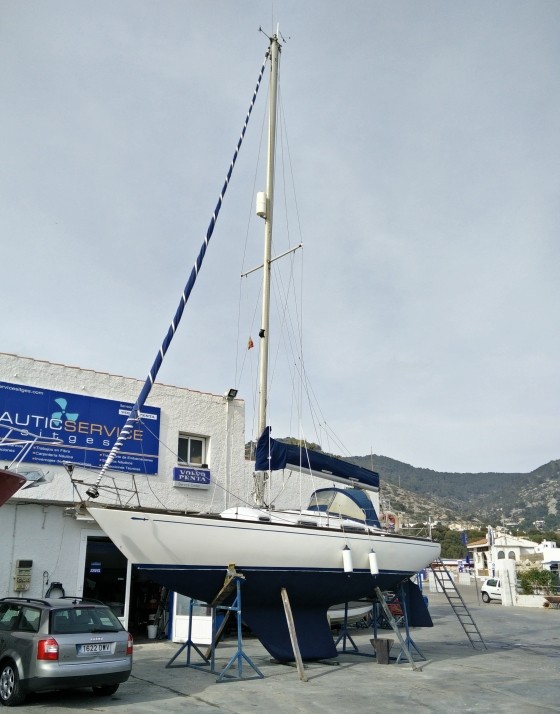
This weekend was again a race against time, getting Iris on the dry, cleaning and sanding her hull and giving it two coats of antifoul paint. She looks nice again and ready for the season.
A recent photograph...
08 November 2014 | Port d'Aiguadolç, Sitges
Tom
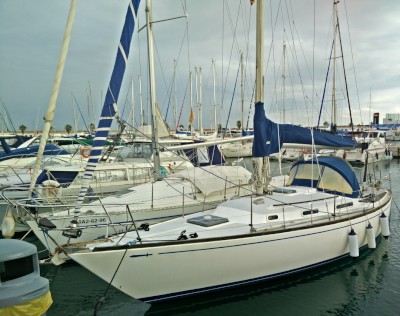
Just taking advantage of my neighbour being out at sea to take a nice picture of Iris...
Centurion 32 chainbolt overhauling
03 November 2014 | Port d'Aiguadolç, Sitges
Tom.
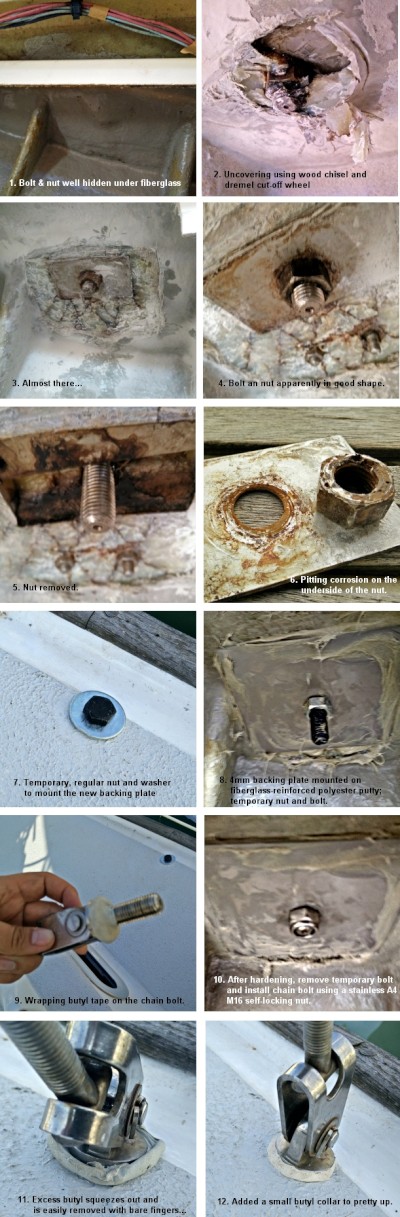
The Centurion 32's chainplates (chainbolts in this case), used to fasten the shrouds, are a known weak point in its construction. Apparently they are fastened with a nut of an inferior quality stainless steel. As a consequence after 40 years of duty in a marine environment these nuts show pitting and sometimes they even break alltogether. Additionally the chainbolts are held with a backing plate smaller tan recommended. Hence, I've started this long-postponed replacement project. The past two Sundays I've dedicated to tackling the first of six chainbolts/nuts: the one situated on starboard behind the little head locker. Tackling one shroud a time, there is no need to unmast. The pictures above show the process.
1. After removing the toilet locker, which is easily done unscrewing few screws, the underside of the deck can be accessed. The chainbolts and nut are well glassed in and can just be recognized as a small bump in the smooth glassed surface (centre of picture 1). The glassing-in of these bolts was merely done for aesthetic purposes and has little or no structural or watertightness end. Hence the glass fiber cover can be broken without fear. To better acces the working area, I cut out a piece of the white gelcoated slat (across the picture) which is not structural either and is invisible behind the toilet locker. Now the hard work could start.
2. 3. 4. To remove the fiberglass covering I used a pair of wood chisels and a dremel-like tool with a cutting disk, and a lot of patience and sweat. Little by little the nut and backing plate started appearing. As can be seen in picture 4, in the back also appeared two small screws holding the boats teak toerail. These two unexpected guys would rather complicate the installation of the new backing plates. On the other hand, at first sight the revealed nut appeared in quite good shape. Anyhow, I had to stop working at this point because it was clear that my chainbolts were not the expected M14 size, but rather M16 ones and I had only purchased new 14mm nuts! Most probably the later Centurions were equiped with 16mm chainbolts, a size which was afterwards continued on the Gladiateurs. Beware of this, since on the new centurion32.fr blog only a kit with 14mm nuts is announced.
5. 6. Yesterday I came back with 16mm nuts to finish the job. The next problem was to unscrew the old nut from the chainbolt. I cleaned the threads on the bolt using the dremel tool with a little metal brush and applied some WD40. Then with a large 24mm wrench I started turning and, as expected, chainbolt and nut turned together. Since I was alone on board I had to find a way to block the chainbolt on deck. Luckily the head has a nice openable porthole (I installed in a previous post) through which with my left hand I poked my boat hook (!) and immobilized the chainbolt, and with the other hand I managed to loosen the nut (since the head's the only openable porthole, when it comes to the other 5 chainbolts, I'll have to find another way to keep them stuck). After that, the nut and old backing plate came off easily. The old nut was structurally ok, but as can be seen from picture 6 some pitting had been started to appear. The area under (or should I say above) the backing plate also looked quite deteriorated.
7. 8. I then extracted the chainbolt and cleaned it entirely. In order not to smudge it with polyester putty, in its place I inserted a regular, temporary steel M16 bolt to do the installation of the new 140x160mm, 4mm thick stainless (316) steel backing plate. I applied a generous layer of fiberglass-reinforced polyester putty to create a solid bed for the new backing plate, installed the latter over the temporary bolt, fastened it with a temporary nut, and let it harden...
9. 10. 11. 12. After about an hour I removed temporary bolt an nut and prepared the chainbolt for watertightness. I opted for butyl tape which is a malleable rubber that never hardens or ages. It can be applied with bare hands, is very clean and doesn't smudge. It can also be removed anytime without problem. A great tutorial on this material can be found here. I slightly countersunk the hole, wrapped a generous amount of butyl around the upper part of the chainbolt and inserted it in the hole. Underneath I screwed on one of the new stainless steel (A4) M16 self-locking nuts and fastened it. Doing so the butyl is pressed inside the countersunk hole and and the excess is squeezed out without breaking, leaving a perfect seal under the bolt head. With my fingers I scratched away the excess butyl and afterwards laid a little butyl collar around the chainbolt to tidy up. That's all. All together quite some job, and I guess I'll leave the other five chainbolts for sometime in a not too far future.
Flying the Belgian Flag
28 August 2014 | Port d'Aiguadolç
Tom
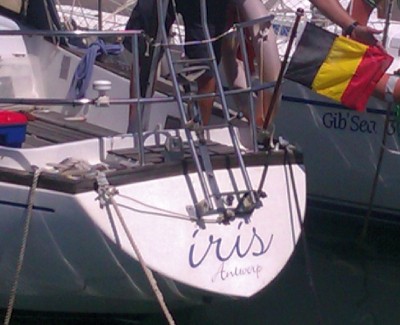
A recent change in Spanish legislation has eliminated the requirement for residents to register their boats under Spanish flag. Therefore, as a Belgian citizen, I have taken the opportunity to register Iris under Belgian flag. As a matter of fact you see a lot of Belgian flags appearing in Spanish marinas since even Spanish skippers are changing flag because of the many advantages of flying the Belgian one. Among these advantages is that I'm allowed to sail all over the world (no more permitted navigation zones depending on safety equipment and certifications), no more ridiculous and expensive 5-yearly 'technical vehicle inspections', no more need to hire expensive authorized equipment installers if I buy a new GPS, etc. In short, less money and less rules.
Also, the "séptima" (7th) suffix has been dropped from the boat's name and Iris is now again just called "Iris". According to Belgian rules the name of a ship's home port is to be written on the transom. Being free to choose whatever city, I chose my home town "Antwerp".
Also, the "séptima" (7th) suffix has been dropped from the boat's name and Iris is now again just called "Iris". According to Belgian rules the name of a ship's home port is to be written on the transom. Being free to choose whatever city, I chose my home town "Antwerp".
| Vessel Name: | Iris |
| Vessel Make/Model: | Wauquiez Centurion 32 |
| Hailing Port: | Port d'Aiguadolç (Sitges) |
| Crew: | Tom Creemers |
Gallery not available
Table of Contents
Links
- Skipper's Profile
- The Small Ship "Iris"
- Wauquiez Centurion 32 (new)
- Wauquiez Centurion 32 (old)
- Centurion 32 blog
- Wauquiez Shipyard
- Wauquiez Forever
- Wauquiez Amphitrites & Amphoras
- Wauquiez Boats Yahoo! Users Group
- Wauquiez Owners Yahoo! Users Group (french)
- Wauquiez Owners Group on Sailblogs
- Wauquiez forum on SailNet
- Wauquiez Info (USA)
- #015 "Baboonty"
- #022 "Taol-Heol"
- #122 "Royana"
- #190 "Viva Binga"
- #197 "Oceanos"
- #??? "Kornog"
- #20? "Spartina"
- #2?? "SY Pyxie", electric engine
- #244 "Winnibelle", crossed single-handed the Atlantic!
- #284 "Kyra"
- #2?? "Supimania"
- #297 "Tobago"
- #320 "Iris", this site
- #321 "Le Hibou"
- #336 "Helios"
- #340 "Diamba"
- #341 "La Cecilia II"
- #343 "Merkan"
- #362 "Altair"
- Wauquiez Amphitrite Trotamar III, circumnavigator neighbour at Port Ginesta
- Spyrit Boats: spare parts for Wauquiez models
- El reto de Luis Miranda: la vuelta el mundo en un Puma 26
- Sonamar
- Amici di Antiope
- Canyelles Diving, Lloret de Mar
- Port Ginesta