Kaimusailing
s/v Kaimu Wharram Catamaran
| Vessel Name: | Kaimu |
| Vessel Make/Model: | Wharram Custom |
| Hailing Port: | Norwalk, CT |
| Crew: | Andy and the Kaimu Crew |
| About: | Sailors in the Baltimore, Annapolis, DC area. |
17 April 2024 | St Marys, GA
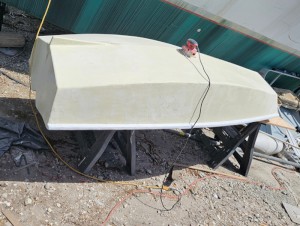
Dinghy Skeg
I was suffering with what seemed like a cold and also had allergy symptoms. I awoke and felt fine. The green pollen that was coating everything was gone. Maybe it will return.
07 April 2024 | St. Marys, GA
Clammy Hands
Items came in from TEMU, the Chinese cut rate retailer. One was a nice little drone that cost about twelve and a half dollars. It looked like an easy thing to play with while I coughed and sneezed. I was fighting a summer cold, even though it is not summer elsewhere, it seems like it here. A nice [...]
02 April 2024 | St. Marys, GA
Sun Doggie
After laminating the cedar strips onto the gunwales of the dinghy I found the screws I used wouldn’t come out. The epoxy had seized them. The screw heads were stripped so I cut a straight slot in the heads with the cut off wheel. The cedar smoked when the screw heads got red hot. I could remove [...]
21 March 2024 | St. Marys, GA
Just Add Water
The rainy weekend started off with overcast and fog but no rain. It looked like I might be able to get something done on the D4 dinghy. I wanted to change the bow seat which is really the bow deck. The sailing option uses the deck to hold the freestanding mast. I didn’t like how the deck looked, [...]
01 March 2024 | St. Marys, GA
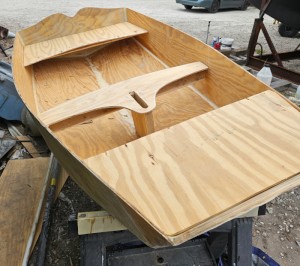
D4 Dinghy Alternative Seats
The rain event was more wind than rain, strong winds with gusts up to 44 mph. We drove into town to see what the harbor was like. There was a small sailboat that had dragged anchor and was sitting close to shore. The tide was out. We left and played with Bleu at Notter’s Pond.
23 February 2024 | St. Marys, GA
D4 Inside Seams
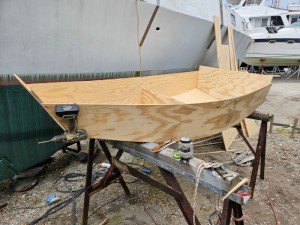
Day two of the dinghy build started out with me finishing wiring the hull bottoms together on the centerline of the bottom panels. This was much easier than the wiring of the chine edges of the bottom panels and the side panels.
#1 Beam Pt II

.
The beam covers were removed and the existing beam was measured. It was almost exactly the same size as #4 beam. The old #4 beam was used as a work table to begin laminating the new #1 beam.
.
This time we are dispensing with the “X” beam construction and making a simple rectangular cross section beam. It will result in a beam that's 20 per cent heavier, but much simpler to build. Cutting scarf joints with a saw was tedious and resulted in a lot of remedial carpentry to clean up the joints. The technique of attacking the ends of planks with a power planer worked very well and resulted in a quick and perfect scarf joint.
.
It was easy. To make a scarf joint in a 1 inch thick plank, a mark was made 10 inches from the end of the plank. An old off cut of a scarf joint was clamped to the plank to provide a sort of ramp right at the 10 inch mark. This old off cut could be the end of a plank with an existing scarf joint on it. It is not only a visual aid, it helps in the final few sweeps of the plane to ensure the correct angle is maintained. A scarf bevel can be made without this guide by marking the correct 10:1 bevel on the side of the plank and planing to it carefully. With the guide, the butt of the plane will ride down the guide and prevent the plane removing any wood when the front of the plane is riding down the new scarf joint. When the plane blade finally contacts the wood, it will be closer to the end of the plank and only take a thin layer off, increasing as it gets to the end, right up to the full thickness the planer is adjusted to. This way more and more wood is planed off the end of the scarf joint and its angle gets progressively closer to the angle of the guide. Finally the last few swipes of the plane can be done at a reduced thickness by adjusting the plane and carefully correcting any errors that might cause a twist of the surface.
.
The scarf joint is finally cleaned up with a right angle grinder with a flap disc if there are any really bad whoop-de-do's in the surface, otherwise a clean up with the belt sander will ensure a perfectly fair and flat scarf joint.
.
The planks were organized as to how straight and fair, and the result is 2/3's of the planks were perfect, and the rest were various amounts of twist or bend. Beginning with the fairest, the first two planks were scarfed on one end and the rest scarfed at both ends.
.
The plan was to lay down two side by side laminations on the old beam, with plastic to keep separation from the beam and each other. Because these were fair planks, 3 layers of lamination could be laid down without clamping, using only air nails to fasten the planks together while the glue set up. It is necessary to shoot nails into the scarf joint to prevent the tendency of the planks to slip apart under pressure.
.
The two laminations are only 3 inches thick which will allow clamping to them using the many 4 and 6 inch clamps available. The two laminations are removed from the beam and the nail ends are clipped and ground off. The relatively unfair remaining planks can be carefully laminated on and straightened with clamps and then air nailed. The original surfaces of the laminations that were facing the old beam are left as is without any new laminations. All the layers are added to the other side. After all the laminations are complete, the two half-beams are glued together face to face using pipe clamps. That is the plan, anyway.
.
The reality was disaster from the get go. When I removed the plastic sheet from the lumber, somehow one of the clamps, now loose due to the lumber drying and shrinking slightly, got caught in the plastic, did a 1 + ½ gainer, fell into the Bodkin. Grrrr. Then the other clamp on the other end waltzed off into the drink, kerplunk. I scrambled to prevent anything else from falling in, but a couple of planks wrestled free and plunged into the unholy waters of the Bodkin. It is remarkable how difficult it is to capture a board with a boathook. By fishing with the high strength magnet on a string, the two clamps could be lifted out.
.
The scarf joint technique did work as planned, and I mowed through several bevels, creating an ever growing mound of wood chips, sawdust, and shavings. I began to figure out how much time each bevel took, then extrapolated how long it would take for all 32 of them. Hmm not today, maybe I'll be finished in a week. The valiant Harbor Freight planer, on sale at about $35, ran astonishingly well, until, there was a slight hiccup, then it ground to a halt. It would only run now at a much slower speed, grumbling along. Toast. I took a look at it. The sawdust had clogged the plastic vents that allowed the overstressed Chinese motor to cool. I still had the packaging and tried to make it look like the tool hadn't been abused.
.
It was possible to find the original receipt using archeological dig methods to find it. This is the secret to finding things, don't try to organize them, you'll never find them again. Let's see, about 5 weeks down in the pile, yes, there it is.
.
Then it's off to the Harbor Freight store, with a side trip to the wine store, which is right on the way, plus a stop at the gas station so we don't end up only halfway there. The Harbor Freight people are great, a quick replacement and in the first 90 days no questions are asked, just bring it in with a receipt.
.
The picture is of scarf bevels, 10:1, made with the planer and a belt sander.
