Kaimusailing
s/v Kaimu Wharram Catamaran
| Vessel Name: | Kaimu |
| Vessel Make/Model: | Wharram Custom |
| Hailing Port: | Norwalk, CT |
| Crew: | Andy and the Kaimu Crew |
| About: | Sailors in the Baltimore, Annapolis, DC area. |
17 April 2024 | St Marys, GA
Dinghy Skeg
I was suffering with what seemed like a cold and also had allergy symptoms. I awoke and felt fine. The green pollen that was coating everything was gone. Maybe it will return.
07 April 2024 | St. Marys, GA
Clammy Hands
Items came in from TEMU, the Chinese cut rate retailer. One was a nice little drone that cost about twelve and a half dollars. It looked like an easy thing to play with while I coughed and sneezed. I was fighting a summer cold, even though it is not summer elsewhere, it seems like it here. A nice [...]
02 April 2024 | St. Marys, GA
Sun Doggie
After laminating the cedar strips onto the gunwales of the dinghy I found the screws I used wouldn’t come out. The epoxy had seized them. The screw heads were stripped so I cut a straight slot in the heads with the cut off wheel. The cedar smoked when the screw heads got red hot. I could remove [...]
21 March 2024 | St. Marys, GA
Just Add Water
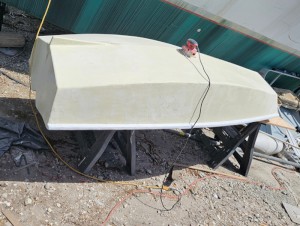
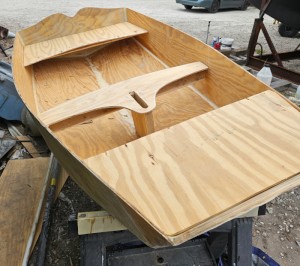
The rainy weekend started off with overcast and fog but no rain. It looked like I might be able to get something done on the D4 dinghy. I wanted to change the bow seat which is really the bow deck. The sailing option uses the deck to hold the freestanding mast. I didn’t like how the deck looked, [...]
01 March 2024 | St. Marys, GA
D4 Dinghy Alternative Seats
The rain event was more wind than rain, strong winds with gusts up to 44 mph. We drove into town to see what the harbor was like. There was a small sailboat that had dragged anchor and was sitting close to shore. The tide was out. We left and played with Bleu at Notter’s Pond.
23 February 2024 | St. Marys, GA
D4 Inside Seams
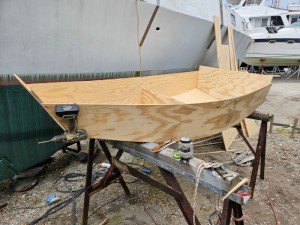
Day two of the dinghy build started out with me finishing wiring the hull bottoms together on the centerline of the bottom panels. This was much easier than the wiring of the chine edges of the bottom panels and the side panels.
Reassembly

.
The beam caps were bolted on. This took 1 ½ days. Although the beams were tight, they were the same dimensions as the old beams, which were tight. The final tightening, with porta power and 4 tons of pressure, was accomplished with long bolts in the beam cap screw holes, tightened as far as I could by hand, then either trying to thread the aviations bolts, old style, without any washers. The new style is hex drive but just a tiny bit shorter, so no good for the first grab. The tightening of the aviation bolts would deform everything else and bring the caps and brackets close to each other. Then a bolt could be tried with a locknut. Eventually the beams were completely seated in the bracket.
.
Next the temporary support of the forward part of the foredeck was tightened to bring the foredeck up even with the new beam. I learned from trying to drill the bolt holes for beam #4 that the larger drill bits took forever to eat their way through the beam. This time I found some tubing that would fit the bolt holes in the crossdeck frame. Then I found a drill bit that would just fit inside the tubing and drilled pilot holes for each of the 4 bolts that pass through the beam. An intermediate size bit was used to follow the pilot holes and enlarge them. The final drill bit, large enough for the bolts, is too large to pass through the crossdeck frame without tearing up the aluminum, so drilling was completed from the other side of the beam, carefully stopping the drill before it would meet the frame. The last hole was left undrilled. This is one of the two near the middle of the beam and they allow bolts to pass through the crossdeck frame, through the beam, and then through the end of the bow tube ramp. To ensure everything lined up OK, this final hole was marked with a punch through the ramp while the other bolt hole had a pin in it to line it up, as drilled. Then the final hole was drilled.
.
This process of reattaching the foredeck and bow ramp, which really consisted of only 4 bolts, took all day. Then a rain forecast put all the tools and gear away and I could take a rain day. Whew!
.
The rain never really materialized, so I ended up finishing the bolts, putting on nuts, but then it turned out the two bolts going through the bow ramp were slightly out of line, and no amount of banging would get them all the way through. I tried one, then backed it out, and tried another. I could only thread one in at a time, and the bolts threaded through 7 inches of beam and crossdeck frame, so drawing them out was an ordeal.
.
The solution to the problem of bolts not in line came from the original Wharram plans, he doesn't bolt right through the beam, but uses lag bolts for each fitting. I used a pair of stout bronze bolts and colloidal silica in epoxy to complete the bow ramp bolts. The problem of bolts working loose is not a problem, the problem is if I could ever extract the bolts, if ever.
.
The old beams were moved off onto the dock for their new use which might be to strengthen the dock or create a new finger. The anchor chocks were remounted on the new beam. The sail track for beam #4 had to be straightened due to bends caused during its removal. It was forced back into shape using portable power.
.
The sail track is in two halves, one 8 feet long and the other 10 feet. The car that rides on the sail track will lose its marbles, ball bearings, if it isn't mounted on the track. It has been mounted on the 8 foot track with stopper bolts through the track to prevent the car from riding off and losing its marbles. The 10 foot track was the one that required straightening and was the first to be reinstalled.
.
Here is the check off list for track installation:
.
measure bolts and track and spacers, mark drill bits for proper depth
.
line up track using beam covers in place
.
temporary screw track in place at ends
.
drill large bit to desired depth using track as guide
.
remove track
.
drill small bit to desired depth
.
vacuum drill holes to remove debris
.
mix epoxy with graphite
.
fill holes with epoxy mix
.
screw in bolts through track, spacers, into holes.
.
clean excess epoxy
.
The holes are carefully drilled to a depth less than the length of the bolt using the larger drill, just a bit larger in diameter than the bolt. Then a smaller bit is used to drill the hole deeper just a bit longer than the bolt. The smaller bit is chosen carefully to match the bolt so that it can be screwed into the bottom of the hole and hold the track in position while the epoxy mix solidifies around the rest of the bolt. The mix is made with 10% graphite which comes out looking like black paint and makes as big a mess as 5200. The epoxy has the same strength as usual, but the graphite allows the bolts to be removed, I hope.
.
After the first longer, straightened, length of track was screwed down, it was left to set up for the second length the following day. The shorter second length of track had the mainsheet car on it, so it was temporarily mated with the installed track and the car was “driven” over onto the installed track. The car was secured and the shorter track section was installed in the same manner as the longer one. Just before beginning to drill the bolt holes I counted the remaining bolts and found we were 3 short. After some searching and trying to remember back when I purchased replacements for the removed bolts that were unusable, I recalled buying them at West Marine and being happy that the package was almost the perfect amount and had one more than needed. Although I had counted up the damaged bolts, there were two damaged bolts still embedded in the old beam, so I really needed two more than what I counted. I reordered a package of bolts from West Marine, free shpping to store.
.
The swimming ladder was moved from the dock to its position mounted to beam #4 and its hoist at the rear crosstube. It was moved by loading it on the inflatable dinghy and moved into position, then brought up to the beam and crosstube, holes marked for lag screws, drilled, and mounted using silicone to bed the lag screws. The photo is of the ladder being hoisted into position.
