Kaimusailing
s/v Kaimu Wharram Catamaran
| Vessel Name: | Kaimu |
| Vessel Make/Model: | Wharram Custom |
| Hailing Port: | Norwalk, CT |
| Crew: | Andy and the Kaimu Crew |
| About: | Sailors in the Baltimore, Annapolis, DC area. |

17 April 2024 | St Marys, GA
Dinghy Skeg
I was suffering with what seemed like a cold and also had allergy symptoms. I awoke and felt fine. The green pollen that was coating everything was gone. Maybe it will return.

07 April 2024 | St. Marys, GA
Clammy Hands
Items came in from TEMU, the Chinese cut rate retailer. One was a nice little drone that cost about twelve and a half dollars. It looked like an easy thing to play with while I coughed and sneezed. I was fighting a summer cold, even though it is not summer elsewhere, it seems like it here. A nice [...]

02 April 2024 | St. Marys, GA
Sun Doggie
After laminating the cedar strips onto the gunwales of the dinghy I found the screws I used wouldn’t come out. The epoxy had seized them. The screw heads were stripped so I cut a straight slot in the heads with the cut off wheel. The cedar smoked when the screw heads got red hot. I could remove [...]

21 March 2024 | St. Marys, GA
Just Add Water
The rainy weekend started off with overcast and fog but no rain. It looked like I might be able to get something done on the D4 dinghy. I wanted to change the bow seat which is really the bow deck. The sailing option uses the deck to hold the freestanding mast. I didn’t like how the deck looked, [...]

01 March 2024 | St. Marys, GA
D4 Dinghy Alternative Seats
The rain event was more wind than rain, strong winds with gusts up to 44 mph. We drove into town to see what the harbor was like. There was a small sailboat that had dragged anchor and was sitting close to shore. The tide was out. We left and played with Bleu at Notter’s Pond.

23 February 2024 | St. Marys, GA
D4 Inside Seams
Day two of the dinghy build started out with me finishing wiring the hull bottoms together on the centerline of the bottom panels. This was much easier than the wiring of the chine edges of the bottom panels and the side panels.
Mast and Crossbeam Pt II
.
I am looking at any used rigging wire that is in good condition and will fit this mast. The attachments to the mast are sockets and the wire terminations have semicircular ball fittings on them. The wire passes through the socket and the terminating ball stops at the socket. The other end of the wire is terminated in a stud which is threaded rod that screws into a turnbuckle, or rather the turnbuckle screws onto the stud. In the case where we are making up a new rig with these old parts, mechanical stud terminations are used. These clamp onto the wire with a teardrop shaped slug in the middle of the wire. It is a very strong connection and the wire can be cut to size while the mast is temporarily held in position.
.
I finally cut off the excess on the crossbeam and then prepared the surface of the planks to glue up a double row of 2X4's by adding another layer to what was already glued up. This went quickly and used about 12 oz. of epoxy including the thickened second layer. I had not been feeling well the past couple of days so it was good to get some work done. Perhaps I am coming down with the flu.
.
I had taken a trip with Radio Bill up to Brunswick and met James Baldwin, not the author, but a guru of Pearson Triton sailboats. He was doing a beautiful job of restoring a Triton for a client. We also visited the marina on Lanier Island where there we more Tritons. The owners flock to Brunswick to get advice, help, and maybe skilled labor from Baldwin.
.
I have been working on ideas as to the installation of the new solar panels. The panels are long and narrow with opposite polarity wiring at the ends. Thus, I could easily wire them in series, putting a minus end between two plus ends. The open circuit voltage would then be around 60 volts and at the maximum power point around 53 volts. This is ideal for an MPPT charge controller. Also the higher voltage reduces the amount of current for a given wattage, so smaller wires can be used. Finding a good bang for the buck charge controller isn't easy. The cheap Chinese units are wildly inaccurately described. MPPT controllers turn out to not be MPPT, but PWM, or even worse. The PWM's just measure out the panel voltage at the same voltage as the batteries, so the panels are not operating at their rated wattage which is taken somewhere around 17.5 volts. MPPT controllers accept current from the panels and constantly compute the actual power, current times voltage, and keep it at a maximum. They release current to the batteries at the batteries' voltage, so if you had 175 watt panel you would draw about 10 amps from it, then the battery would receive 175 watts and that would be about 14 1/2 amps. That's almost half again as much as the cheap controllers put out.
.
I have been using Sunsei PWM controllers and it is an attractive system and I understood the limitations but had upgraded from the old original panels of 45 watts each to panels of 172 watts each, so I wasn't too concerned about losing some wattage due to the charge controllers. Now I would like to optimize the wattage without paying hundreds of dollars for charge controllers.
.
The chinese charge controllers have improved over the past few years and some of them are reliable and effective. I was almost sold on a very cheap controller that would manage 20 amps and it only cost about $30. I would have installed four of them to replace the two Sunsei PWM's. Then I found updated reviews and tests that showed while the cheap controllers did appear to work properly, they would over a period of time drift into a state where they were performing very poorly. It seems you have to spend at least $125 to get a good controller and of course there are many that are much more expensive.
.
There is a fellow on YouTube named Adam Welch who has posted some very good videos of solar charge controller performance. He puts metering devices on the input to the controller from the panels and on the output of the controller to the batteries. He can compare what the controller is doing to what the manufacturer is claiming, also he can see if the controller's display is showing correct numbers for electrical parameters.
.
Early the next morning I went ashore and did some planing and sanding of the double 2X4 core of the new crossbeam. It is basically a 4X4 and these are rough sawn planks so there were irregularities, but eventually it started looking like a straight 4X4 stick 18 feet long. The next step was to start laminating 2X6's that have been ripped down to just less than 5" width. These are ten foot planks and I could have just scarfed together a pair of them to cover the 18 foot length, but then all the scarf joints would be in the middle of the beam. No no. So I am making one layer two planks with the scarf somewhere in the middle of the beam, and then making the sister plank with a long plank in the middle of the beam and two scarf joints toward the ends of the beam. There will be two layers of these planks top and bottom of the beam. The top layer and the bottom layer will be laminated similarly.
.
On the boat, this #4 beam has the 18 foot main traveler track running across from starboard to port. The old beam failed when the forces on the track started lifting the top of the beam from the bottom. The previous builder had already made beam covers and left a gap for the main traveler car to slide the full length of the beam. The beam covers protect all the big bolts and attachment points of the beam to the hull as these were a source of water accumulation and rot in the earliest of the Wharram boats. Wharram didn't envision someone putting a full width traveler track running all the way from port to starboard on the #4 beam, be would not have liked that. It ended up that the beam covers were damaged and never really worked the way the designer intended. Wet leaves and crap could come into the beam trough through the gap made by the traveler track, plus the beam cover was now in two halves, a forward part and an aft part, with really no way to support the edges of the gap over the beam where the traveler track came through. If someone stepped on the beam cover, it would damage it, and also it would obstruct the traveler car, so why have that traveler track go all the way across?
.
Why have the traveler track at all, unless to give Harken and Co. additional funds for the expensive track, car, and lots of line to control it all. Some of the smaller Wharrams have evolved a much simpler, nicer, and effective mainsail control that I will adopt from here on out. It is simply a multiple purchase, maybe triple blocks, going to the attachment on the boom and anchored to either side of the boat. You can pull the boom in with one and by hauling in on the other, the boom is brought down and that satisfies the downhaul of the main traveler. The boom can be positioned just about anywhere, plus it automatically gives a preventer, the boom can't gybe unexpectedly and set off on a big swinging strike at the lee shrouds. I will be buying some expensive blocks to set it up, but I already have offers for the old track and car.
.
I pop riveted the halyard winches to the new mast, that is, I blind riveted them. The rivet tool from Harbor Freight had worked well even just about a month ago when I was ripping the boom apart, then pop riveting it back together with 1/4" stainless pop rivets. These require a great deal of pressure to snap them in place and I expect to be having extra ibuprofen the next day. But this time the tool wouldn't grip the rivets and the shank of the rivet which is just a piece of wire with a bulb on the end, would slide down inside the rivet and disappear inside the boom. Of course what was left, the body of the rivet, was distorted enough to be impossible to remove, but probably not strong enough out at sea to keep things together.
.
The boatyard has a lot of stuff going on all around and even though it is a holiday there are many people in the yard getting at their projects. Probably some of them have extra time off from their day jobs and can invade the boatyard and try to compete in the melee. It happens that my new mast sits next to another of the same manufacture and I've already been in touch with the valiant folks who are wrestling with it. We are kin. But they brought more kin, a young mother and baby, to inspect their project while I am attacking bad blind rivets, prying them up and cutting them down with an angle grinder with a cut off wheel. Big sparks and grit. Even one of those stainless steel rivets goes away quickly when hit with superior power. But I had to relent and warn them what might happen if the baby got hit with molten metal. Then the rivet was gone, damn it, and a few whacks of a hammer on an old screwdriver knocked it into the mast, and I was ready to try another.
.
Going through the next week it will be gluing crossbeam laminations together and getting the mast ready. The boatyard is working at getting the big crane operational. When the crane is ready we will be ready to haul out and replace the beam and step the mast, good to go.
.
Back up to Brunswick with Bill and I borrowed his car to get a haircut, deposit some checks, and shop at Harbor Freight. All successful. Back at James Baldwin's place the wind was howling with some rain and they were struggling with a Sail Rite sewing machine. They had finished bending tubes for a new Bimini top and now were preparing the sewing machine to stitch the Sunbrella fabric for the top. Soon we were on our way back to St. Marys and stopped at Luigi's for pizza, a dinner treat for Bill and his loan of the car.
.
I told him of my rowing in a gale in Connecticut out to my boat on a mooring and our conditions were similar, high winds and rain, but back in the boatyard it let up and I rowed out. The wind was still brisk but the rain may have stopped completely. I zigged and zagged looking for the boat in the dark, then scooted aboard and stowed my stuff. It was only 7:30 but seemed much later.
.
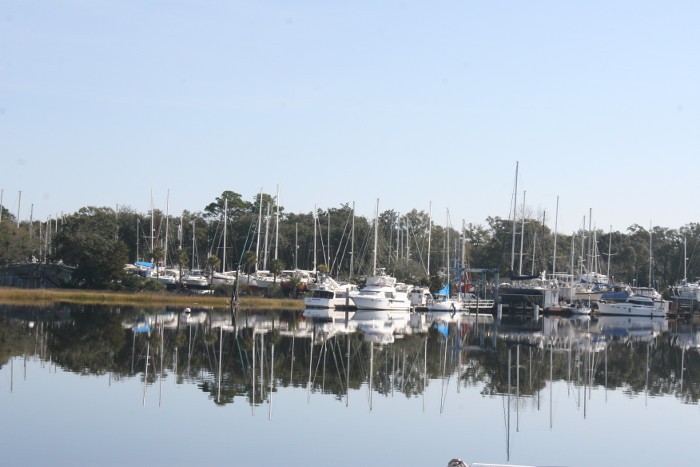
The photo is of the boatyard from Kaimu at anchor.
