Kaimusailing
s/v Kaimu Wharram Catamaran
| Vessel Name: | Kaimu |
| Vessel Make/Model: | Wharram Custom |
| Hailing Port: | Norwalk, CT |
| Crew: | Andy and the Kaimu Crew |
| About: | Sailors in the Baltimore, Annapolis, DC area. |

17 April 2024 | St Marys, GA
Dinghy Skeg
I was suffering with what seemed like a cold and also had allergy symptoms. I awoke and felt fine. The green pollen that was coating everything was gone. Maybe it will return.

07 April 2024 | St. Marys, GA
Clammy Hands
Items came in from TEMU, the Chinese cut rate retailer. One was a nice little drone that cost about twelve and a half dollars. It looked like an easy thing to play with while I coughed and sneezed. I was fighting a summer cold, even though it is not summer elsewhere, it seems like it here. A nice [...]

02 April 2024 | St. Marys, GA
Sun Doggie
After laminating the cedar strips onto the gunwales of the dinghy I found the screws I used wouldn’t come out. The epoxy had seized them. The screw heads were stripped so I cut a straight slot in the heads with the cut off wheel. The cedar smoked when the screw heads got red hot. I could remove [...]

21 March 2024 | St. Marys, GA
Just Add Water
The rainy weekend started off with overcast and fog but no rain. It looked like I might be able to get something done on the D4 dinghy. I wanted to change the bow seat which is really the bow deck. The sailing option uses the deck to hold the freestanding mast. I didn’t like how the deck looked, [...]

01 March 2024 | St. Marys, GA
D4 Dinghy Alternative Seats
The rain event was more wind than rain, strong winds with gusts up to 44 mph. We drove into town to see what the harbor was like. There was a small sailboat that had dragged anchor and was sitting close to shore. The tide was out. We left and played with Bleu at Notter’s Pond.

23 February 2024 | St. Marys, GA
D4 Inside Seams
Day two of the dinghy build started out with me finishing wiring the hull bottoms together on the centerline of the bottom panels. This was much easier than the wiring of the chine edges of the bottom panels and the side panels.
Houston We Have Compression
.
After removing the 4 portlights from the starboard cabin side, I began cleaning off the flanges of the openings in the cabin side. I used a fiber brush disc in the cordless drill and varied the direction of rotation to brush toward the opening. The fiber disc worked well in cleaning up the silicone from the surface. One opening had been bedded with something else, maybe clear 5200 or a urethane product. It was more tenacious but I could pull on a glob of it and the whole mess would come off. Perhaps it was clear Dow Corning 795.
.
By the end of the work day I had all 4 portlights disassembled, cleaned up, and ready for reassembly and installation. One tool that really made a difference was the multitool with scraper blade. I could run that around the seals of the window panes in just a few seconds, then the frame would come apart. That tool paid for itself on this project.
.
In order to park the Catalina at a marina I need liability insurance and pursuant to that I received a quote from MMIS, who I use for Kaimu’s insurance. I can’t get comprehensive without a survey, but they will issue a liability policy, very reasonable, with the understanding that I will get a survey and comprehensive when the Catalina is ready for a survey. Certainly not with a disassembled gasoline engine.
.
My original plan was to follow the portlight rebedding procedure outlined on the Catalina 30 website. The portlights are removed, disassembled, cleaned of old sealants, then reassembled with the proper plastic channeling and Dow Corning 795 sealant, then the portlights are installed using butyl tape between the portlights and the cabin top. My problem was I couldn’t find my masking tape, so working with the sealant without the tape would produce a horrendous mess. I had the portlights disassembled and ready to go. I decided to dry fit them and see how the plastic channeling and the window frames would work together. I ended up using soapy water to lubricate and I was able to assemble the portlights, but without using the 795 sealant. I doubt they will leak very much without it. It was a very tight fit. I decided to install them like that and see how it worked. If they leaked I could just remove them again. Disassembly without sealant is pretty straightforward.
.
First I put the windows into their openings and then put a couple of pieces of Gorilla tape on the upper corners after adjusting the position. Then I went topside and marked the lower corners of the portlights with a fine point pen. I removed them and sealed the edges of the openings with the 795 sealant. I’m guessing that some of the water coming in from the portlights was coming in from between the hull and the liner. I filled all that gap and used most of a tube of sealant. Then I remounted the portlights with pieces of tape outside, making sure they were aligned with the marks. I ran a generous bead of 795 around the flanges of the portlight frames before mounting them. Down below I began screwing the inside fascia to the frames. Here I found the old frames and beat up fascias were a mess. Some of the screws went in but refused to bite into the well worn screw holes. Some mysteriously seized and the heads broke off. At least I got them assembled acceptably. Let’s see how well they keep the rain out.
.
I will probably not do the port side portlights the same way. I’ll probably remove all the portlights and put in plastic windows mounted externally to the cabin side. It will be easier to do that on both sides than to try to do on the port side what I have done on the starboard side.
.
Now we’ve returned from Crisfield with pizza and other leftover food. CM made a great corned beef stew and a shrimp pasta salad. We spent a fine day on the beach at Janes Island aboard CM’s skiff. I was allowed to steer the little boat and its 25 HP Suzuki Vee Twin outboard motor. It is of the maximum size for that skiff without using a center console. We visited Eve, CM’s artist friend, and her art studio on her front porch. I can see CM is already at a point where she can compare her art to someone who is 20 years her senior, an accomplished artist.
.
Back at the dock on the Bodkin I was eager to see if water had come in through the portlights that had been repaired. It looked like only one was leaking from the seal between the glass and the frame. None seemed to be leaking around the seal between the frame and the cabin side. Maybe I’ll do the port windows the same way.
.
The mandatory liability insurance for SUNSPLASH was quoted and issued by MMIS using Markel as the provider. It is the same firm that does Kaimu’s insurance. The liability is $200 per year with a $75 origination fee. Our dock rent on the Bodkin will run out the end of August, in a few days. I’d like to get my slip at Somers Cove in Crisfield finalized next weekend. I have the parts to continue the work on the engine, but come what may, I will sail down there without an engine if I have to. I’d love to do it.
.
Now we have a thunderstorm and rain and I’m in the cabin, able to see water coming in, if it does. The worst leaker was the forward starboard portlight. It no longer leaks. There is a leak in the next portlight aft, let’s call it #2, the leak is between the glass and the frame. It shows up as water pooling in the frame, then dripping off the aft corner. The aftmost portlight has a leak between the frame and the cabin side, dripping on the 415 gas detector device mounted below the portlight, maybe that’s why it doesn’t work anymore.
.
I continued on the Atomic Four, putting in two more valve springs and resetting the intake valve spring on cylinder #3. It took about 2 hours to do that one. The keepers or collets were not positioned correctly so I compressed the spring and reset them. It is very tedious work. Earlier work on cylinder #4 depressed me so much I quit and had lunch. Then I realized I would have to remove the fuel pump to have any chance of installing those valve springs. When I looked in the repair manual about removing the fuel pump there was no information. It ended up being simple, just 2 bolts.
.
After 1 1/2 days of cruel torture installing valve springs I finally had the last 4 springs installed. Then came valve adjustment which was not at all difficult or tortuous. It was time to put the cylinder head on and check compression. Rust had reformed on the head so I brushed it with the fiber brush disc in the cordless drill. I also redid the surface of the block and vacuumed both to remove any stray particles. The head went on and so did the thermostat, two of the head bolts pass through the thermostat. I torqued them to 25 ft lbs, which is the first step in torquing down the head, then I did a compression check and all 4 cylinders came out the same, but only at 60 psi. My gauge is Harbor Freight and I know that 60 is good, it was the same compression on Jane’s propane outboard, and the same compression on this engine’s #4 cylinder, the only one with compression when I tore it down. The remaining work on the engine involves installing the manifold, carburettor (maybe cleaning that first), exhaust, alternator, and valve cover plate.
.
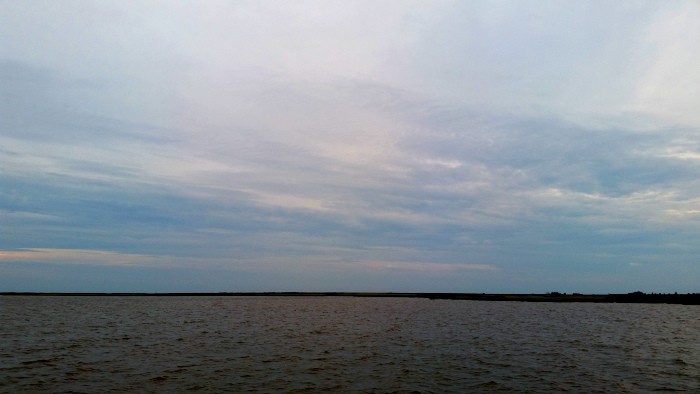
The photo was taken last weekend at Crisfield.
