Adventures of s/v Moor'ea
Documenting the recomissioning of my 1970 Ericson 29 after a long period of neglect
Moor'ea's Mischief

Who: Jay
Port: Sausalito, CA
04 February 2009
03 February 2009
02 February 2009 | Delta
01 February 2009
24 September 2005 | Dissapointment Slough, California Delta
the Atomic 4 Lives Again!
04 February 2009
Engine Overhaul
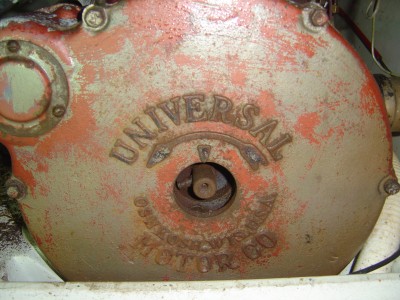
One of the big, important tasks on the plate early on was to get the venerable old Atomic 4 running again. Budget considerations precluded any sort of fancy new diesel engine, so resurrect the Anemic 4 it was!
I had already figured out that there wasn't a useful amount of fuel making it to the combustion chamber, no spark, and no compression in any of the four cylinders. Sweet. I pulled the head and found that all four exhaust valves were stuck (read: rusted) in the open position. I also found a rather disturbing amount of water in the Nº 4 cylinder, as well as a small amount in Nº 3. Once I got into the exhaust section I noticed that the water mixing elbow - which, in normal circumstances, should direct the flow of cooling water down the exhaust pipe into the muffler - was actually on the manifold side. Great. At least I knew why it stopped running in the first place.
So, six months and a whole mess of Pb-Blaster and Marvel Mystery Oil later - not to mention some judicious hammering - the exhaust valves were once again free. The inlet valves weren't too bad to begin with and came out with only minor coaxing. I took the head down to my local machine shop and had the surface milled and had it primed for painting. The block got as much of a work-over as I could give it without actually removing it from the boat. There was a heavy amount of scaling on the water jacket side of the motor, which was taken care of by some of West Marine's "Rust Lock Metal Prep", a sort of purple liquid which converts iron oxide to iron something else, and allowed it to be scraped off, primed and painted. Normally this stuff turns the rusty areas a deep black, but in the case of the Atomic 4 it ended up turning all the rust into a white powder. My guess is that due to the fact that the Atomic 4 was cast in some sort of unique alloy that was supposed to be resistant to corrosion. Given that the motor sat a sailboat that was primarily in salt water for 40 years I think it was doing okay. With a fresh coat of primer and paint, it should be good to go for another 40 years.
Now for the fun part... Putting it all back together.
I became a fan of Moyer Marine, the east coast operation that deals specifically with Atomic 4s. They have a number of parts for sale that are otherwise relatively unobtainable. So, I got a new water jacket side plate, with new and improved water directing technology, new valve cover, water pump overhaul kit (which included a new shaft, impeller and cam), as well as the extend-o-bolt to allow easier maintenance of the pump, new stiffer valve springs, and a carburetor overhaul kit. Oh, and a new oil vent cap. Oh, and a new thermostat and thermostat housing. From West Marine I got all new water hoses, raw water strainer, fuel water separator (the beefy one!), and various fittings to make a rig for flushing the engine from a bucket or dock pressure.
I rebuilt the carburetor with all the spiffy new parts from Moyer, hooked up the fuel and water lines with their respective new goodies, put the (original!) valves back in with the new springs, closed 'er all up and crossed my fingers.
After some fiddling, she fired up! Man, what a fun day that was! Six months, about $1000, lots of cursing, as many bloody knuckles and a few beers was all it took!
Check out the shots here. (unfortunately my camera died around the time that I finished this project so there is no 'after' shot yet)
Here is a list form of the work done to the engine:
• Ignition Coil Replaced
• Plugs/Wires replaced
• Points replaced
• Carb rebuilt
• Thermostat/housing replaced
• all Brass Fittings replaced
• H20 Pump rebulit (new cam, seals, impeller, cam, 'easy' fastener)
• Hoses replaced
• Exhaust mixing elbow replaced
• Head Magna-fluxed, surface milled,
• Valves removed, cleaned, seats lapped, reused
• Valve springs replaced with stiffer springs
• Raw H2O Strainer
• H2O jacket side plate replaced
• new Diverted flow "t" inlet
• Fuel/Water Seperator replaced
• Fuel Shutoff valve installed
• Cleaned, Primed, Painted,
• Oil Changed
OK, here goes. Major Update.
03 February 2009
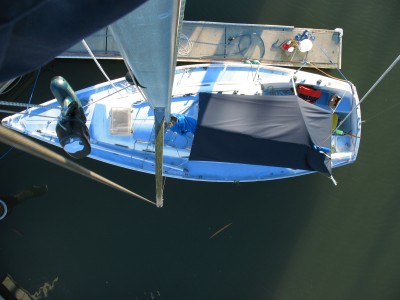
As I've said before, Moor'ea sat for a long while with very minimal care in a relatively harsh environment. Much of the deck hardware was pretty shot, but worked well enough to cruise around the Delta for a spell. The goal, however, is to get the boat prepared for the rigors of San Francisco Bay and the North Pacific Ocean - neither of which are forgiving in the least. So, pretty much every block, line, clutch, cam and jam cleat got removed once I settled in down in Sausalito. This made for a nice blank canvas and lots of options. I also don't really want to have to rely on other humans to go out sailing for an afternoon or weekend, so singlehandability was the priority. I wanted the loads to be light (in terms of how much effort it takes to sheet in a line), so there is a lot of purchase in most control lines. The designs are sort of a hybrid of dinghy and small racing keelboat setups. I also wanted things close at hand so every control line, halyard and the first reef are being led back to the cockpit. With the traveler and double-ended mainsheet already there, the real estate aft on the cabin top went fast! It took months of noodling, doodling and pouring over catalogs until I finally had it figured out...
Meanwhile, I set about taking care of other general tasks that needed attention.
Rigging/Deck Hardware Refit
• Relocate/Reinforce Traveler (see note 1)
• Install Mast Base Blocks (for Gadget Plate)
• Install Clutches
• Relocate Cabin-Top Winches
• Replace, relocate Deck Organizers
• Re-bed Toe-Rail Tracks
• Design, install Cunningham (see note 2)
• Design, install Outhaul (see note 3)
• Design, install Vang (see note 4)
• Replace all Running Rigging (see note 5)
• Replace Mainsheet Cams
• Modify/Install Bow Pulpit (see note 6)
• Modify/Install Stern Rail (see note 6)
General Projects
• Replace Bilge Pump
• Thorough Cleaning (three days worth!)
• Overhaul Top-End of Atomic 4
• Replace LPG Tank & Regulator
• Replace Starting Battery
• Replace Battery Charger
• Inspect Rig (see note 7)
• Replace Mooring gear (see note 8)
• Re-bed Deadlights
• Mount VHF
• Install Stereo
• Refinish Washboards
• Refinish Handrails
SO, I think that just about does it for projects completed thus far. If I think of anything else I will add it to the list. There are still a few major hurtles to be over come, but I think I'll clear 'em.
Outstanding Hurtles
• Replace Spreaders (see note 9)
• Replace Forestay & Tang
• Mount new Range (see note 10)
• Finish Traveler
• Make new Tiller (the previous tiller blew up one night in the delta while dousing sails in a narrow river)
• Make new Forward Hatch (the original one blew away in an 84kt gust during a storm)
Once those few hurtles have been cleared then it should be smooth sailing, literally!
NOTES
1. The traveler had pulled up through the bottom layer of fiberglass one the port side of the deck - my traveler is mounted above the companionway - obliterating the defenseless balsa core. The area was also slightly damp. I dried out what dampness there was and filled the holes with West Systems Epoxy fortified with 404 High Density Filler. I then relocated the traveler 3" forward of its original location. I did this for three reasons: for one there could be the possibility of braining yourself pretty good on it; two I wanted to mount some instruments aft of the traveler over the companionway and felt that there wasn't enough space with the traveler in its original location; and three because I didn't trust the area of the deck where the damage had occurred. So, to avoid a similar event, I proceeded to create epoxy slugs where the fasteners would go through deck. I achieved this by drilling out a 5/8" hole centered where the fastener would be. I used the same concoction of West Systems with 404 and filled the holes I'd just drilled. I like to give epoxy a good cure before I sanding, so I left it to cure overnight and sanded, drilled and fastened the traveler in place the next day, using some Sikaflex 291 FC to bed it down. I'm a big fan of the epoxy slug. All the compression load from the fasteners is transferred to the epoxy from the balsa core, and it spreads out the tensile and sheer loads over a larger area.
2. Cunningham is an 8:2:1 Cascade with 8mm v100 and 6mm Amsteel
3. Outhaul is a 3:1+4:1 Cascade with 8mm v100 and 6mm Amsteel
4. Vang is an 8:2:1 Cascade with 8mm v100 and 6mm Amsteel
5. Halyards are 9.5mm Warpseed, Mainsheet is 9.5mm Salsa Line, and the Traveler is 6mm Sta-Set
6. The boat came sans pulpits and stanchions. I was able to acquire 4 sets of stanchions and bases as well as a Bow Pulpit and Stern Rail from an Ericson 27. Oddly enough they were both too big and required some modification before they would fit correctly. The Stern Rail only needed a minor adjustment to the two forward legs, though none of the legs corresponded to the molded-in mounting pads. The Bow Pulpit, on the other hand, required a bit more effort to coax into place. With some judicial whacking here and there I managed to get the thing to fit onto the factory mounting pads (more critical up forward due to sealing issues with the waffle pattern non-skid), and perhaps even more impressive, I managed to get the fastener holes to line up with the originals, negating the need to fill & drill new ones!
7.. The standing rigging was replaced before the stint in the delta, and saw very little use, and was in a fresh-water environment. Thus, it was not in very bad shape. The forestay needs replacement before any sailing, but the rest will do 'till they get swapped out in the near future.
8. I spent the first 8 months I had the boat on the hook, so ground tackle was an important issue to me. The primary setup is a 16lb Danforth with 50' of 5/16" chain and 250' of 5/8" Megabraid. The stern/lunch hook is an 8lb Danforth with 25' of 1/4" chain and 175' of 1/2" Megabraid. The primary hook will most likely be upgraded to a 25lb CQR for venturing outside of the Bay. For the Bay and Delta the Danforth style anchor has served me very well. When funds become available the Danforths will get swapped out for Fortress anchors of equivalent size.
9. I was on a boat last summer that had a :wooden: spreader fail, which resulted in a dismasting. This catastrophe was compounded by the fact that the boat was ketch rigged. The spreader failed due to poor tang design which allowed water to penetrate into areas critical for structural integrity, as well as difficult to impossible to detect water intrusion. The insurance surveyor that looked over the boat after the incident was skeptical that the damage was not visible until he saw the spreader and agreed. So, I'm not willing to risk having the rig come down because if a rotten spreader. One of the spreaders has a gnarly crack where it attaches to the spreader tang so I have no hesitations about having new ones made. I opted to go with wood again due to cost, and because I like the way wood looks. My friend's spars and spreaders came out beautifully, so I'm having the same shop whip me up some new ones. They should be ready in about a month (they've been pretty busy building boats!).
10. I got a Stove with Oven to put into the galley, but it's a completely different size from the two-burner Force10 drop-in. So I'll have to build a new 'bulkhead' onto which the gimbal brackets can be mounted, as well as refinish the countertop.
From the Begining
02 February 2009 | Delta
So, pretty much none of that stuff I wanted to do in the first post actually happened. Eight months would have been plenty of time if I were independently wealthy - however, seeing as that is not the case, it's taken me considerably longer to accomplish the laundry list of tasks required to take this boat offshore.
I finally managed to make it up to the boat, the new plan was to live aboard. Not such a stretch of the imagination as my Dad had lived aboard Moor'ea for several years previously, as had I. That had been mostly in Moss Landing, Ca., but when Dad got an Islander 36 the idea was to keep Moor'ea in the Delta as a sort of a holiday spot. Over time she saw less and less attention until I took the conn. Apparently a few years earlier she had been the home to a roost of some kind of bird, I don't remember which. The result of which was no interior cushions. Bummer. Those are expensive.
The First task was to clean her up. Some knuckle skin, lots of biodegradable boat soap, a healthy dose of bleach and we were on our way. Getting that black mossy stuff out of the waffle pattern in the nonskid was a real joy. Three days later and the boat was sparking clean (sort of).
Now to see about that engine. The Atomic 4 had its exhaust rebuilt during a yard period prior to heading to the Delta; unfortunately the mixing elbow was installed backwards and the water was channeled into the exhaust manifold. Buh. I didn't figure that out at first, but I did figure out that I had no fuel delivery, no spark and no compression. Awesome. Good thing the Nissan 8 runs well.
An inspection of the standing rigging was what I'd expected of 15 year old wire in the Delta. Some corrosion, but nothing totally bad. It'll do till I'm ready to replace the rig.
I had been told that the VHF had been stolen when some vandals had boarded the boat and broken in. Also missing was the AM/FM Radio. They left the empty beer bottles, though. I brought with me an old car radio and plugged it in to the spot where the old one used to be. Gotta have tunes! Once I had the stereo installed I realized that the speakers were blown. Sweet. I had also brought with me a new VHF and plugged that in where the old one of those used to be. Check, Check, uh, Anybody copy, over? Cool. Communications, check.
Among the other gear I brought were an array of blocks, halyards, sheets, medical supplies, tools, personal gear, saftey supplies, charts and other various goodies. I set about rigging up the boat in such a way that I could at least put the sails up and putt around. I knew that this would all be temporary as I wanted to lead a few more things back to the cockpit, and generally redesign the running rigging.
With all those details attended to, I was ready to cruise my new home around the Delta for a tick before I settled down in Sausalito for a spell.
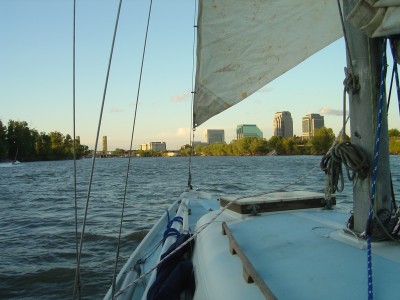
I went from Dissapointment Slough where the boat had spent it's long slumber, down the San Joaquin River to Three Mile Slough, then though that to the Sacramento River, where I got to open my first bridge! I didn't have to wait long before I had to hail the bridge operator in Rio Vista to open my second bridge! Then I hung a right into the Old Sacramento River and went all the way up to Sacramento. I hung out there for a week, kicked it with friends, saw some of the Jazz Jubilee and had an all around good time (except when I dropped my phone in the water). Then back down the river all the way to Berkeley where I spent a couple of nights, then turned around and went back up to the San Joaquin to check out some more of that. Then I had to go back to work and headed back to Sausalito and dropped the hook.
Unfortunately, I didn't have a camera for the whole trip, or for much of the early stuff for that matter. What I do have of that trip is here.
Anyway, I'll get to work on posting the engine overhaul!
| Vessel Name: | Moor'ea |
| Vessel Make/Model: | Ericson 29 |
| Hailing Port: | Sausalito, CA |
| Crew: | Jay |
| Extra: | Overhauling and Re-comissioning after lengthy period of non-use |
| Home Page: | http://picasaweb.google.com/redbeardarr |
Gallery not available
Moor'ea's Mischief
Who: Jay
Port: Sausalito, CA