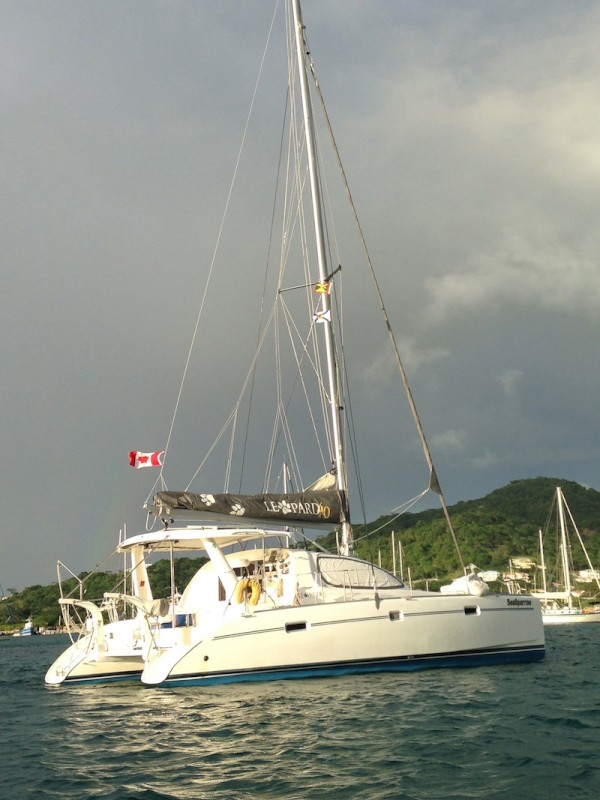
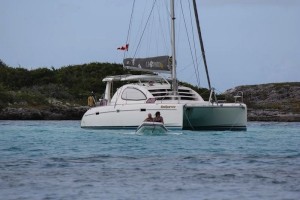
SeaSparrow
23 December 2017 | St Anne, Martinique
20 March 2017 | St Martin
23 February 2017 | St Martin, French Lagoon
06 February 2017 | Brewer's Bay, St Thomas, USVI
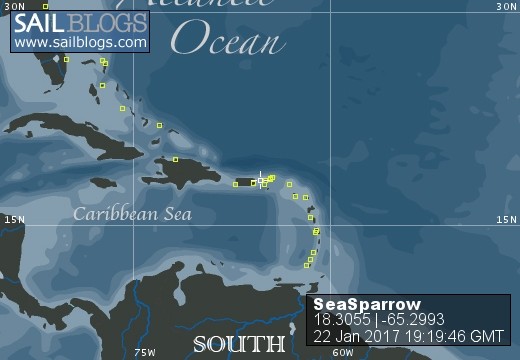
22 January 2017 | Culebra, Puerto Rico
02 May 2016 | Charlotte Amalie, St Thomas, USVI
05 April 2016 | Charlotte Amalie, USVI
04 April 2016 | Charlotte Amalie, USVI
09 March 2016 | Simpson's Bay, Sint Maarten
26 February 2016 | Grande Anse D'Arlet, Martinique
14 February 2016 | Fort de France, Martinique
31 January 2016 | Prickly Bay, Grenada
21 January 2016 | Prickly Bay, Grenada
17 January 2016 | Prickly Bay, Genada
01 April 2015 | Port Elizabeth, Bequia
11 March 2015 | Jolly Harbour, Antigua
20 February 2015 | Jolly Harbour, Antigua
05 February 2015 | Jolly Harbour, Antigua
22 January 2015 | Jolly Harbour, Antigua
11 January 2015 | Sint Maarten
Blog Post Part 1 – St Maarten to The BVIs
04 April 2016 | Charlotte Amalie, USVI
Jeff/ Sunny 91F
Hello Folks,
As often happens during during our sailing season the blog posting frequency hits a bit of a lull and productivity goes down. This is partly due to the fact I can be lazy, plus when we have guests onboard the blogs just don't happen. So to catch up a bit I will try to put together a couple of posts covering our time in St Maarten and our trip to the British Virgin Islands (BVIs) then in part 2 try to remember what happened while our most recent guests were onboard in the BVIs.
I have commented before regarding our like for St Maarten due to things like regatta time, good friends and $2 beers that become $1 beers at happy hour. St Maarten is also a great stopping place to get stuff done on the boat as it is the best supplied and has the most available repair capabilities in the Caribbean. With this in mind we had planned to change our chain when we reached St Maarten this year as our anchor chain was very rusted and looked like an accident waiting to happen. Remembering a chain is only as strong as its weakest link, we were concerned as our chain seemed to have many weak links with a failure of any single link resulting in our boat being set adrift while we're ashore having $1 beer. Somehow with this thought in the back of my mind the beer just didn't taste quite as good. Time for new chain.
Like everything else in the boating world one doesn't just go and get new chain. There are many different types and sizes and price points and when one does research online or by talking to other boaters you end up with more opinions then options. After a bit of research, I determined that the chain that came with the boat was in fact incorrectly sized for the windlass (the windlass is the thing that raises and lowers the chain/anchor that I repaired last season) on SeaSparrow. Our chain never ran smoothly through the windlass which we attributed to the poor rusted condition of the chain rather then a sizing issue. After learning more then I really wanted to know about anchor chain, off to Budget Marine we went to get rid of another boat buck (a boat buck in the sailing world is $1000). The chain was delivered to SeaSparrow the next day while we were at anchor in Simpson Bay which meant it couldn't be installed until we either went to a marina or tied up to a mooring ball as the current anchor and chain were in use holding the boat in place.
Below is a pic of Debbie marking the new chain. In order to know how much chain has been put out you must put markings on the chain at specific intervals. In our case we use different colour twist ties at a 25 ft spacing to keep track.

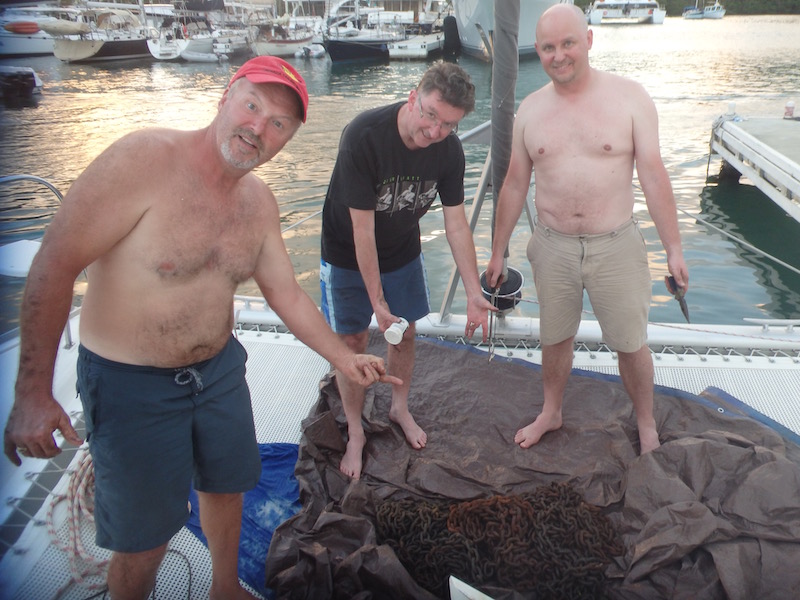
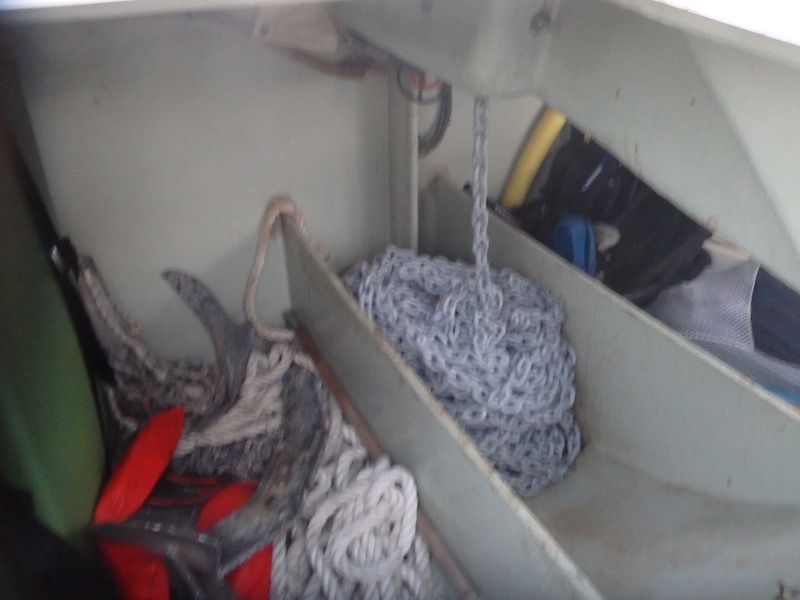
As mentioned the new chain couldn't be installed immediately as the old one was in use. Our future plans included meeting our next guests at a marina in the BVIs so we decided to wait until then to change out the chain. Although this pic is out of sequence for the blog timeline I thought it fit better here. Shortly after arriving onboard SeaSparrow after a full day of travel I put Sean and Shane to work doing the dirty job of removing the old rusty chain and installing the pretty clean new one. Here's a couple of shots showing the old chain out of the chain locker and the new chain in place.
With the chain sorted out we were up to date on the major maintenance items required to be completed onboard SeaSparrow, time to sit back and get a few $1 beers - did I mention beer is $1 during happy hour in St Maarten. Not so fast, remember this is a boat and there is always something waiting in the wings to keep you on your toes and ensure the boat bucks continue to flow. This time it was the f%#$@ing house batteries. Put the beer down the party is definitely over.
If you have read all of these blogs I am sure your saying "No Jeff, it can't be because you anticipated this problem when you bought the boat and one of the first things you did was replace the house bank in Florida so you wouldn't have to do this job in the Caribbean where things are much more expensive." Well that's what I said to myself anyway. I did in fact change out the house batteries after buying the boat but it seems the batteries that were installed were not really the right ones for the job. The batteries that were installed in Florida were what is known as dual purpose, meaning they can be used for the house bank or also as a starter battery. Without getting into the nitty gritty technical detail of what this really means, in the end you end up with a battery that does neither job particularly well. All part of the learning curve as I now know more about batteries then I do about anchor chain and that is saying something. Having said this, I have also learned most people are full of S#!t when they talk about batteries in terms of the marine application. For a technology that has been around for a couple of hundred years it's amazing that the proper use and maintenance of batteries in the marine application is not fully understood by many people. Oh people talk a good game, but in the end when you start to scratch a little deeper you quickly get to the bottom of their knowledge sandbox, at least with respect to batteries.
Anyway, here's a bit of technical stuff I am going to share because I had to deal with it in great detail in the last little while. Here's the answer:
Pb + PbO2 + 2H2SO4 → 2PbSO4 + 2H2O
Any questions? Good lets move on then. OK, OK, for those still reading here's the story in a reader's digest nut shell. The chemical equation above describes what is happening in any lead acid battery. Pb is lead and it exists in the negative plate of the battery, PbO2 is lead dioxide and it is in the positive plate, and when combined with an electrolyte such as sulphuric acid H2SO4 you got yourself a battery. As the battery is discharged by doing things such as lighting the boat, or more importantly running the fridge to keep the beer cold, the acid in the electrolyte combines with the lead and lead dioxide to form lead sulfate PbSO4 and water, good old H2O. This will keep happening until all the lead and lead dioxide is used up unless you recharge your battery, in which case the lead sulphate and water is reconverted to the good stuff or active material again i.e. lead and lead dioxide. In theory this could go on forever if you fully recharge your battery each time it gets discharged. Of course nothing is perfect, or should I say perfectly efficient, and all that lead sulphate doesn't get converted back into active lead and lead dioxide. This problem is particularly acute for sailboats as you rarely have the electrical power available or time to fully charge your batteries. Eventually the lead sulphate that doesn't reconvert back to active material hardens on the interior plates of the battery reducing its capacity a little bit each time. After a while this lead sulphate will accumulate to the point the battery has lost so much capacity it won't keep your beer cold and its time to buy new batteries. This is what happened onboard SeaSparrow. Exactly why I wasn't able to get rid of the lead sulphate even though I thought I was fully recharging my batteries isn't fully understood but I think in part at least it was due to the poor battery selection when I bought in Florida. Oh by the way, those batteries were recommended to me by a "battery expert".
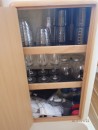
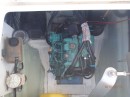
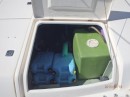
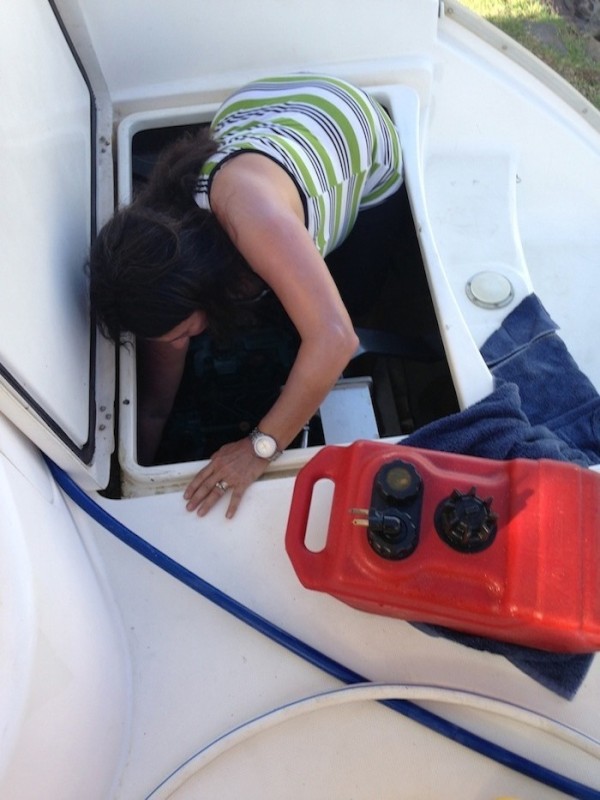
Here's a pic of two of the three new batteries we bought and installed while in St Maarten. Just for info these batteries are known as 4Ds and weigh approximately 135lbs a piece. Getting the old ones off the boat and new ones into the space I am trying to fit in below is lets just say not real fun and in some cases can lead to foul language. I told Debbie to watch her tongue but I can only do so much.


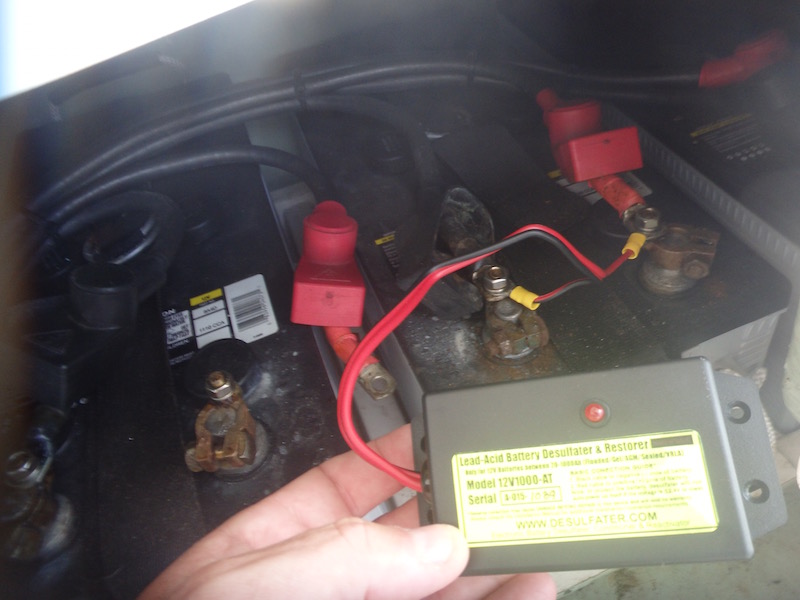
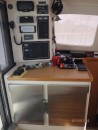
One last bit on the battery story. During this evolution I met a neat guy in St Maarten who is an engineer and has a special interest in batteries. His name was Alex, and Alex is one of those guys with a deep sandbox when it comes to batteries. Alex fully understands the equation I described above and gets the sulphate part on the right hand side. Alex has developed a desulfator that attaches to your battery in order to get or keep sulphate off the battery plates. I bought one for each battery and now have them installed. We'll see if they work but I like the engineering behind them (I won't bore you with that detail but its cool if your a geeky engineer, which I can be on occasion). Here's a couple of pics of the desulfators being installed on my batteries.

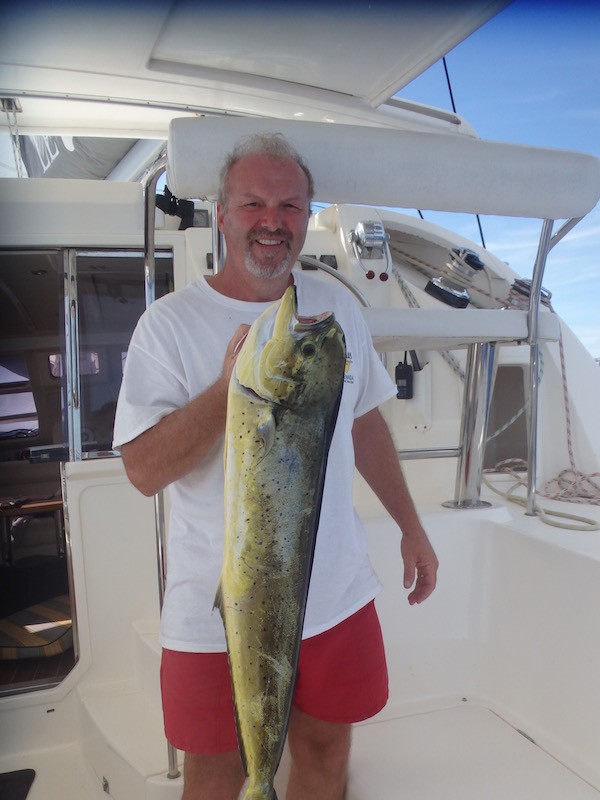
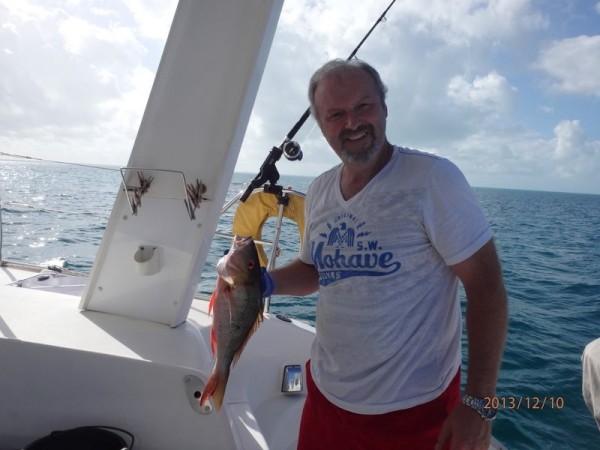
OK, now lets get to the real point of this blog which kind of jumps out at you in the lead picture. That my friends is what is known as a Mahi Mahi or Dorado in the french islands. We have been trying to catch one of these bad boys since getting into the Caribbean and based upon the picture obviously we were finally successful. After getting some great advice from our friend Michael on "Nautidog", we caught this Mahi Mahi on the trip from St Maarten to Virgin Gorda, BVI. We left St Maarten at approximately 4am and caught the Mahi Mahi about 12 hours later at 4pm and about 2 hours back from Virgin Gorda. This was a large Mahi Mahi and other than Halibut I think the best tasting fish I have ever eaten. This guy was about 39 inches long and thanks to some tips from Spencer during his last visit, I was able to filet it before arrival and had a great Mahi Mahi dinner that night. There was enough left over to feed Debbie and I and all our guests that we met in the BVIs. That's part 2.
Jeff
As often happens during during our sailing season the blog posting frequency hits a bit of a lull and productivity goes down. This is partly due to the fact I can be lazy, plus when we have guests onboard the blogs just don't happen. So to catch up a bit I will try to put together a couple of posts covering our time in St Maarten and our trip to the British Virgin Islands (BVIs) then in part 2 try to remember what happened while our most recent guests were onboard in the BVIs.
I have commented before regarding our like for St Maarten due to things like regatta time, good friends and $2 beers that become $1 beers at happy hour. St Maarten is also a great stopping place to get stuff done on the boat as it is the best supplied and has the most available repair capabilities in the Caribbean. With this in mind we had planned to change our chain when we reached St Maarten this year as our anchor chain was very rusted and looked like an accident waiting to happen. Remembering a chain is only as strong as its weakest link, we were concerned as our chain seemed to have many weak links with a failure of any single link resulting in our boat being set adrift while we're ashore having $1 beer. Somehow with this thought in the back of my mind the beer just didn't taste quite as good. Time for new chain.
Like everything else in the boating world one doesn't just go and get new chain. There are many different types and sizes and price points and when one does research online or by talking to other boaters you end up with more opinions then options. After a bit of research, I determined that the chain that came with the boat was in fact incorrectly sized for the windlass (the windlass is the thing that raises and lowers the chain/anchor that I repaired last season) on SeaSparrow. Our chain never ran smoothly through the windlass which we attributed to the poor rusted condition of the chain rather then a sizing issue. After learning more then I really wanted to know about anchor chain, off to Budget Marine we went to get rid of another boat buck (a boat buck in the sailing world is $1000). The chain was delivered to SeaSparrow the next day while we were at anchor in Simpson Bay which meant it couldn't be installed until we either went to a marina or tied up to a mooring ball as the current anchor and chain were in use holding the boat in place.
Below is a pic of Debbie marking the new chain. In order to know how much chain has been put out you must put markings on the chain at specific intervals. In our case we use different colour twist ties at a 25 ft spacing to keep track.
As mentioned the new chain couldn't be installed immediately as the old one was in use. Our future plans included meeting our next guests at a marina in the BVIs so we decided to wait until then to change out the chain. Although this pic is out of sequence for the blog timeline I thought it fit better here. Shortly after arriving onboard SeaSparrow after a full day of travel I put Sean and Shane to work doing the dirty job of removing the old rusty chain and installing the pretty clean new one. Here's a couple of shots showing the old chain out of the chain locker and the new chain in place.
With the chain sorted out we were up to date on the major maintenance items required to be completed onboard SeaSparrow, time to sit back and get a few $1 beers - did I mention beer is $1 during happy hour in St Maarten. Not so fast, remember this is a boat and there is always something waiting in the wings to keep you on your toes and ensure the boat bucks continue to flow. This time it was the f%#$@ing house batteries. Put the beer down the party is definitely over.
If you have read all of these blogs I am sure your saying "No Jeff, it can't be because you anticipated this problem when you bought the boat and one of the first things you did was replace the house bank in Florida so you wouldn't have to do this job in the Caribbean where things are much more expensive." Well that's what I said to myself anyway. I did in fact change out the house batteries after buying the boat but it seems the batteries that were installed were not really the right ones for the job. The batteries that were installed in Florida were what is known as dual purpose, meaning they can be used for the house bank or also as a starter battery. Without getting into the nitty gritty technical detail of what this really means, in the end you end up with a battery that does neither job particularly well. All part of the learning curve as I now know more about batteries then I do about anchor chain and that is saying something. Having said this, I have also learned most people are full of S#!t when they talk about batteries in terms of the marine application. For a technology that has been around for a couple of hundred years it's amazing that the proper use and maintenance of batteries in the marine application is not fully understood by many people. Oh people talk a good game, but in the end when you start to scratch a little deeper you quickly get to the bottom of their knowledge sandbox, at least with respect to batteries.
Anyway, here's a bit of technical stuff I am going to share because I had to deal with it in great detail in the last little while. Here's the answer:
Pb + PbO2 + 2H2SO4 → 2PbSO4 + 2H2O
Any questions? Good lets move on then. OK, OK, for those still reading here's the story in a reader's digest nut shell. The chemical equation above describes what is happening in any lead acid battery. Pb is lead and it exists in the negative plate of the battery, PbO2 is lead dioxide and it is in the positive plate, and when combined with an electrolyte such as sulphuric acid H2SO4 you got yourself a battery. As the battery is discharged by doing things such as lighting the boat, or more importantly running the fridge to keep the beer cold, the acid in the electrolyte combines with the lead and lead dioxide to form lead sulfate PbSO4 and water, good old H2O. This will keep happening until all the lead and lead dioxide is used up unless you recharge your battery, in which case the lead sulphate and water is reconverted to the good stuff or active material again i.e. lead and lead dioxide. In theory this could go on forever if you fully recharge your battery each time it gets discharged. Of course nothing is perfect, or should I say perfectly efficient, and all that lead sulphate doesn't get converted back into active lead and lead dioxide. This problem is particularly acute for sailboats as you rarely have the electrical power available or time to fully charge your batteries. Eventually the lead sulphate that doesn't reconvert back to active material hardens on the interior plates of the battery reducing its capacity a little bit each time. After a while this lead sulphate will accumulate to the point the battery has lost so much capacity it won't keep your beer cold and its time to buy new batteries. This is what happened onboard SeaSparrow. Exactly why I wasn't able to get rid of the lead sulphate even though I thought I was fully recharging my batteries isn't fully understood but I think in part at least it was due to the poor battery selection when I bought in Florida. Oh by the way, those batteries were recommended to me by a "battery expert".
Here's a pic of two of the three new batteries we bought and installed while in St Maarten. Just for info these batteries are known as 4Ds and weigh approximately 135lbs a piece. Getting the old ones off the boat and new ones into the space I am trying to fit in below is lets just say not real fun and in some cases can lead to foul language. I told Debbie to watch her tongue but I can only do so much.
One last bit on the battery story. During this evolution I met a neat guy in St Maarten who is an engineer and has a special interest in batteries. His name was Alex, and Alex is one of those guys with a deep sandbox when it comes to batteries. Alex fully understands the equation I described above and gets the sulphate part on the right hand side. Alex has developed a desulfator that attaches to your battery in order to get or keep sulphate off the battery plates. I bought one for each battery and now have them installed. We'll see if they work but I like the engineering behind them (I won't bore you with that detail but its cool if your a geeky engineer, which I can be on occasion). Here's a couple of pics of the desulfators being installed on my batteries.
OK, now lets get to the real point of this blog which kind of jumps out at you in the lead picture. That my friends is what is known as a Mahi Mahi or Dorado in the french islands. We have been trying to catch one of these bad boys since getting into the Caribbean and based upon the picture obviously we were finally successful. After getting some great advice from our friend Michael on "Nautidog", we caught this Mahi Mahi on the trip from St Maarten to Virgin Gorda, BVI. We left St Maarten at approximately 4am and caught the Mahi Mahi about 12 hours later at 4pm and about 2 hours back from Virgin Gorda. This was a large Mahi Mahi and other than Halibut I think the best tasting fish I have ever eaten. This guy was about 39 inches long and thanks to some tips from Spencer during his last visit, I was able to filet it before arrival and had a great Mahi Mahi dinner that night. There was enough left over to feed Debbie and I and all our guests that we met in the BVIs. That's part 2.
Jeff
Comments
| Vessel Name: | SeaSparrow |
| Vessel Make/Model: | Leopard 40 Catamaran |
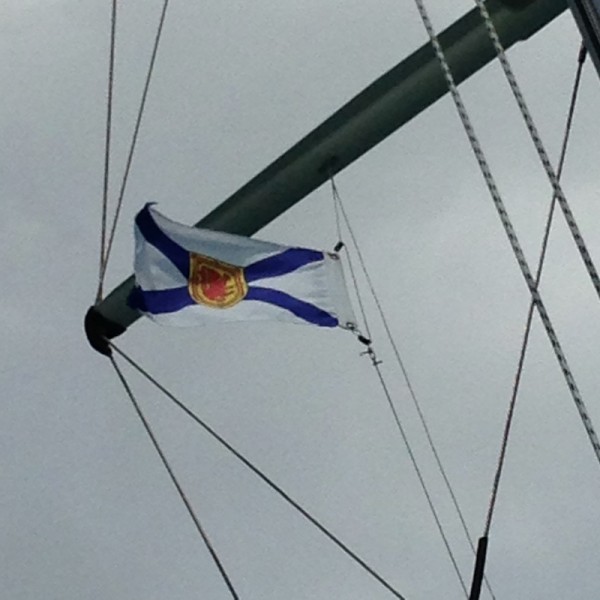
| Hailing Port: | Halifax, Nova Scotia |
| Crew: | Jeff and Debbie |
SeaSparrow's Photos - Main
Photos 1 to 29 of 29 |
1 |
 |
 |
 |
 |
 |
 |
 |
 |
 |
 |
 |
 |
 |
 |
 |
 |
 |
 |
 |
 |
 |
 |
 |
 |
 |
 |
 |
 |
 |
1 |
 |
|
|
|
|
|
|
|
|
 |
 |
 |
 |
 |
 |
 |
 |
 |
 |
 |
 |
 |
 |
The Adventures of SeaSparrow
Who: Jeff and Debbie
Port: Halifax, Nova Scotia