The Adventures of Smart Move
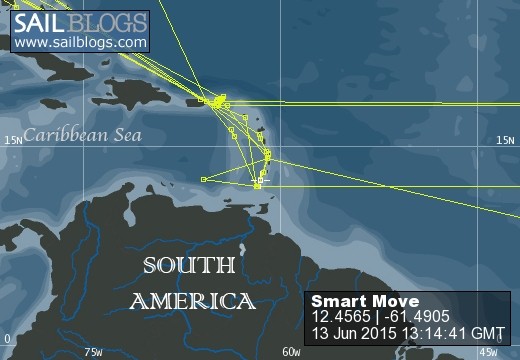
13 June 2015 | Tyrell Bay, Carriacou
24 May 2015 | Saints Anne, Martinique
24 March 2015 | Puerto del Rey Marina, Fajardo, Puerto Rico
01 February 2015 | Charlestown, Nevis
13 January 2015 | Prickly Bay, Grenada
03 December 2014 | Prickly Bay, Grenada
01 December 2014 | Somewhere in the Caribbean Sea
01 December 2014 | Somewhere In The Caribbean Sea
30 November 2014 | Fajardo, Puerto Rico
22 November 2014 | Puerto del Rey Marina, Fajardo, Puerto Rico
29 October 2014 | San Juan, Puerto Rico
26 August 2014 | Cheyenne, Wyoming
01 August 2014 | Highlands Ranch, Colorado
29 July 2014 | Cheyenne, Wyoming
16 May 2014 | Sunbay Marina, Fajardo, Puerto Rico
15 May 2014 | Sunbay Marina, Fajardo, Puerto Rico
14 May 2014 | Sunbay Marina, Fajardo, Puerto Rico
02 April 2014 | Terre D'en Haut, Iles des Saintes
31 March 2014 | Prince Rupert Bay, Dominica
Getting Serious About Boat Projects!
18 November 2012 | Fajardo, Puerto Rico
Robyn
The other night Barry was reading blogs by other cruisers and complained that very few included the technical side of sailing and maintaining a boat and he wanted to included some of that into our blog. The challenge is how to write about that kind of stuff in a fun and engaging way.
The reality of completing any project on a boat is that it takes four times longer than it would to do it on land. The boat is constantly in motion, which makes the use of power tools a much more exciting adventure (at least for me). Additionally, the boat is hot (no A/C on Smart Move) and in all of the tiny, tight spaces you have to get into to do anything, it is even hotter. The work always involves lots and lots of sweat. I have never in my life had sweat drip off of me, during these projects I could have filled buckets and Barry could have filled a small pool – I was beginning to believe that was why the boat has a bilge pump! The other thing that goes hand-in-hand with boat projects is copious amounts of swearing! For me it was every third word, Barry was a little more restrained. Also, I never realized how often I must say ‘uh oh’ until hearing Barry say ‘what?’ in an alarmed manner several times during each project.
I think the hard part about trying to describe these projects is to convey the working conditions inside the boat. To install anything, you first have to move everything out of the space you are going to be working in. Next, you will most likely have to dismantle part of the boat to get the area you need to work in. It is also worth noting that, in general, the area you are working in will not have enough head room (if any) and you will not be standing, sitting, or laying on a level surface while you work. And, finally, all of this stuff that you just took has to go somewhere that will not be in the way, not an easy task on a boat. So, for instance, Barry and I were each doing a project simultaneously. For Barry’s winch replacement project he had to clear out the port-side cabin, dismantle the bed, and remove a ceiling panel. For my fuel tank project, I had to clear out the starboard-side cabin and dismantle the bed. All of this stuff ended up in the forward cabin. Every project requires stuff to be moved from cabin to cabin to have access to the area and to have room to work in. Now, on to the boat projects. Be sure to check out our Gallery to see pictures of our handy work!
Barry decided to start by replacing our port-side winch with a new Lewmar 40 electric winch. This is the winch that is used to raise the main sail and sits on the cabin roof next to the companion way. I should mention that, whenever possible, we have tried to use Beneteau OEM parts. In this case, our boat had been designed to accommodate an electric winch and Beneteau had manufactured a cover for the motor that was mounted at the ceiling inside the cabin – see the before and after pictures in the Gallery. The install of the winch itself was a piece of cake except for drilling the holes for the motor shaft and the new bolt pattern. We downloaded the template from Lewmar’s website but when we printed it out it was not to the right scale, with a little trial and error we got it figured out. The most stressful part of this project was the electrical work, not so much hooking everything up but running the 1/0 wire (5/8" diameter). In the end, working from the top down, it was not nearly as hard as Barry had imagined it would be. The two hardest parts of the project were terminating the ends of the wire with lugs and finding a spot for the circuit breaker panel. To get the lugs on the wire we had to buy a small sledge hammer! The circuit breaker panel found a home squeezed between the one of the battery bank switches and the windless circuit breaker on the face of the panel below the bed.
While Barry was busy with the winch, I tackled the new fuel tank. Smart Move had four water tanks that collectively held 222 gallons of water and one fuel tank. It just did not seem smart to us to try to cross an ocean with only 57 gallons of fuel, so we decided to replace the stern water tank with a new 57 gallon fuel tank from Beneteau. Be sure to check out the Gallery to see the condition of the package containing the fuel tank, we were speechless when it arrived! The first thing I had to do was remove the water tank and all of the associated plumbing/hoses and deck hardware. But to do this I had to empty the tank. You would think the valve labeled stern would empty it – but sadly no. After some trial and error we emptied the tank labeled forward! Removing the tank was the easy part, with a little lifting help from Barry, it was off the boat in a flash. Likewise, the deck hardware. However, removing all of the hoses was like living in zip-tie hell! Everything was zip-tied to everything else, at about six to eight inch intervals and they weren’t the cute little things we use at home – no, these were big, fat, thick ones that were zipped to within an inch of their life (translation, no room for scissors)! Over half of the zip-ties were located in what we call the ‘Garage’, it is the interstitial space between the hull of the boat and floor of the cockpit and cabin. Getting into the space isn’t hard as it is covered by a large hatch at the back of the boat, moving around in the space is another matter all together. Remember the contortionist at the carnival? Well that was me, wedging and twisting myself into a pretzel to reach all of the zip-ties and eventually the hose clamps. And as if that wasn’t hard enough, the entire area was filled with other hoses and ducts that I had to work around! Have I mentioned the part about sweating and swearing yet – there was a lot of that going on in the Garage! Finally, with everything gone and a little help from Barry I got the new fuel tank in place. Next, it was back to the Garage again to pull the new hoses through and connect them to the new deck hardware. The last part of the project was installing the valves for the fuel supply and return for both tanks to the engine, grounding all of the metal on the tank together, and installing the fuel gage. The installation of the valves was the trickiest part. Beneteau sent everything we needed to complete the project, not one trip was made to West Marine or Home Depot during this project. However, a few instructions would have been helpful, especially regarding the valves. A quick email to Ward at Beneteau and a picture emailed back got things moving forward again. In the end, we did not install the valve in the same location shown in the picture because we felt it would obstruct access to parts of the engine. I will upload pictures to the Gallery when I have access to the boat again. I have not installed the fuel gage yet. We decided to wait and do it at the same time we install the gage for the new wind instruments.
I have also replaced two cabin fans. But, when it comes to electrical work, I require more assistance from Barry – so really it was a joint effort. Apparently, I am a better plumber than electrician! I also replaced the port lite (boat speak for window) over the nav table. The original was a fixed lite and we wanted an operable one for more ventilation. Since the new Lewmar port lite was exactly the same size, this was a pretty straight forward project. One of the challenges was getting the original out, breaking the bond of the sealant and realizing how hard I had to hit the flat, scrapper tool with the hammer – it took a lot of force to get between the frame and deck to loosen the lite enough to get it out. The other challenge was squeezing out the sealant to bed in the new lite – Barry didn’t want to cut too big of a hole in the tube. I am pleased to say that after several really hard rains the new port lite does not leak!
Wondering what Barry was doing? He was busy replacing deck/sail hardware. We now have all new Genoa cars for our new Genoa sail. He also began the installation of the new Garhauer traveller. However, before he could get started, he had to remove the ceiling panels in the salon to get access to the backside of the bolts (nuts). Taking out the ceiling was no small feat! It was not at all apparent how it was all held up – yet another helpful email from Ward at Beneteau! Remember the part about trying to find a place to put things while you are working? These ceiling panels were close to ten feet long! Barry finally got the old traveller removed and started installing the new one. As is usually the case with boat projects, the new stuff usually requires some form of modification to adapt to the boat and this has been the case here. This project is still in process.
Also, we have installed a new watermaker, a new deck wash down pump and a new electrical panel for the watermaker and wash down pump. The watermaker was such a big project, it deserves a post of it’s own! The boat has finally been hauled, putting an end to the boat projects for now. Before you start feeling too sorry for us for all of our hard work, let me say ... we don’t get to the boat until around 10:00 AM take an hour lunch break and then work until 3:00 PM, hardly a rigorous schedule! We still have a list of projects to do, but the only ones that need to be done before we leave the marina in mid December are the two new toilets and the installation of the single side band radio. The rest can be done at anchor in some beautiful bay somewhere in the Caribbean!
Comments
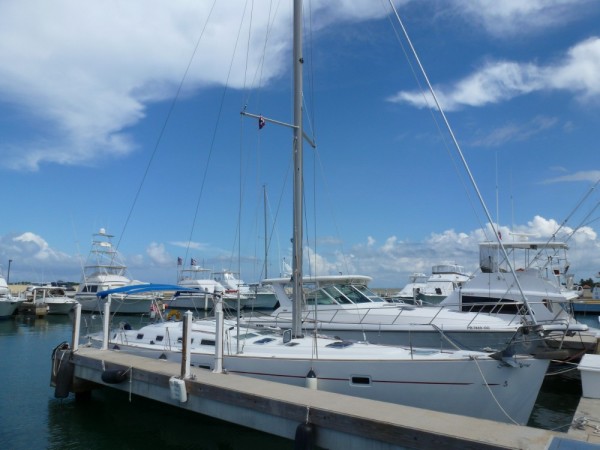
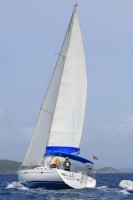
| Vessel Name: | Smart Move |
| Vessel Make/Model: | Beneteau 473 |
| Hailing Port: | Salt Lake City, Utah |
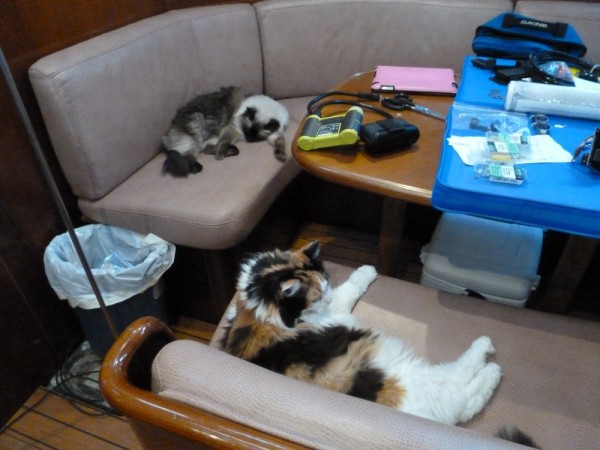
| Crew: | Barry, Robyn, Lilly and Chloe |
Smart Move's Photos - Main
 |
 |
 |
 |
 |
Pictures from Sherri's October 2012 visit.
9 Photos
Created 17 November 2012
|
 |
Our time in Fajardo, Puerto Rico
6 Photos
Created 17 September 2012
|
 |
 |
 |
 |
Smart Move
Who: Barry, Robyn, Lilly and Chloe
Port: Salt Lake City, Utah