
S/V Firefly
1979 CSY 44, Walk-over
Comfy Cozy
20 May 2016
Dawn
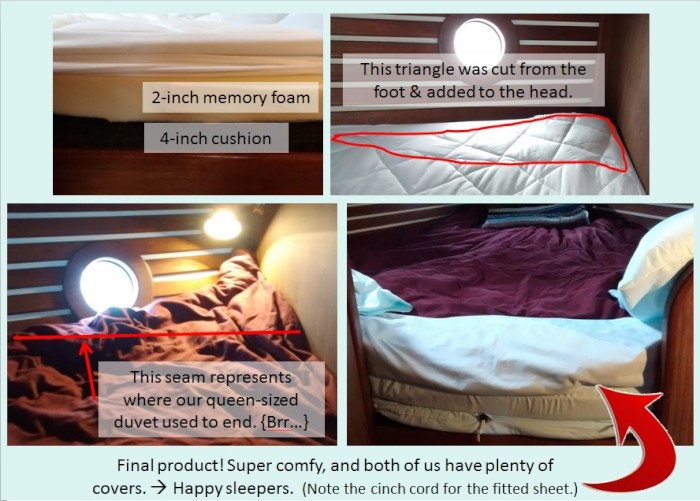
Ross had been complaining about how uncomfortable the v-berth was, and so I set about to making it more pleasant. In addition to the very firm cushions, our boat’s v-berth is actually wider at the head than a normal king-sized bed. So of course, no bedding fit.
2-inch memory foam: I had read (on WWS!) that you that you can cut memory foam with an electric knife. After carefully measuring all dimensions of the v-berth, I determined that we could actually get by with ordering a QUEEN sized memory foam topper, rather than a king. After carving off the triangles at the foot (bow), I used super-strong spray adhesive to attach them to the head. I even have enough left over to make a (small) dog bed!
Mattress pad: Using my same measurements, I figured a queen-sized mattress pad would again be sufficient. I then set about ripping out the seam that attached the casing to the top of the pad. Then I cut off the triangles from the foot and attached them to the head. While the queen size was fine for the topper, I forgot basic geometry, and nearly ran out of casing when I was reattaching it. Fortunately, I was able to make it work. I also shortened the depth of the casing by about 2 inches, to better fit our 6 inch mattress (4” from the original cushions, plus 2” from the memory foam).
Sheets: I was really happy with these brushed microfiber sheets that we’d bought for Gracie’s normal bed at the house. Very soft! To determine the size to buy, I compared the size of the flat sheet to the corresponding width of a regular mattress. By doing this, I found that the average “overhang” of the flat sheet is about 30”. Since I still wanted to have adequate overhang (no sheet-less nights for me!), I looked at the widest point in our v-berth, the head, and added 30”. By cutting from the bottom, and adding that to the top, I determined that KING sized sheets would fit.
I was most concerned with getting the fitted sheet to stay on. Here, I used an idea from Sailboat Interiors, which specializes in making boat sheets. Their fitted sheets come with an elastic cord that goes around the entire perimeter of the sheet. As the cord stretches, you’re able to pull in on the cord to make it tight again. Brilliant! And after going through the work of sewing top and bottom sheets, all I can say is: If you have the money, DEFINITELY buy the sheets from Sailboat Interiors! As someone who is not a particularly experienced seamstress, the whole process seemed straightforward. But it still took forever.
Duvet and Cover: The final – and most complicated – step was to cut and sew the duvet and cover. I was really not relishing cutting up a perfectly good duvet. Fortunately, my husband made the brilliant suggestion to sew two lines, then cut between them. This worked MUCH better than my idea: cut first and swear later, as filling flew all over the room.
Then, I had to make a fabric tape to sew on to the new seams of the duvet, to really seal in the filling. The triangles that I removed from the foot then had to be attached to head. With two thicknesses of duvet, and 8 thicknesses of fabric, my poor little Brother machine was really not up to this task, and Ross ended up attaching the two triangles. You would think that you’d feel the bump from two seams, with their fabric tape, sewn together. But you really only feel it when you press through the duvet cover. That’s the beauty of a duvet cover: it hides a lot of sins. And boy, were there a lot of sins in my sewing of that duvet…
The duvet cover was really the hardest part, thinking-wise, since it’s a giant pocket. With all of the other bedding, I only had to think about one layer. But with the duvet cover, things like the buttons at the bottom had to line up. First, I ripped out the seam attaching the top to the bottom, except for the head of the cover. Then I measured and cut the triangles from the foot (where the buttons are for inserting the duvet). These, I attached to the head. Then I had to resew a portion of the foot (the portion not covered by the buttons), the two – top and bottom, and a bit of the head. The result is a perfectly-fitted duvet and cover, though it is not easy to stuff the duvet into the tiny opening at the bottom.
I’m really happy with how the project turned out. But more so, I’m happy with Ross’ reaction. He claimed he slept so soundly that first night, he forgot where he was!
Nothing is too good for my hubby! ;-)
A New Chapter
29 October 2015
Dawn
I have been dreaming about owning a boat, pretty much since the day we stepped off S/V Jean Marie on 6/30/1991, after a 4-year circumnavigation. But teenagers don't tend to have a lot of (or any) money. So the dream was on hold...
Fast forward to 2000. Ross & I were getting married, we'd just purchased our home, and we were setting up our investments to prepare for retirement and our dream of cruising one day. From our meager paychecks, we set aside a small portion for The Boat. And then we forgot about it.
Then came the kids - and daycare payments. And better-paying jobs - and the Great Recession. Over the next 15 years, we saved. At first, a little. Then more. And finally, in January, we decided it was time. Time to start looking for The Boat.
Despite my familiarity with the CSY 44, the boat I'd circumnavigated on as a teenager, I wanted to look at ALL the boats that might work for our family. After a month of researching older boats, newer boats, and narrowing it down to boats we could afford, we had arrived at a decision: a CSY 44!
Despite their age, these are nice, safe boats. Their heavy displacement, cutter rig, and interior layout all make them excellent family-friendly cruising boats. Plus, they were in our (very limited) price range. The search was on.
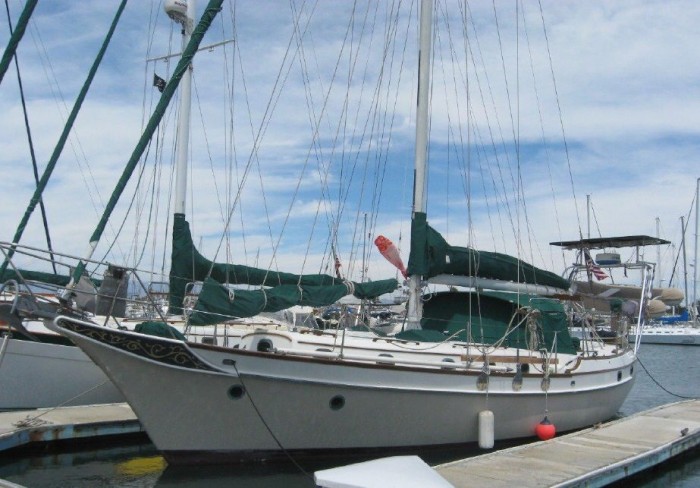
Now, after eight months of active looking, emailing, and even an ill-fated trip to Nova Scotia, we will be closing on our own lovely 'Firefly' (ex 'Odyssey') this Saturday. A Happy Halloween, indeed!
And then we get to start a new chapter in our lives, as Boat Owners. First up, we have to get 'Firefly' down here to San Diego, as she is currently in Ventura, CA. Our first adventure!
Fast forward to 2000. Ross & I were getting married, we'd just purchased our home, and we were setting up our investments to prepare for retirement and our dream of cruising one day. From our meager paychecks, we set aside a small portion for The Boat. And then we forgot about it.
Then came the kids - and daycare payments. And better-paying jobs - and the Great Recession. Over the next 15 years, we saved. At first, a little. Then more. And finally, in January, we decided it was time. Time to start looking for The Boat.
Despite my familiarity with the CSY 44, the boat I'd circumnavigated on as a teenager, I wanted to look at ALL the boats that might work for our family. After a month of researching older boats, newer boats, and narrowing it down to boats we could afford, we had arrived at a decision: a CSY 44!
Despite their age, these are nice, safe boats. Their heavy displacement, cutter rig, and interior layout all make them excellent family-friendly cruising boats. Plus, they were in our (very limited) price range. The search was on.
Now, after eight months of active looking, emailing, and even an ill-fated trip to Nova Scotia, we will be closing on our own lovely 'Firefly' (ex 'Odyssey') this Saturday. A Happy Halloween, indeed!
And then we get to start a new chapter in our lives, as Boat Owners. First up, we have to get 'Firefly' down here to San Diego, as she is currently in Ventura, CA. Our first adventure!
| Vessel Name: | Firefly |
| Vessel Make/Model: | CSY 44 |
| Hailing Port: | San Diego |
| Crew: | Dawn, Ross, Gracie, & Drake |
Gallery Error: Unknown Album [1:]:35294
Firefly's Photos -
The Crew of S/V Firefly

Who: Dawn, Ross, Gracie, & Drake
Port: San Diego
SailBlogs Friends
