Sailing Isabella
| Vessel Name: | Isabella |
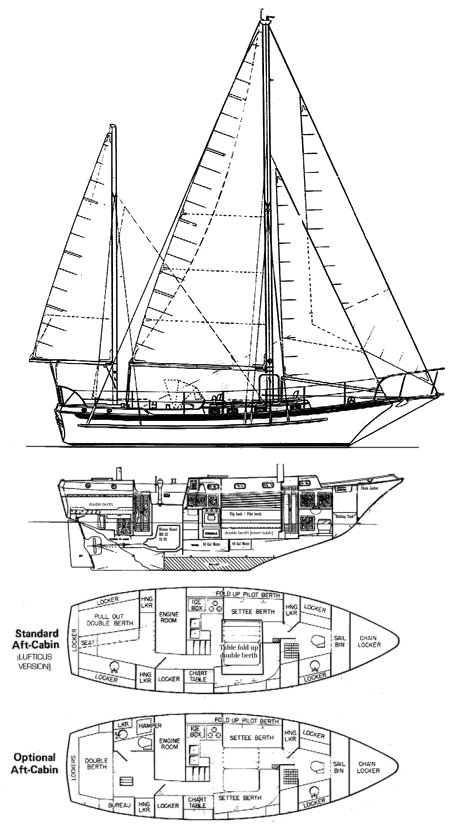
| Vessel Make/Model: | Cabo Rico Tiburon 36 Cutter Ketch |
| Hailing Port: | Biloxi Mississippi |
| Crew: | Jim Ulmer |
25 September 2023
12 June 2023
25 May 2023
19 April 2023
19 April 2022
14 December 2021
15 June 2021
24 May 2021
24 May 2021
24 May 2021
24 May 2021
31 March 2021
17 November 2020
15 September 2020
02 June 2020
05 March 2020
24 January 2020
04 December 2019
18 November 2019
24 October 2019
Recent Blog Posts
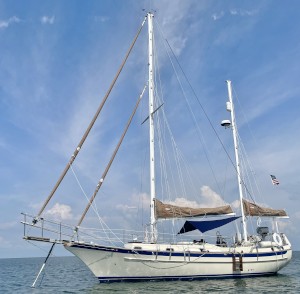
25 September 2023
At anchor Mississippi Barrier Islands
After 8 long years of rehab I am enjoying the fruits of my (& friends) labor!
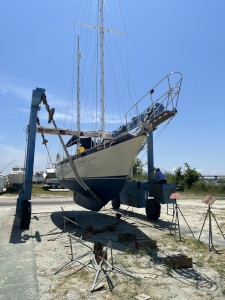
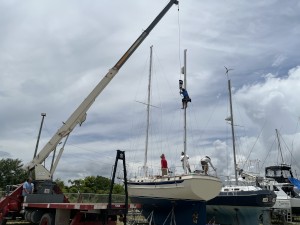
19 April 2023
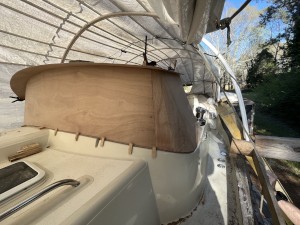
Hard dodger
Progress continues on the dodger project. Finally, got Isabella back in the water and new rigging installed. The dodger has been put on the back burner. I have to have it to go to the Bahamas in the spring, so will be getting back to it soon.
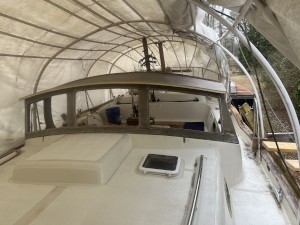
19 April 2022
Hard Dodger Build
A Hard Dodger is a must in my book. So I am attempting to design and build one that will be both functional and not take away from the lines of the boat. There are additional pics in the Gallery.
Making the aft cabin cover permanent
22 April 2019
Jim Ulmer
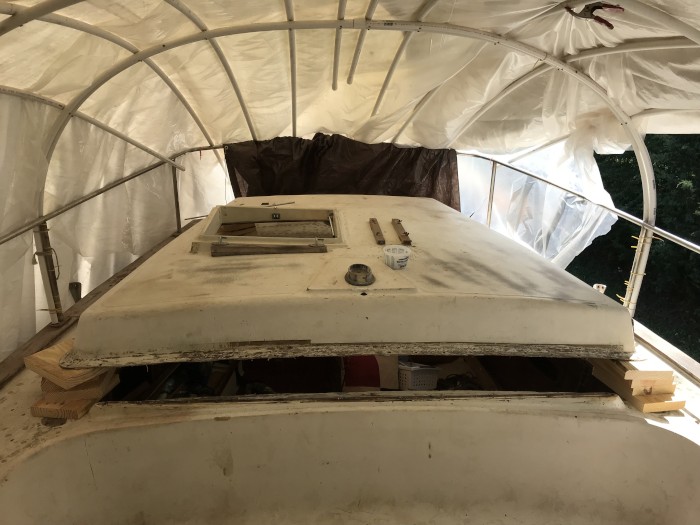
Cabo Rico decide to raise the deck of the aft cabin on the later model Tiburons. What they did was basically cut a hole in the aft deck and add a raised section over the hole. This was secured with 5200 and screws and the joint was covered with teak trim.
This was a fast way to complete the alteration and it does provide a nice additional head room in the cabin. And it lasted for over 40 yrs but there where signs that the seal was now leaking.
I decide that I need to make this a solid part of the deck. It took me all day to cut the cover free and then all the next day to remove the sealant and prep for glue.
I was working alone so I had to get this right or the epoxy would cure before I was able to get the cover in place and screwed down.
Mixed up 12oz of epoxy added 12 heaping tablespoons of West 404 and 15 tablespoons of West 406 to make a strong and thick glue.
I loaded into a West caulk tube. I had first primed both surfaces with epoxy resin and then laid a 1/2" bead of the thickened epoxy all the way around the joint. I lowered the cover quickly as the epoxy was starting to cure. I quickly went around the outside seam to put in screws to clamp the joint. It worked very well but I was worn out.
I will grind the outside seam and but two or three layers of glass over the seam then fare and paint. No more leaking!
More pictures in the refit gallery.
Comments
Isabella's Photos - Main
 |
About & Links

Photo Albums
 |
28 March 2019
191 Photos
|