The New Keel
10 June 2020
by Alan Duffy
The Starboard keel damage was quite extensive and would require a new keel to be formed up and affixed to the hull.
The removal of the existing broken keel and glassing of its replacement would create a reasonable amount of dust. The yard area has a dedicated area where this sort of work is performed.
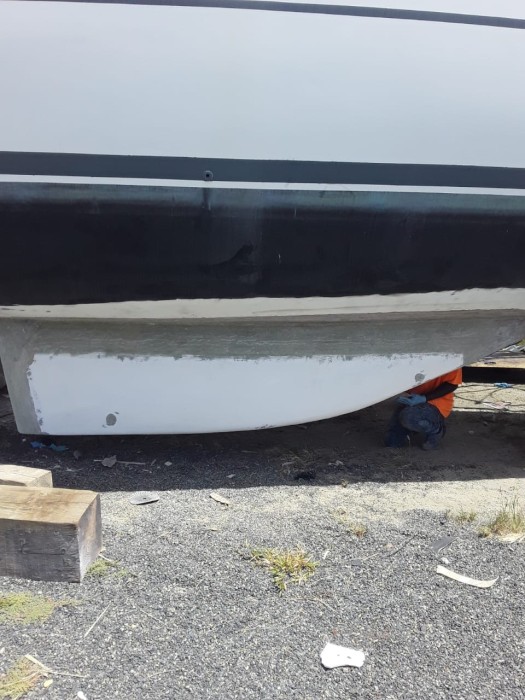
To form up the new keel a mold is needed. The undamaged port keel was used as the plug for the mold. When the boat was moved to the new location to commence the dusty work, Mark had the yard crew place the boat on stands to ensure access to the bottom of the keel so a complete mold could be made.
Many of the modern catamarans have sacrificial keels that are designed to break off in the even of a grounding. Some manufacturers even have a separate mold for the bottom (or shoe) of the keel that is attached onto the boat after the hull been made. That is not the situation with the Lagoon 42 TPI which has much finer keels than more modern catamarans. With the finer keels, it is not possible to glass them as one piece but rather they are done in two halves split down the middle and then joined. The mold for the keels is made in the same way, two halves.
The Port keel was wrapped in plastic to act as a release mechanism, before two layers of glass were applied on either side. These glass layers would be the beginnings of the mold. Once cured, they were removed from the keel and taken to the workshop to be turned into the molds. The mold surface had to be sanded, fared, and sanded again before the mold surfaces could be sprayed.
Once the molds are complete they need to be prepared before the job (new keel) can be laid up. This preparation includes to polishing and application of a mold release wax. The wax enables the job to come away from the mold once it is finished.
The layup of the keel starts from the outside and works inwards. The gelcoat is applied to the mold first, then once cured a light weight glass is applied known as the tie layer. The tie layer is of little strength but because of the small amount of resin used doesn't generate too much heat. Too much heat against the gelcoat could cause it to pull away from the mold.
Once the tie layer has cured, the layup of the structural layers begins with many layers of heavy tri-axial glass and unidirectional glass applied in alternating layers until the required thickness is achieved. The job can then be released from the mold and the two halves joined together to form the keel.
The broken keel was cut away from the boat leaving just the upper forward section as well as the original stringers. These remaining pieces would provide the reference to ensure correct alignment/positioning. To allow for multiple layers of glass to bond the keel to the boat, a section of the gelcoat and existing glass was ground back, tapering out as moving away from the keel.
The joined keel can then be taken to the boat and trimmed to fit onto the stringers and remaining keel section at the front. It is then held in place while the epoxy sets between the stringers and keel. Then the glassing of the new keel to the boat can begin.
Staring with narrow strips of glass and working up to wider strips on each layer until the keel is glassed on. Peel ply used over the final layer to ensure a smooth finish. Once the peel ply is removed faring is applied and sanded back before the epoxy barrier coat is applied.
The keel is then filled with a two part expanding foam to prevent water ingress should the keel be damaged. This is a slow process that needs to be done carefully to avoid overflow. Once the keel has been filled with the foam, the top of the foam is trimmed and the keel closed and glassed over. The stringers are also glassed in at this point. This forms part of the bilge and is sealed with an epoxy paint completing the manufacture and fitting of the new keel.


Comments